Bosses
- Asylum Demon
- Boss template
- Taurus Demon
- Bell Gargoyles
- Moonlight Butterfly
- Capra Demon
- Gaping Dragon
- Stray Demon
- Chaos Witch Quelaag
- Great Grey Wolf Sif
- Iron Golem
- Crossbreed Priscilla
- Dragonslayer Ornstein and Executioner Smough
- Dark Sun Gwyndolin
- Pinwheel
- Gravelord Nito
- Seath the Scaleless
- The Four Kings
- Ceaseless Discharge
- Centipede Demon
- Demon Firesage
- Bed of Chaos
- Gwyn, Lord of Cinder
- Sanctuary Guardian
- Artorias the Abysswalker
- Manus, Father of the Abyss
- Hellkite Dragon
- Hydra
- Black Dragon Kalameet
Asylum Demon
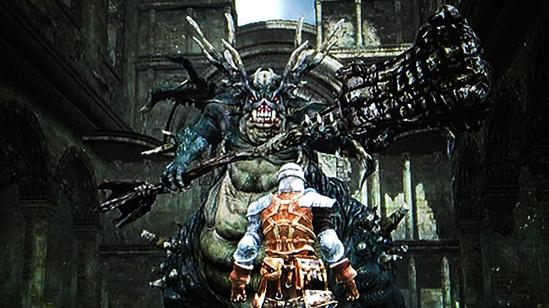 The Asylum Demon (不死院のデーモン) is the first boss encountered in Dark Souls, serving as an introductory challenge that familiarizes players with the game's mechanics and combat system.
Information
The Asylum Demon is a greater demon spawned from the Bed of Chaos, the source of all demons in the game's lore. It wields the formidable Demon's Great Hammer and resides in the Northern Undead Asylum, acting as a guardian to prevent the imprisoned undead from escaping. Its presence underscores the perilous world players are about to explore.
Strategy
First Encounter:
-
Escape Option: Upon first encountering the Asylum Demon, players are equipped only with a broken weapon, making direct confrontation challenging. It's advisable to evade the demon by sprinting to the left and exiting through the gate, which allows players to acquire proper equipment before re-engaging.
-
Early Defeat: For those seeking an early challenge, defeating the Asylum Demon during this initial encounter is possible. Choosing Black Firebombs as the starting gift enables players to inflict significant damage, potentially defeating the demon with approximately five bombs. Success in this encounter rewards the Demon's Great Hammer.
-
Blocking: Every class' starting shield, apart from Pyromancer's, can effectively block most of his attacks. You'll take nearly no damage from a blocked hit. Preserving stamina doesn't matter; it can even slightly hurt you, because whether you're at full stamina or next to none, you'll still fully block his hits, and if you're at low stamina, you'll receive the shorter guard-break animation instead of the major knockback animation at high stamina.
It's essential to stay close to him because if you get too far away, he'll use long-range wide-arc attacks, which are hard both to block and dodge. While you're close to him, his only attacks that can't be blocked are his prolonged forwards overhead attack, which you can easily step out of the way from, and his fly-up butt-slam attack, for which you can simply back away, then close back in. It's recommended to keep trying to circle behind him, as it sets you up for gettings a lot of attacks off between his hits.
-
Dodging: There is an almost completely safe spot standing right behind him; while in it, he will usually only go for his sideward swings. He'll hit on whichever side of him you're currently on. To evade them completely, you can stand on one side, await the attack, then quickly strafe to the other side. This lets you continuously have him keep doing the same attack while you hit him as many times as you'd like. Sometimes he'll start turning around or fly up to buttslam instead; in both cases, keep circling him and wait for him to recommence his side swings.
His most dangerous move during this cycle is his backstep; however, it's extremely rare. If he does it, you'll almost always end up in front of him and in range for him to do any attack, which requires you to move much more refinedly to dodge.
If you mistime and end up in front of him and in range for his hits, you can try rolling through his attacks; if timed properly you'll both take guaranteed no damage, and it lets you immediately get back behind him. If you fail, you're only at about the same disadvantage as if you'd tried dodging away from his attack range.
Second Encounter:
-
Plunging Attack: Re-entering the arena from an elevated platform provides an opportunity to perform a plunging attack, dealing substantial damage to the demon at the outset. To execute this, step off the ledge and press the attack button mid-fall.
-
Close-Quarters Combat: Staying close to the demon, particularly near its legs, can mitigate the impact of its wide swings. Circling around and attacking from behind reduces the risk of being hit. Be cautious of its ground pound attack; when the demon leaps into the air, move away to avoid the area-of-effect damage upon landing.
-
Ranged Attacks: For players with access to ranged weapons or spells, maintaining distance and attacking from afar is a viable strategy. However, ensure ample space to dodge the demon's leaping hammer smash, which can cover significant ground.
Drops
-
Souls:
- New Game (NG): 2,000 souls
- New Game Plus (NG+): 10,000 souls
-
Items:
- Big Pilgrim's Key: Dropped upon defeat, allowing progression to the next area.
- Demon's Great Hammer: Awarded if the demon is defeated during the first encounter.
- Humanity: A consumable item that can be used to restore human form or kindle bonfires.
Attack Patterns
| Attack | Damage | Damage Type | Parryable? | Speed | Tracking (left/right) |
|---|---|---|---|---|---|
| Hammer Swing | 190 | Normal | No | Medium | Neither |
| Hammer Driver | 190 | Normal | No | Slow | Neither |
| Hammer Backswing | 205 | Normal | No | Medium | Right |
| Hammer Scoop | 205 | Normal | No | Medium | Left |
| Hammer Smash | 245 | Normal | No | Medium | Neither |
| Butt Slam | 305 | Normal | No | Slow | Both |
| Leaping Hammer Smash | 275 | Normal | No | Medium | Neither |
| Double Hammer Swing | 200 | Normal | No | Medium | Neither |
Video Guides
Lore
The Asylum Demon is one of the greater demons born from the Bed of Chaos, the progenitor of all demons in the Dark Souls universe. After the war against Gwyn's Silver Knights, it survived and eventually took residence in the Northern Undead Asylum. Its role as a guardian emphasizes the Asylum's purpose: to confine the undead and prevent them from threatening the world outside.
Notes
-
If the Asylum Demon is defeated during the first encounter, the Big Pilgrim's Key is instead obtained from Oscar of Astora, an NPC found later in the Asylum.
-
The demon's attacks are slow and telegraphed, providing opportunities for players to learn dodge timing and attack patterns early in the game.
Trivia
-
The Asylum Demon shares similarities with the Vanguard Demon from Demon's Souls, both in design and function as an introductory boss.
-
The boss theme for the Asylum Demon is reused for other bosses in the game, such as the Taurus Demon and the Demon Firesage.
-
Defeating the Asylum Demon during the first encounter is a challenging feat for new players, often serving as a rite of passage for those seeking to master the game's mechanics early on.
Boss template
is a Boss in Dark Souls, encountered in area.
Information
Strategies
Drops
Lore
Notes
Trivia
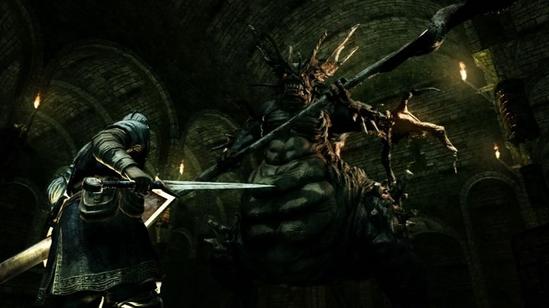
Taurus Demon
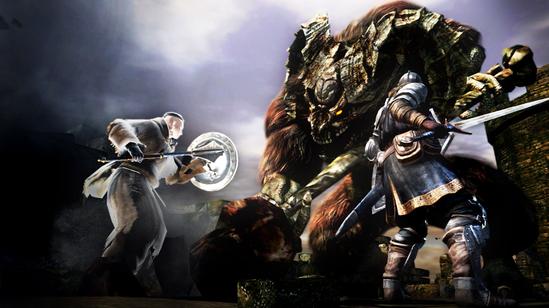 Tarus Demon (牛頭のデーモン) is a demonic Boss encountered in Undead Burg.
Description
The Taurus Demon is generally the first non-tutorial boss players encounter in Lordran. It wields a massive Greataxe, and later appears as the overworld enemy Minor Taurus Demon in the Demon Ruins.
Location
Undead Burg
Located on the walkway after ascending the tower with the spiral staircase.
Getting there
- From the Undead Burg bonfire, run across the small stone bridge toward a room with several hollows inside, either clearing them out as you go or running past and turning left to emerge onto an enclosed platform.
- Run up the stairs and take a left to descend a staircase and run towards the spire directly in front of you. Be wary of the flaming barrel that will roll down the staircase as you approach.
- Once inside the spire, ascend the spiral staircase to the top level, and enter the fog gate. It is recommended to climb the ladder to your right and deal with the Hollow Archers first as they can be troublesome during the fight, and the Taurus Demon will not spawn until you are roughly halfway across the bridge.
Stats
| Playthrough | HP | Souls |
|---|---|---|
| New Game | 1,215 | 3,000 |
| NG+ | 3,162 | 15,000 |
| NG+6 | 3,953 | 18,750 |
Drops
- Humanity
- Homeward Bone
- Demon's Greataxe (rare)
Resistances
Physical resistances
| Regular | Strike | Slash | Thrust |
|---|---|---|---|
| 103 | 103 | 103 | 103 |
Elemental resistances
| Magic | Fire | Lightning |
|---|---|---|
| 77 | 88 | 67 |
Auxiliary resistances
| Poison | Toxic | Bleed |
|---|---|---|
| 150 | 150 | 150 |
Elemental resistances
| Magic | Fire | Lightning |
|---|---|---|
| 77 | 88 | 67 |
Auxiliary resistances
| Poison | Toxic | Bleed |
|---|---|---|
| 150 | 150 | 150 |
Sourced from the Future Press Official Dark Souls Strategy Guide.
Attack Patterns
| Attack | Damage | Attack Type | Parry | Tracking | Speed |
|---|---|---|---|---|---|
| Giant Swing | 315 | Physical | No | Both | Medium |
| Jumping Pound | 349 | Physical | No | Both | Medium |
| Quick Ground Stab | 315 | Physical | No | Neither | Medium |
| Standing Pound | 315 | Physical | No | Neither | Medium |
| Forward Lunge | n/a | Physical | No | Neither | Medium |
Strategies
Upon passing through the fog gate, look to the right of the stairs to find a ladder. Climb up to find two crossbowmen that you will want to kill before engaging the boss. The Taurus Demon himself engages you as you cross the bridge.
Note that you can bypass this boss with the Master Key by going past Havel the Rock into Darkroot Garden and entering Undead Parish by Andre of Astora.
Dodging and Blocking
Generally, if rolling his attacks beware of the inconsistency of the windups. A right to left swing comes very quickly however the left to right swing can be tricky to time due to a long windup and a slight repositioning before the actual swing. Vertical attacks tend to be somewhere in the middle. Also note that many of his attacks incur shockwaves that are difficult if not impossible to roll, although they do little damage.
You can dodge roll in between his legs when he dose his forward lunge letting you get a good couple hits off on his back.
His attacks track you very well so while being directly behind him will help, you still need to dodge any attack he starts. Do NOT attempt to run past him on the bridge while he is attacking, he will likely hit you anyway and perhaps knock you off the edge. Bait out an attack, step back and run past as soon as he finishes.
Blocking in general is not particularly recommended due to how easy it is to be knocked off the edge, both on the bridge and on the roof of the tower.
Most if not all of his attacks should miss you if you are walking between his legs. A 100% block shield is recommended as he can damage and stagger you while stepping.
Environment
There are two sections to this map, the bridge and the roof of the tower you exit to reach the boss. Engaging the demon on the bridge is dangerous due to patches of broken wall that he can knock you through to your death, even while blocking, but the length allows for ranged characters, mainly Sorcerers and Pyromancers, to kite effectively.
The roof of the tower is best suited for a melee duel and for doing plunging attacks off. Walk across the bridge until he jumps down then run back and go up the ladder. After a delay he will jump up after you (do NOT stand near the edge, although if he does not jump up you may have to approach to trigger it, just be sure to run away again). Note that when he lands there is a shockwave effect that will stagger you if you are too close. If you are standing at the edge you will likely be killed immediately.
Melee
A melee duel can be tricky due to the high damage and knockback of the demon. If you are having trouble dealing damage, the Morning Star inflicts Bleed reasonably easily and is available at Firelink Shrine. It will stagger him after three consecutive attacks and inflict Bleed on the fourth.
Dodging his attacks at the top of the tower is recommended but you can also try kiting him along the bridge, stepping back from his attacks and running up for a hit or two before he can attack again. You can two-hand your weapon for extra damage, or keep your shield out just in case you need to block an attack provided you have enough stamina.
Critical Damage
Climbing the ladder next to the fog gate allows you to perform a plunging attack on the demon for high damage. There are various strategies for manouvering yourself for this.
- The most basic is to just do the plunging attack. This however leaves you stuck on or beside the stairs with the demon blocking your escape. You should be able to dodge or safely block an attack and run past him but an element of luck is involved. Once past him you need to run a little way along the bridge, say to the halfway point. Dodge an attack and run past once he has completed it, then bait out another attack and run back to the ladder. You can watch a video here.
- When jumping off to do the attack, if you do a running jump and land your attack in just the right place (about on his back) the animation will spin around and you will land on the other side of the demon. See previous point for getting back to the ladder.
- If you jump off from the top of the ladder, rather than the middle of the opening, you should land back in front of the ladder and have just enough time to climb above what is usually a horizontal swing. You can watch a video here.
Ranged
A Sorcerer, Pyromancer, or given enough ammunition any character with a Bow or Crossbow should have an easy time with this boss. Run right up to him as he jumps off his tower and bait out an attack. His attacks take long enough that you can back up and land a projectile or two before he can attack again. Remember to save your ammunition for the boss and use a melee weapon on the way. Note that Sorcerers can buy extra spells for more casts from Rickert of Vinheim.
You can watch a video here. Note that it is safer to wait until he finishes an attack and then run past, as rolling past him as in the video may get you knocked off the edge. Proper management of distance (not running back too far) should mean you don't need to pass him at all.
If you have the Heavy Soul Arrow, the second hit will stagger him. This makes it possible to stunlock the Taurus Demon to death, making it a complete cakewalk.
You can also climb the ladder, hit him once or twice while he looks at you then jump or start climbing down before he jumps up. He'll follow you back down allowing you to climb back up and repeat. You can watch a video here. Pyromancers should be careful as your spells cause you to walk forwards and possibly off the edge.
Items and Status Effects
Bleed from a Morning Star can cause very high damage. See the Melee section for details.
Firebombs can be used instead of a ranged ability or weapon if you do not have those options but still want a ranged battle.
Gold Pine Resin will cause your weapon to deal significant additional damage and is available in a residence on the way from the Bonfire (Residence Key or Master Key required).
Other
If you stand in the hole in the wall on the left of the bridge, the Taurus Demon may knock you off then jump down after you. You will both die and you can collect the souls from your blood stain. You can also try standing on the other side of the bridge to this hole and hope he jumps back off it (good shield recommended).
Get the Taurus Demon on top of the tower and climb a little way down the ladder, high enough so that he will attack you but low enough so that it will not hit. He may eventually step forward enough while swinging to fall to his death.
Lore
Notes
Trivia
Bell Gargoyles
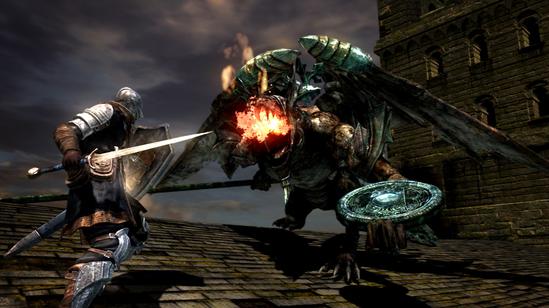 Bell Gargoyles (鐘のガーゴイル) is a Boss encounter taking place in Undead Parish.
Description
The guardians of the first Bell of Awakening. After the first gargoyle's HP drops below 60%, a second, fire-breathing one will come to the boss arena. Generally, this is the first boss encounter in which you can summon NPC phantoms.
Location
Undead Parish
On the rooftop of the main church building.
| Playthrough | HP | Souls |
|---|---|---|
| New Game | 999 + 480 | 10,000 |
| NG+ | 2,499 + 1,200 | 50,000 |
| NG+6 | 3,123 + 1,500 | 62,500 |
Drops
- Twin Humanities
- Gargoyle Tail Axe - cut the first gargoyle's tail, 100% drop
- Gargoyle's Shield - 3%
- Gargoyle Halberd - 3%
- Gargoyle Helm - 3%
Don't worry if you miss the 3% drop chance items, the final gargoyle in Anor Londo will have a 100% drop rate for each item you missed
+ Resistances - hide this content
Physical resistances
| Regular | Strike | Slash | Thrust |
|---|---|---|---|
| 133 | 133 | 133 | 133 |
Elemental resistances
| Magic | Fire | Lightning |
|---|---|---|
| 103 | 98 | 104 |
Auxiliary resistances
| Poison | Toxic | Bleed |
|---|---|---|
| 260 | 260 | 230 |
Summoning
Solaire of Astora
In front of the fog gate, you can't miss it.
Knight Lautrec of Carim
You must have opened his cell cage (requires Mystery Key or Master Key), which is nearby the fog gate, down the right hallway and then talked to him at the Firelink Shrine to be able to summon him. His Soul Sign is behind the first ladder, proceeding up to the fog gate, on a ledge.
Notes
- There are two similar gargoyles in Anor Londo, both of which drop the same items and the first of which can have his tail cut for a total of two Gargoyle Tail Axes per play-through.
- You can farm the two gargoyles at the Church if you want to get their drops. When you enter through the fog, weaken the first gargoyle to near death. Wait until the second gargoyle shows up then kill the first one. Grab any loot if any dropped and then Quit Game. You will appear outside the fog and can repeat the process until you get what you want.
- Summoned allies can run to the other side of the roof without triggering the fight. Waiting for them to go to the other side can let you surround the first gargoyle before the battle begins.
Attack Patterns
- Horizontal Combo - Up to three horizontal swipes with his halberd.
- Thrust Attack - Thrusts his halberd at the player.
- Shield Bash - Bashes the player with his shield.
- Overhead Smash - An overhead strike with his halberd, can be one-handed or two-handed.
- Flying Overhead Smash - Flies into the air and quickly descends towards the player with an overhead attack with his halberd.
- Tail Uppercut - Flies into the air and swings his tail upwards at the player. Requires a tail so only the first can use it until you cut his tail off.
- Halberd Uppercut - Flies into the air and swings his halberd up at the player.
- Flying Swipe - Flies into the air and towards the player, attempting to land behind them, twists in the air and upon landing does a swipe with his halberd in the direction he came from.
- Sweeping Breath Attack - Breathes fire in an arc in front of him. Both gargoyles can use this, but the first will only do so after the second arrives.
- Flying Breath Attack - Flies into the air and breathes fire down at the player. May appear to start an overhead smash but use this instead. Both gargoyles can use this, but the first will only do so after the second arrives.
Note that the second gargoyle has the same moveset, but will almost solely use the sweeping breath attack. Similarly, the first gargoyle can use breath attacks (after the second has joined him) but will prefer to attack with his halberd.
Dodging and Blocking
Everything except the breath attacks can be blocked with relative ease using a Normal Shield, although the overhead attacks may consume a lot of stamina. Blocking a breath attack will significantly reduce the damage depending on the fire resistance of your shield but be careful of the other gargoyle as if he hits you while blocking a breath attack you will likely be staggered and take full damage from the fire. The Heater Shield and the Hollow Soldier Shield are easily obtainable and ideal for this fight.
Note that while blocking, you will still be knocked back a little way, so stay away from the edge of the roof. Always try to be moving towards the peak in the middle.
His attacks are well telegraphed, so rolling through them is relatively simple; roll into each swing or sideways as he uses a vertical attack. His horizontal combo has a broad sweep, but getting directly behind him will avoid it altogether. If he flies into the air, you are safest moving back, although with a little practice he can still be dodged.
Once the second gargoyle joins the fight, it becomes a little trickier. The new gargoyle will mainly use slow breath attacks that have a long range, so you will find yourself limited in movement. It is even more important to remain as close to the middle of the roof as possible, so you do not get caught between the edge and a wall of fire.
The sweeping breath attack is easily dodged by running to your left while facing the gargoyle to get behind him. He will continue the lengthy attack until it is finished allowing for a large window to counter.
Keep them both on your screen, avoid the fire as much as possible and attack when at least one of them is locked up in a breath attack (and you are not in danger of being hit by it).
Melee
Highly recommend getting the Drake Sword for this fight, you will be able to kill the first gargoyle before the second even hits the roof. Roll or block his attacks to get behind him and hack away at the base of his tail, you are mostly safe here and will get his tail axe as a bonus. Be careful engaging him after he lands from a flying attack as the window for attacking him then is relatively small.
Note if he is higher up on the roof, your attacks will often pass under him. Try to engage him at the same level or higher up the roof to avoid this. Additionally, being lower them him increases the risk of being thrown off the edge by blocking or failing a dodge.
As always watch your stamina while attacking him as you need to be ready for his next attack. If you are blocking, make a note of how much stamina he takes off and ensure you do not fall below that much while attacking.
If the second gargoyle arrives before you kill the first one, keep them both on your screen, DO NOT get surrounded by them. Bait out their attacks and get hits in where you can, don't get yourself between them and the edge wherever possible and if you get backed up against a wall, carefully circle them. It may be worth staying just to one side of the peak to allow for more room to circle. Jumping attacks (Forward + R2) will enable you to quickly get into range and attack if you are having trouble finding windows.
Environment
The sloped roof can be a tricky ground to navigate as it is reasonably narrow considering the size of the gargoyles and how far you can be knocked back. Always try to be on the same level, not only so your attacks will hit (if using a melee weapon) but so that if you are knocked back, you can only go so far as either wall. Note if you do get below or above him his attacks will often miss, but this is dangerous to rely on due to the knock-back.
Ranged
A ranged Sorcerer can utilize spells at range for a simple fight, walk or backstep away from any attack and follow up with a Soul Arrow. If he is flying, wait for him to land as he will usually duck under it. When the second gargoyle joins, do the same thing, bait each into an attack, step back and hit them.
A Pyromancer can utilize the above strategy with the first gargoyle but the second is more resistant to fire, so bringing a melee weapon to finish it is advised.
Stealth and Diversion
Ranged strategies are particularly useful if summoning Solaire of Astora (not recommended to summon both phantoms due to the increased boss HP) as he will distract the gargoyle while you bombard him with attacks. Melee builds may also benefit but will still need to be wary of the broad sweep attacks, flying attacks, and the gargoyle(s) changing targets.
Tail Cut
To cut off a tail, it's necessary to deal a certain amount of damage against it. The HP of the tail increases with higher NG cycles and is based on the HP of the respective enemy.
| Playthrough | Tail HP |
|---|---|
| New Game | 78 |
| NG+ | 195 |
| NG+6 | 243 |
In case of the Bell Gargoyles, the tail has about 7.81% of the gargoyle's HP.
Information
Strategies
Drops
Lore
Notes
Trivia
Moonlight Butterfly
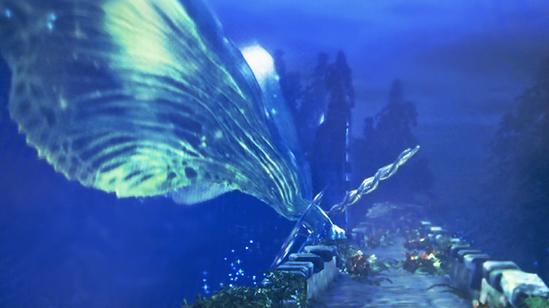 The Moonlight Butterfly (月光蝶) is a Boss encountered at the end of Darkroot Garden.
Description
Large magical butterfly created by Seath the Scaleless from magic. Capable of several ranged magic-based attacks but very limited close range capabilities.
Location
Darkroot Garden
At the end of the area accessible by going through the corridor near the Crest of Artorias door.
| Playthrough | HP | Souls |
|---|---|---|
| New Game | 1,506 | 10,000 |
| NG+ | 3,449 | 40,000 |
| NG+2 | - | 42,801 |
| NG+3 | - | 44,000 |
| NG+6 | 4,311 | 50,000 |
Drop
- Soul of the Moonlight Butterfly
- Humanity
+ Resistances - hide this content
Physical resistances
| Regular | Strike | Slash | Thrust |
|---|---|---|---|
| 184 | 184 | 184 | 184 |
Elemental resistances
| Magic | Fire | Lightning |
|---|---|---|
| 230 | 110 | 148 |
Auxiliary resistances
| Poison | Toxic | Bleed |
|---|---|---|
| ∞ | ∞ | ∞ |
Sourced from the Future Press Official Dark Souls Strategy Guide
Summoning
Witch Beatrice
Under the stairs leading up to the boss, hidden under a bush, roll through it to reveal the sign.
Attack Patterns
- Slow-moving, homing missiles.
- Multiple fast moving spear like missiles, 2 waves in rapid succession.
- Beam attack.
- Additional attack when its HP drops below 50%: flies over the bridge and fires a blue orb that explodes on impact with the floor.
Strategies
- You cannot do damage at the start of the fight until it has sat still and all it's tendrils "spasm" in place, showing that it can now take damage.
- Does entirely magic damage, so wear your best Magic defence gear
- Intentionally encumber yourself to stay down longer when rolling
- You can alternatively use the Dark Wood Grain Ring to roll quickly
- Gold Pine Resin is effective against the butterfly, but probably a waste on this boss.
- Acquire the Crest Shield as it has 80% magic block makes this fight much easier. Alternately, the Caduceus Round Shield and Warrior's Round Shield sports a decent 65% damage reduction
- Having the Grass Crest Shield to boost stamina regeneration and sticking to dodging also works
- Summon Witch Beatrice at the bottom of the stairs. Equip a shield with high magic resistance and just let Beatrice kill the boss by herself while you block its attacks.
Melee Strategy
The butterfly flies around shooting soul arrow-like projectiles until it lands and allows melee players to hit it. Two-hand your weapon as it poses absolutely no threat during this phase. After a while (~8-10 seconds) it will start to glow - that's your clue that it is about to radiate a damaging magical pulse, then take off again. The butterfly's regular magic attacks can take some practice to dodge. One launches multiple quick projectiles and another slower, green, homing projectiles. Here it's recommended that you strafe back and forth in front of the butterfly while it's flapping.
The quick multi-projectile attack is harder to dodge than the homing one. In general, as soon as you see the butterfly flash, you want to be backing away to one side of it with your shield up. With luck, the quick multi-projectile attack will miss you as you're strafing away, though you may wind up blocking one or both hits. The homing magic projectiles are easily dodged without fail if you strafe one direction and roll the other direction immediately before impact.
Resist your urge to stay far away and try and dodge incoming shots, as this will guarantee that all 3 homing shots have time to focus in on you and hit you.
The butterfly will start throwing a large blue attack down at you as it flies overhead once it's below roughly half life.
Pyromancer Strategy
Try standing directly under her and use fireballs, fire orbs, or any ranged pyromancy you have.
The butterfly is weakest to fire, just make sure you only attack between it's attacks.
Warrior of Sunlight Strategy
If you've joined the Warrior of Sunlight covenant, this boss fight becomes very easy. Equip the Lightning Spear miracle, target the boss, then fry the overgrown moth in seconds. It likely won't be able to get many attacks out due to the speed and range of the lightning spears, just don't get cocky and be sure to dodge when it does attack.
Fog Gate cover Strategy
When the boss comes over to your side of the bridge, run as fast as possible to the side with the other fog gate. Once here, the boss shouldn't come back over to you if you are backed against the wall. This makes dodging the magic missiles and spears a lot easier by just dodge rolling for the missiles or moving for the spears. Once the boss comes in for the face bomb, run as fast as you can to it and wail on it (jumping attack is recommended). Once it starts shooting the bomb from overhead at you, when it is near you dodge roll forward and you should avoid it flawlessly.
Ranged Strategy
Bow
If you don't have access to spells, you can just use a crossbow or a bow.
Stay close to the wall in which the boss is nearest, This makes dodging the fast moving missiles easy and sometimes unnecessary. Shoot arrows while locked onto the boss and dodge if needed. Use arrows as the butterfly is starting to land. Once landed the butterfly can be attacked several times with a melee until the blast attack. Once the butterfly's face starts to light up with an aura quickly break lock-on and sprint either left or right (Which ever way you can get further from it.) Boss should take minimal flasks and be a brief fight.
Firebombs
When fighting this boss, if you still have your Black Firebombs and firebombs left over, you can deal 158 with black firebombs and 103 with regular firebombs. Approximately 10-15 depending which you use will win you this fight before she even has a chance to land.
You can purchase firebombs cheaply from the Undead Merchant Male in the Undead Burg
NG+ Strategy
You can use the butterflies own weapons against itself in NG+
If you create the Crystal Ring Shield you can just spam the projectile attack on it, using repair powder if needed.
Combined with the 90% magic block on the shield, this fight is made even easier.
Glitches
- If you have summoned a phantom to help with this boss, near the end of the fight the butterfly will turn so that its back is towards the bridge. It can then fly into the forest, completely out of range of any sorceries or arrows, leaving you stuck on the bridge. After 10 to 20 minutes the butterfly dies on its own.
- This can happen even if no phantom has been summoned. After the first "laser" attack, instead of flying up to the bridge to rest the butterfly flew through the forest, clipping with the terrain. It did not return.
- It is possible for the Moonlight Butterfly to get stuck on the tower to your right, as you enter. It will be unable to attack you, though you can hit it with arrows. It may then glitch out further and fly off into the forest, never to be seen again.
- When being summoned for this fight on PC or PS3, the butterfly may glitch and be unable to hit you on your screen. However, it can still kill the summoner.
Information
Strategies
Drops
Lore
Notes
Trivia
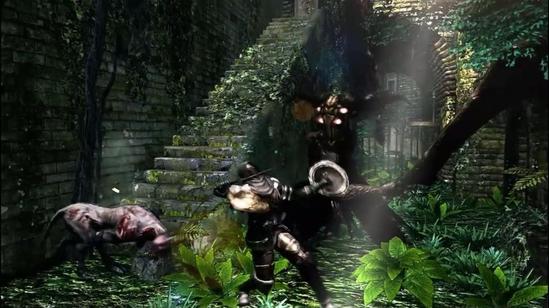
Capra Demon
 The Capra Demon (山羊頭のデーモン) is a Boss encountered in Lower Undead Burg.
Description
A lesser demon resembling a humanoid with a goat's head, wielding two large machetes. He has two Undead Attack Dogs with him.
Location
Lower Undead Burg
After the area with the Undead Attack Dogs and Undead Assassins.
| Playthrough | HP | Souls |
|---|---|---|
| New Game | 1,176 | 6,000 |
| NG+ | 2,940 | 30,000 |
| NG+6 | 3,675 | 37,500 |
Drops
| Item | Chance* | Notes |
|---|---|---|
| Key to the Depths | 100% | - |
| Humanity | 100% | - |
| Homeward Bone | 100% | - |
| Demon Great Machete | 5% | - |
*Item drop rates can be improved by increasing Item Discovery
+ Resistances - hide this content
Physical resistances
| Regular | Strike | Slash | Thrust |
|---|---|---|---|
| 159 | 159 | 159 | 159 |
Elemental resistances
| Magic | Fire | Lightning |
|---|---|---|
| 119 | 127 | 106 |
Auxiliary resistances
| Poison | Toxic | Bleed |
|---|---|---|
| 220 | 220 | 220 |
//Also takes extra damage from Black Knight Weapons.
Attack Patterns
- Basic horizontal swings, up to 4 hits in a combo (*two 2-hit combos consecutively*).
- Two-handed swing, has a long windup. Don't try to block it, move away from him when you see him wielding his blades together.
- Jump attack, telegraphed by standing still and crouching a bit. Will cause knockdown, high damage, and break through shields. Often uses it when you climb the stairs. Note: On NG, this attack can be blocked completely using a Balder Shield +5, with stamina level at 12 Endurance. You will have about a sliver of stamina left, assuming your stamina was at full before blocking.
General Strategy
Highly recommend turning off Camera Auto Wall Recovery in the options menu before this fight as it is an enclosed area and you want to know exactly where you stand in it. This is recommended for the rest of the game but more so for this fight.
Killing off the Attack Dogs is your priority (thus the need for a good weapon), take the first one after dodging the demon's first attack and then head to the back of the area to find the second one hidden in a little nook in the far right corner. Alternatively, they will both chase you if you immediately run up the stairs where you can dispatch them.
He may immediately attack you upon entering the courtyard on subsequent attempts. If you are having trouble with this, roll towards the stairs to dodge the attack (rolling right will get you trapped).
Dodging and Blocking
His attacks can be blocked relatively easily except for his two-handed overhead smash and jump attack. These two attacks have narrow areas of effect, so roll or step to the side to avoid them. Keep circling him and make sure he doesn't trap you against a wall.
Increasing your Poise can help if you are having trouble with being staggered by the demon or Attack Dogs. The Wolf Ring is a particularly valuable item for those who aren't using heavy armor.
For lighter builds, the start of the fight can be tough. You need to time a roll to dodge both the demon and the first dog, and then your best bet is getting up the stairs and quickly killing off the dogs.
Environment
The stairs can be ascended to provide a brief respite from the demon (he will follow you) should you have trouble finding an opening to attack, but note he will usually use his jump attack as you do so don't dawdle.
You can also lure the demon up the stairs then jump off when he is about halfway up, run past him so when he jumps down, you won't get cornered. He'll jump off as well and then need some time to recover from the fall so you can get a few hits in without risk. You can watch a video here.
Melee
You should also have at least the Drake Sword for this fight. He is weak to fire so you can apply Charcoal Pine Resin to your weapon for some extra damage.
As a demon, he will take additional damage from Black Knight weapons, but it is unlikely you will have found one or be able to wield it at this point in the game unless you are on NG+.
Critical Damage
You can do a jumping attack from the platform at the top of the stairs if you can lure him under it. Note he will try to follow you up the stairs, and this strategy isn't as effective as it was against the Taurus Demon.
Ranged
While not a ranged fight per se, ranged builds will have a tough time getting into this fight as with how early it is in the game you likely have not got a reliable melee weapon you can equip, especially in the case of Sorcerers. Given how quickly the dogs can attack you, you do not have time to wind up your spells or ranged weapon.
Do not try to take the dogs with an inferior weapon such as a Dagger; it takes too long, leaving you open for attack from the second dog or the demon itself. You should aim to roll past the demon and the first dog, perhaps block the dog's leap with your shield to prevent yourself being staggered, then run to the top of the stairs and hit the dogs as they ascend. If you only kill one dog by the time the demon is on the stairs that's fine, jump off. The demon and dog will follow you but will take much longer recovering from the fall, allowing you to kill the other dog. You can then kite the demon around and hit him with your ranged ability after back-stepping his attacks.
Status Effects and Items
You can utilize Bleed damage from something like the Bandit's Knife, or toxic damage from Dung Pies (available from the Undead Merchant Female).
You can also use Firebombs at range for some additional damage.
Stealth and Diversion
The Aural Decoy Sorcery will distract the demon, allowing you to deal with the dogs.
Other
The Lightning Spear Miracle does significant damage.
If you are having trouble and want an easy alternative to this fight, you can hit the Capra Demon from outside the fog gate by manually aiming Dung Pies or Firebombs and throwing them over the wall at the correct angle. You can watch a video here. The fog gate will disappear once he is dead and the dogs will attack you if you are in range.
Information
Strategies
Drops
Lore
Notes
Trivia
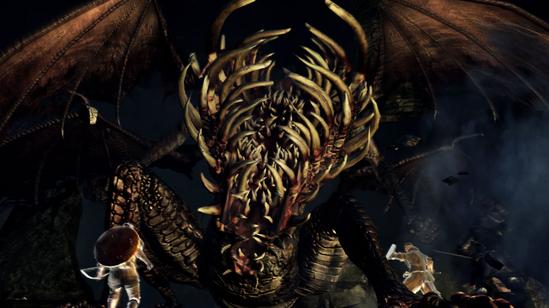
Gaping Dragon
 Gaping Dragon (貪食ドラゴン) is a Boss encountered in The Depths.
Description
A descendant of the Everlasting Dragons. The dragon was once a normal dragon, until his eternal hunger transformed his upper body part to a giant mouth.
Location
Depths
His fog gate is at the bottom of the huge open area, accessible when you turn right at the broken grille leading to Blighttown/Domhnall of Zena.
| Playthrough | HP | Souls |
|---|---|---|
| New Game | 4,660 | 25,000 |
| NG+ | 8,947 | 75,000 |
| NG+6 | 11,183 | 93,750 |
Drops
- Blighttown Key
- Twin Humanities
- Homeward Bone
- Dragon King Greataxe - tail cut
+ Resistances - hide this content
Physical resistances
| Regular | Strike | Slash | Thrust |
|---|---|---|---|
| 167 | 167 | 167 | 167 |
Elemental resistances
| Magic | Fire | Lightning |
|---|---|---|
| 117 | 108 | 84 |
Auxiliary resistances
| Poison | Toxic | Bleed |
|---|---|---|
| ∞ | ∞ | 118 |
His head also takes 50% extra damage from any attack
Sourced from the Future Press Official Dark Souls Strategy Guide
Summoning
Solaire of Astora
Right next to the stairs leading down to the fog gate.
Knight Lautrec of Carim
You must have opened his cell cage (requires Mystery Key or Master Key) back at Undead Parish then talk to him in Firelink Shrine to be able to summon him. His Soul Sign is near the corpse containing the Heavy Crossbow.
Bug Notes
- Lautrec and Solaire may both got stuck behind the fog gate, and as a result the Gaping Dragon kept running into the door, trying to attack them, leaving it wide open for attack.
Attack Patterns
- While prone
- Crawl - Crawls in a mostly straight line, tracking slightly. Ignores pillars, has long range. Beware when approaching, as it hits you when you get near it during this attack, dealing high damage.
- Raise Torso - Raises torso off the ground and assumes an upright position. Does this after Crawl attack or if there are no targets in front of it.
- While upright
- Grab - Attempts to grab you with either hand. If successful, chomps on you for a lot of damage and throws you to the ground. Quickly alternate shoulder buttons to escape.
- Swipe - Swings left foreleg, short range, only uses while close.
- Tail Swipe - Moves tail slowly to one side and executes a quick swipe. High damage, can still use if tail has been cut but range is severely reduced.
- Acid - Wriggles its torso and releases a large pool of acid that expands rapidly. Will severely damage equipment, avoid by running in the opposite direction. The pool disappears upon reaching max range.
- Flying Smash - Flies up and attempts to smash down on you.
- Stomping - Stomps the ground three times with left foreleg.
- Slam Attack - Slams torso on the ground, reverting to prone position.
Strategies
Make sure to kill the Channeler at the top before entering the boss fog (see Depths for location), he will empower the boss and cast Soul Arrow and Heavy Soul Arrow at you making the fight a lot more difficult.
Summoning NPC help for this fight is not recommended, they increase the boss health but do little damage and die quickly, plus the boss behaves unpredictably.
Having the Repairbox by this point is highly recommended as if you are hit by the acid attack you will either have to swap out your equipment (at least a different weapon) or repair it.
Dodging and Blocking
Medium or light encumbrance is recommended, stay out of range while it is upright and bait out its slam attack. While it is prone, stay in front of it but slightly off to one side, so it will still use its crawl attack and giving you enough room to run to the side to avoid it. Watch for its acid attack, running directly away from it should get you out of range.
Stay back and wait for a charge attack, then dodge and run to the tail. Attack until almost out of stamina, then run away. Repeat.
Blocking its crawl and upright attacks is not feasible and it is a very simple matter to avoid all damage from this boss.
Sometimes it will chase you around while upright, just keep running and do not let it hit you. Try to put yourself between it and a long stretch of the arena to encourage it to slam down.
If you wish to fight it while upright you can run to the right of it with a shield up (you may have to dodge a grab) and get a few attacks in. Since it turns slowly it will usually use its flying attack, run away and repeat. This is riskier but potentially a bit faster.
An alternative is to use Iron Flesh and just tank it, however this is a novel method and does not protect you against the grab attack or acid.
Melee
Run to the side of the crawl attack and attack its rear leg as it returns to its upright position. You should be able to expend your entire stamina bar and still have enough time to walk away. Attacking from the left side (the dragon's right) it is less likely to use its tail sweep.
Note as you should not be blocking anything, you should two-hand your weapon for additional damage.
You can get a few attacks in on its head with good positioning as it slams down, but be careful of the impending crawl attack.
Ranged
Same as melee, bait out the crawl and fire away. Has the advantage of being able to attack during the crawl as long as you are sure you are out of its path.
Solaire and/or Lautrec can be summoned to distract the dragon however this will increase its health and dodging is a simple matter without them.
Environment
The pillars offer zero protection so don't bother hiding behind them. There is also a drop on one side of the arena but there is so much room it is not an inconvenience.
Status Effects and Items
Domhnall of Zena sells 3 Gold Pine Resins for 1,000 souls each which add 150 points of lightning damage to your right-hand weapon (if it is enchantable) causing it to deal significantly more damage.
Tail Cut
To cut off a tail it's necessary to deal a certain amount of damage against it. The HP of the tail increases with higher NG cycles and is based on the HP of the respective enemy.
| Playthrough | Tail HP |
|---|---|
| New Game | 539 |
| NG+ | 1,036 |
| NG+6 | 1,295 |
In case of the Gaping Dragon, the tail has about 11.58% of his HP.
After the crawl attack it will spend a lot of time returning to its upright position. Use this time to get hits on its tail, preferably with a vertical attack.
Note if using the Drake Sword that its heavy two-handed attack consumes durability, so only use light attacks.
Skipping
It is possible to skip the Gaping Dragon, since its defeat is only required to gain access to Blighttown, which ultimately leads to Quelaag's Domain. To gain access to Blighttown without defeating the Gaping Dragon (and without the Master Key), the player can travel to the Undead Parish, then to Darkroot Garden, then to Darkroot Basin. In Darkroot Basin, take the passage to Valley of Drakes. The player can then either fight, or run to the left past the Drakes and up to the back entrance to Blighttown. (Here the player can also enter Blighttown and get the key to New Londo Ruins to open that passageway for easier access from Firelink Shrine).
Note that the large door to the Depths can only be opened from the side of the Depths, so if it is not unlocked, it will be a dead end.
Information
Strategies
Drops
Lore
Notes
Trivia
Stray Demon
 Stray Demon (はぐれデーモン) is a Boss encountered during the player's second visit to Undead Asylum.
Location
- Undead Asylum (revisited) - The floor where you fought the Asylum Demon will collapse on your return visit to the Undead Asylum. This is where you will find the Stray Demon. You can avoid the fight by walking around the perimeter of the room. At least avoid the fight until you have rested at the bonfire on the opposite side room.
Description
The Stray Demon is the second boss in the Undead Asylum, but can only be fought during the return visit to the Asylum later in the game. His shape is similar to that of the Asylum Demon, but much stronger with an additional magical explosion attack.
You can actually see the Stray Demon at the very beginning of the game, from the hallway outside the starting cell. When you are in the Asylum Demon's boss arena, you can hear him walking around underneath you.
Stats
| Play-through | HP | Souls |
|---|---|---|
| NG | 5,250 | 20,000 |
| NG+ | 8,242 | 40,000 |
| NG+6 | 10,303 | 50,000 |
Drop
- Titanite Slab
- Humanity
- Homeward Bone
+ Resistances - hide this content
Physical resistances
| Regular | Strike | Slash | Thrust |
|---|---|---|---|
| 258 | 323 | 194 | 258 |
Elemental resistances
| Magic | Fire | Lightning |
|---|---|---|
| 195 | 207 | 168 |
Auxiliary resistances
| Poison | Toxic | Bleed |
|---|---|---|
| 104 | 104 | 75 |
Sourced from the Future Press Official Dark Souls Strategy Guide
Note
- It is possible to trigger the collapse of the floor without actually falling. When approaching from Snuggly, proceed to the pillars on the right. The second pillar has a vase immediately beside it. Destroy this vase, face towards the middle of the room, and run across. At about the halfway point, jump. If you're unencumbered, you should be able to make it across. Unfortunately, he can't actually be hurt until you're down there with him.
Attack Patterns
- The Stray Demon swings his weapon horizontally in a large arc, always starting from his right, then following up from his left.
- The Stray Demon raises his weapon above his head, then slams down on the area in front of him, upon impact this causes a large explosion.
- The Stray demon swings his weapon from his left, causing a large explosion. This explosion does extend behind the demon.
- The Stray Demon floats up into the air for a second and slams back onto the ground, facing the player. Sometimes he just floats up to turn around, without doing the slam.
- The Stray Demon will jump back rapidly (sort of like the Tower Knight from Demon Souls' jump back) This is often followed up by two extremely powerful overhead smashes.
Strategies
- His explosive attacks are magic based. As such, it is recommended that you use the Crest Shield found within your return visit to the Undead Asylum during this battle, or any other shield with high magic resistance. Also advisable is the Spell Stoneplate Ring which can be obtained from the Crestfallen Merchant.
- If you have Fall Control, use it before approaching the area that breaks down. It'll protect you from fall damage.
- Take note that the Grass Crest Shield will be of much use, for you will be doing quite a bit of running, and quite a little of resting
Melee Strategy
The most dangerous part of this fight is the fall. Like many bosses, the safest place is close-to and behind the demon, so after falling run towards it and around to its side. You may have to dodge an attack.
*His greatest strengths are his rotation speed & that the entire arena is within his attack range! Stay behind him & get an occasional hit. You will need a fair stamina gauge & to be at 50% encumbrance, max.
Once behind the demon stay there. Locking onto it can be a hindrance, but if you stay at a good distance it's actually helpful. Your ideal position should be close to point blank after his attacks, and around tail length during them. Being close to him will usually provoke him to either flutter up and buttslam (which has a tiny shockwave that doesn't do much damage. Even if he hits you with it you'll be able to get one hit in.), or he will raise his axe vertically and slam it into the ground, creating his red magic blast. This attack gives you plenty of time to move away from it and circle behind him. You can keep this sequence going until he dies.
The biggest problem you will encounter is his reach-forward magic blast attack, which creates a pale red blast about 60ft in diameter and can hit you from behind. This is tricky, but your best bet is to try to roll away from where he's pointing his arm. You might die a few times because of this, but If you stay directly behind him, this forward magic blast won't be fired often.
Be wary of stopping to drink estuses, he may spear you if you're in range & will blast you if you aren't.
Try not to stay too far away from him, as this will encourage him to use his massively powerful axe swings, which will one-hit-kill you almost every time unless you're running a real tank build or are way above par for level.
An important note in the Melee Strategy. If he ever jumps back, move AWAY from him and re-position later, as he will most likely kill you as you are trying to run back around him with his overhead smashes
The Black Knight weapons are very effective, doing 100% of base damage against any demon. Be warned, while the two-handed strong attack does about this much damage too, it is much slower. If you don't manage to tap forward while attacking him this way… well, just don't mess up, okay?
Once at the demon's back, a good approach is using a halberd weapon's running R1 attack, this allows you to get a strike in and back off with ample time to avoid either of his explosive blasts if timed correctly. The crystal halberd is an excellent choice here.
2nd Strategy ( Light encumbrance )
When you drop in the hole, he is either going to swing his weapon from his left, from his right, or from above. If he swings from his left, the damage will come from a delayed explosion, not the weapon itself. Wait until the explosion occurs, then roll away from the wave right before it reaches you. If he swings from his right, just dodge the weapon swing, as well as the follow up. If he swings from above, wait until he starts the weapon swing before rolling away. From now on, stay behind him. If you see him fly up, wait until he lands then roll behind him to your right once. As long as you're past his leg, you're pretty safe.
Now, regarding the defense first. If you're behind him, and he does the magic explosion swing ( the swing from his left ), back away as far as you can while waiting until just before the wave reaches you then roll away. If he does the physical swing ( from his right ), just keep your shield up and you'll be fine. Now, if he does the explosion smash, just back away from him, a little past the tail, After the explosion ends, quickly rush foward and land a hit. If you're using a greatsword, you can safely land 2 normal two handed swings. Sometimes as you're swinging your second hit, he might repeat his explosion smash, If this happens, immediately roll away after your swing ends. Repeat this and you may be able to finish him.
Recommendations
- Using the jump attack (tap forward + R2) can provide enough range to safely attack him without taking hits from the tail. A large 2-handed weapon (such as the Black Knight Sword) will do considerable damage with this attack, and can be aimed without locking on.
- The Bandit's Knife, with its bleed property and fast attack speed can inflict a large amount of damage on every third hit. If you're unburdened enough, it's possible to attack his leg three times, roll away from the butt-stomp attack and dash back in to attack again. The stray demon often repeats this pattern and can result in a rather easy, if repetitive boss clear. Video
- The Iaito-sword has high bleed property and fast enough attack speed to work well against the Stray Demon as long as you use light attacks. The two-handed strength requirement of 11 makes it almost certainly useable by all characters at this point, as long as you've been to the top half of Blighttown to get it.
- Upon first falling into the pit, quickly run to either side and into the pillars. If done quickly enough, the demon will NOT immediately engage you, and you will have time to heal and buff before you plan your attack on the demon. Additionally, the demon tends to not engage you unless you move to the closest row of pillars, out of 3, or you attack him. Be aware that once the demon does engage you, hiding behind pillars will not hide you anymore.
Mage Strategy
As a mage, you might believe the best strategy is to pelt with long ranged attacks and stay out of the danger zone of his axe. Unfortunately this tactic is quite hard to do, as his axe follows rolls to some extent, and he has many attacks that can reach more than halfway across the room, leaving very little time to use spells between all the dodging and recovering. Even then, you may be hit with a fire/shockwave spell and have the boss follow up with another hit for your death.
The best way to deal with the demon is to get up close and personal as a mage. After running behind the pillars and healing, position yourself in a place where you can easily get behind the demon and have plenty of space to run around him, as getting stuck on a wall or in a corner will likely mean your death. While behind the demon, the attack he will use most often will be his shockwave/fire spell, and since this has a long cast time you will be able to hit him in the back with your spells. He seems to have two forms of this attack, the first when he moves a bit forward and seems to slam the weapon on the ground during his descent, and the second when he stands in place and hits the ground in this manner. Both are excellent times to attack with spells.
There are only two things you need to look out for with this strategy. The first is his shockwave CAN hit you if you are behind him, but it doesn't go too far behind him. If you stay out of the range it would take you to melee the demon, you will be fine. Secondly, he will occasionally fly up a short distance in the air and do a butt slam, which can hurt you very badly, set you up for a combo, or just outright kill you. When you see him fly up and start facing you, don't panic; just run a safe distance away, wait for him to hit the ground, and resume the strategy. He has a LOT of HP, so don't get greedy and keep hitting him until he falls.
Another Mage Strategy
Kill the 2 undead then cast Homing Crystal Soulmass. drop in and cast Strong Magic Shield then blast with Crystal Soul Spear with a Bellowing Dragoncrest Ring equipped. he hardly hit me, but when he did, it was all mitigated by the shield. there is no need to move unless you are going to cast Soulmass and you dont want him on top of you. this method worked easily from NG to NG+++
Cheap Mage Strategy
Equip the Ring Of Fog and run to the side of the room where he doesn't patrol back and fourth, either corner. He should have lost track of you and be patrolling the room in a line now. Wait until he is closest to the corner you picked, and fire a spell at him, and run to the opposite corner of the same side you are on, he'll attack where you were and go back to patrolling. Repeat this until he's dead. If he doesn't drop aggro after you run to the other corner, run to the other side of the room, he should drop aggro then. Its pretty easy for him to lose sight of you with the Ring Of Fog equipped.
Pyromancy Strategy
With an upgraded Pyromancy Flame, the demon's health can be cut down rapidly, particularly when using Fire Orb and Fireball in conjunction with a Bellowing Dragoncrest Ring. The challenge remains in avoiding and mitigating its attacks and casting when time allows.
Lifehunt Scythe
Requirements:
1.15 intelligence for use of fall control
2. The lifehunt scythe ( halberd+10 and soul of Priscilla)
3. Bloodbite ring ( purchased from Oswald the pardoner for 20000 souls )
Cast fall control before falling into the pit to ensure you have time to dodge his first strike. If he swings his weapon to his right it causes an explosion that can be dodged by moving behind him. If he starts lifting up his weapon to plunge into the ground, dodge at least two roll lengths away and then roll back towards him. These are the only two attacks to watch out for during the fight and while he recovers from his attacks 2-hand your scythe and get at least 2 hits in. Every two hits he bleeds for massive damage and using the bloodbite ring to stop you from killing yourself really helps as the scythe causes self inflicted bleed build-up
"Get Him Stuck" Method
There isn't exactly a safe spot. But pillars will give you some breathing room. There are a couple places he might get stuck and not attack at all. If this happens don't move and just rain arrows and spells on him. If you fall coming from the crow get him stuck in the pillars on the left hand side and stand by the little fog gate. Its not actually pillars that get him stuck but the arches on the ceiling. Good luck this boss can be like taking on a god at low levels so just try your best to evade him until you get him stuck in the arches.
- Rest at bonfire downstairs from the room with breaking floor.
- Run upstairs to the room.
- After falling make evasion to the forward in columns (boss will not react on you), heal, go to the left corner.
- Take bow, aim (so columns are in row) and when boss appears from left - shoot JUST BEFORE he turns back.
- Turn 90 degrees CCW run another corner, boss will probably attack you.
- Run to the fog gate along the walls, turn around, boss can make swing attacks but doesn't touch you (except attack from top).
- Now run along the walls to the left cave. You should see him stucked and not moving. Use arrows.
Dung Pie
It is possible to throw Dung Pies at him without getting his attention, so as you fall into the pit, run to one side, and throw some dung pies at him until he gets inflicted with toxic. Repeat as necessary.
Quickroll method
For this method, you need to be under 25% of max load. At the end of the day it doesn't really matter what you wear, if you get hit by him you WILL take massive damage. Removing your equipment or wearing lighter armor will provide the aglity needed for this method
Enter the arena furthest away from him and move back a little way then HEAL, wait until he has advanced to the middle of the room and then run towards him, when he goes to use his weapon roll towards him then get behind them. Make sure you pay attention to his orientation, and make sure you stay behind them. Use his tail as a marker for how far to stay back when he does his massive AOE, wait until the pink/red effect has gone before running in to hit him or you will take damage. The key is "don't be greedy" because you will just end up being punished for it. Doing this becomes easy with practice, it also allows you to learn his patterns, then just watch out for his butt-slam when he leaps into the air.
WATCH HIS LEGS, he will crouch before he jumps, when he does crouch RUN and then roll away from him, he can't follow you all over the room he can only stay up there for a short time, you just need to not be close to him when he lands. When he does his jump, try and move towards the middle of the room, this will influence where he lands and thus keep him away from the walls (If during the fight you get him up against the wall you are going to have an uphill battle on your hands because you really need to try and keep him in the middle of the room.). As soon as he lands you need to get back behind him (you can run "through" his weapon, you don't have to take the long way around it). Rinse and repeat. You can also trigger his massive AOE if you need time to heal by getting in a swipe as you run back behind him, use the time that you would normally be using to get a hit in to heal.
Information
Strategies
Drops
Lore
Notes
Trivia
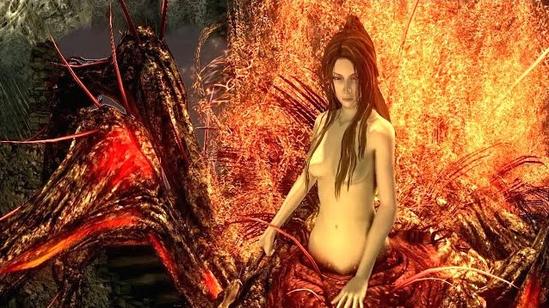
Chaos Witch Quelaag
 Chaos Witch Quelaag (混沌の魔女クラーグ) is a Boss encountered in Quelaag's Domain via Blighttown.
Description
Quelaag once lived with her mother, the Witch of Izalith, and her siblings in the ancient city of Izalith. After the Flame of Chaos incident, all but her sister Quelana were transformed into demons. She and one of her sisters escaped the worst of it, having their lower torsos bound to giant spiders. Fleeing their deranged, demonic kin, they climbed to the base of Blighttown, and Quelaag fashioned themselves a home.
Location
Quelaag's Domain
More accurately, at the end of Blighttown. Quelaag's Domain's entrance is behind the three boulder-throwing Infested Barbarians at the Blighttown swamp.
| Playthrough | HP | Souls |
|---|---|---|
| New Game | 3,139 | 20,000 |
| NG+ | 6,027 | 60,000 |
| NG+6 | 7,534 | 75,000 |
Drops
- Soul of Quelaag
- Twin Humanities
Resistances
Physical resistances
| Regular | Strike | Slash | Thrust |
|---|---|---|---|
| 255 | 255 | 255 | 255 |
Elemental resistances
| Magic | Fire | Lightning |
|---|---|---|
| 229 | ∞ | 205 |
Auxiliary resistances
| Poison | Toxic | Bleed |
|---|---|---|
| ∞ | ∞ | 110 |
Sourced from the Future Press Official Dark Souls Strategy Guide
Summoning
Maneater Mildred
You must have defeated her Dark Spirit form earlier in the level, within the swamp, to be able to summon her as a white phantom. Her Soul Sign is in front of the fog gate.
Notes
- For phantoms helping a host, equipping the Orange Charred Ring does not affect Quelaag's lava damage.
Attack Patterns
- Spider
- Lava stream - Slow buildup, long-lasting. Quelaag's spider-mouth spews a solid stream of lava left to right. Telegraphed by the witch pushing the spiders head down for a while.
- Lava glob - Quick attack. The spider-mouth lowers and spews out a small blob of lava right under it. Telegraphed by the witch dipping the spiders head quickly.
- Lava spit - Quick attack. Small blob of lava shot a distance away from the spider's mouth, followed by Quelaag leaping to the side. While up close, this attack will look similar to the longer lava-spewing attack, but differs in that the glob is not followed by a solid stream of lava, but rather thinner, seethrough lava that doesn't settle on the floor.
- Side stomp - Long buildup. The spider raises its legs on one side of the body and then stomps them all down on one side of Quelaag's body for high damage. Even if not hit by the stomp itself, small shockwaves erupt from the impact points, doing fire damage and making it hard to punish the attack if it misses. Telegraphed by the spider leaning back on its hind legs for a while.
- Lava spray - Quick attack. Spider will light up and send fireballs in all directions.
- Lava sideswipe - Attacks may be followed up by a quick, solid stream of lava in a quarter-circle to the side of Quelaag's body. Seems to be in response to the player being on Quelaag's side.
- Lava pounce - Used when the player is at medium-long range. Without a doubt, Quelaag's most dangerous attack. Spider lowers its body and then jumps quickly forward toward the player, spewing a quarter-circle of lava that lands in front of where it lands. If the spider lands on you, it does high damage.
- Roar - The Spider will occasionally roar. It will do the attack much like the stomp except without the legs lifting into the air. This move is very damaging and sometimes will be chained together with the spider's lava spew or a strike from Quelaag's sword.
- Quelaag
- Flame Aura - Slow buildup. The fire on the spider's abdomen brightens as she slumps forward over the spider's head, charging up a high damage AoE attack. Usually follows a Lava stream attack if the player is behind her.
- Firesword swipe - Quick buildup. Raises her sword, striking horizontally in a circular pattern. Can easily be avoided by circle-strafing or walking backward, thus saving energy for a shield block.
- Firesword stab - Medium buildup. Quelaag raises her sword, stabbing straight ahead with huge fire damage, can be avoided by circle-strafing or rolling backward.
- Sword combo (3 moves) - Performs two Firesword swipes followed by a Firesword stab. Similarly to other enemies Quelaag will stop the combo if the player is too far away.
Strategy
Dodging and Blocking
- Human: Quelaag's weapon deals a mixture of fire and physical damage but is easy to block. A shield with high fire resistance is recommended, the Black Knight Shield or Dragon Crest Shield are good choices, especially when paired with Flash Sweat. To dodge, roll back from her swipes and to the side from her stab, or you can run out of range. You can also get under her attacks by running up against her, however always run away when you see her start her flame aura, she often uses this if you try to attack her after she finishes a weapon attack.
- Spider: You should not aim to block her spider half's attacks. Just keep her in sight while she chases you (don't lock on) and run to her side whenever she uses a lava attack. Beware of her pounce attack! Stay close where you can and if she uses this, immediately run back, if she hits you with the lava it will nearly always kill you.
Note she may use her pounce attack upon engaging you after you enter the fog gate. Again you should run back and then around the lava to get in close enough that she does not use it.
Your best window of attack is when she uses her spewing lava attack. It has a long channel and does not track you.
Environment
All of Quelaag's lava attacks leave a varying (depending on the attack) amount of lava globs on the floor. These do a lot of damage if stepped into as well as slowing your movement speed. The globs disappear after a while, fading out as they do so, but keep a close eye on your surroundings and try to lead her to "clean" areas. She seems to attack more frequently on lower life so beware of increasing amounts of lava on the ground.
The Rusted Iron Ring is useful if you have a spare ring slot as you will be able to run through the lava without being slowed (although you'll still take damage).
Try not to get too close to the walls; it's not too big a deal, but with such a large arena there is no reason to limit your movement, especially with lava globs involved. You can also, in a few places, become pinned against the wall.
It is possible to get Quelaag stuck on the environment. As soon as the fight begins, run to the door up the stairs in the back of the room, the right corner is just far enough to cause the boss to become stuck trying to run towards the player, although she may still use lava attacks.
Melee
Your safest strategy is to bait out her lava spew attack, then run around her and attack her back leg. This requires her to turn for all but her flame aura (watch for this) to hit you, allowing you to get out of range again. Do not confuse her lava spew with just spitting a gob of lava as that attack is much shorter.
- If you're close enough and want to play a bit riskier, the lava glob attack (a glob of lava forms directly underneath the spider-mouth), and the long-distance lava spit attack (while close, look for a glob being shot out of the spider's mouth followed by thinner/see-through lava) provide short windows for an attack or two. Do not try any long combos here; with the short-distance lava spew, Quelaag may immediately follow up with another attack; with the long-distance lava spit, Quelaag will jump away to the side before you have time to do anything more.
- For an additional window, get in close to Quelaag as she starts swinging her weapon, all of her swings seem to have a blind spot on her left (between the spider's head and foreleg) allowing you to attack once each time she misses (slow weapons not recommended). Once the combo is over, she will usually hop back and retreat. Note you can stun her this way and the spider will start attacking you so retreat if this happens.
- A large weapon with an overhead attack such as a Halberd will hit her human body and stagger her. You can keep her staggered until you run out of stamina. Timed right you can keep her staggered the whole fight making it an easy battle.
Ranged
For headshots, Quelaag's human half is considered a "head." With a strong ranged attack, you can stagger her but keep your distance and watch for her pounce.
Status Effects and Items
Shooting Quelaag's human half with a Great Soul Arrow (Soul Arrow or a strong arrow from a bow may work too with high INT or DEX respectively) will stun her instantly and as long as you are reasonably close the spider will nearly always start its lava spew attack providing you with a long window to attack. Quelaag will then wake up and can be stunned again (note if attacking in melee Quelaag will usually use a flame aura attack as she wakes).
Stealth and Diversion
Summoning Maneater Mildred and letting her draw aggro away from you makes for an easier fight. You must still be careful in melee as Quelaag will often switch targets but ranged builds can easily run away until she switches back to Mildred.
This strategy doesn't always work very well, as Mildred has very low resistances and can get stun locked by lava pools.
Other
(Requires online phantom/s)It is possible to stunlock Quelaag with the Gargoyle's Halberd or Great Scythe. You need to two-hand the weapon and time your R-1 so that she is locked in place and cannot cast spells. You will want to go up in front of her and attack her human torso. Attacking Quelaag's human body also deals extra damage. While she is stunlocked, have your phantoms attack her nonstop until she dies. A very simple method as long as you have enough stamina regen.
Information
Strategies
Drops
Lore
Notes
Trivia
Great Grey Wolf Sif
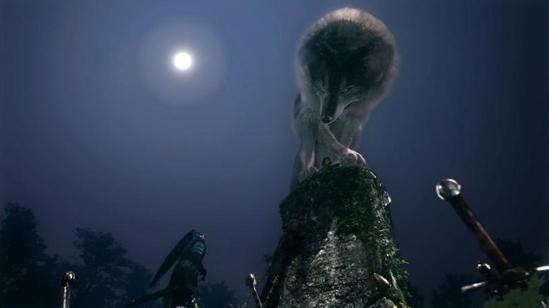 Great Grey Wolf Sif (灰色の大狼シフ) is a Boss encountered in Darkroot Basin.
Description
Great Grey Wolf Sif is the wolf companion of Sir Artorias, the Abysswalker. After Artorias passed away, Sif became the guardian of Artorias' grave in the Darkroot Garden. Sif wields Artorias' Greatsword and uses some of his moves in combat.
A younger Sif appears in the additional content. Sif accompanied Artorias on his quest to save Oolacile from the spread of the Abyss. But Artorias and Sif are eventually overrun by Humanity Phantoms, so the former leaves his shield to erect a barrier around Sif.
Location
Darkroot Garden
After the second stone bridge, Sif serves as the area's boss. Opening the stone gate does not trigger the boss fight, as you need to approach to the Greatsword at the tombstone to trigger the fight.
| Playthrough | HP | Souls |
|---|---|---|
| NG | 3,432 | 40,000 |
| NG+ | 5,800 | 120,000 |
| NG+6 | 7,250 | 150,000 |
Chasm of the Abyss
To find Sif, you must follow an illusion of Alvina, until the illusion is standing next to a wall. Attack the illusory wall, and you find Sif inside a protective barrier, surrounded by Humanity Phantoms. Defeat them, and Sif disappears to leave behind the Cleansing Greatshield. After saving Sif, their soul sign can be found in Manus' boss arena on the lighter grey stone floor within the circle of pillars, about five steps left from your starting position after the cutscene.
Drops
- Soul of Sif
- Covenant of Artorias
- Humanity
- Homeward Bone
Resistances
Physical resistances
| Regular | Strike | Slash | Thrust |
|---|---|---|---|
| 260 | 260 | 260 | 260 |
Elemental resistances
| Magic | Fire | Lightning |
|---|---|---|
| 195 | 182 | 195 |
Auxiliary resistances
| Poison | Toxic | Bleed |
|---|---|---|
| 320 | 320 | 200 |
Notes
- The name Sif itself is a female name of Norse origin. However, all translations into European languages with grammatical gender use male gendered language for Sif, though many of them can be interpreted as the most neutral phrasing of the name. This includes French, Italian, German, Spanish, Polish, Portuguese and Russian.
- When down to the last segments of their health, both old and young Sif start limping. Sif moves and attacks slowly, and does less damage.
- When Sif starts limping, they will fail to swing the sword and instead fall.
- If you have not met Sif yet (i.e. triggering the boss fight) in the base game but have received the Cleansing Greatshield from Sif (when playing the Additional Content), the introductory cutscene changes, with Sif now recognizing you as their savior and reluctantly choosing to fight. In each playthrough, you have to save Sif in the Additional Content before facing them in the base game for this to happen.
- Attacking and killing Sif does not betray the Forest Hunter covenant.
- If you have an Eye of Death active you cannot interact with the doorway to Sif.
Attack Patterns
- Two circular slashes: Sif will hold the sword straight in their mouth. Dodge/roll backwards to be safe. Can be blocked if you have a very good shield (both attacks combined will cause a guard break with heavy damage on most players). If you time it right you can dodge/roll through the attacks towards Sif and attack them.
- Jump slash backwards: Usually very powerful but can be blocked. Creates distance between Sif and the player, and thus is usually followed up by a Charge slash.
- Charge slash: Sif uses this when at medium-long range. Either dodge or block it if you have a good shield. Can be followed by a Sword Slam.
- Combo (3 moves): Slash from left to right, back, then a Sword Slam. Sif will stop the combo if the player is too far away.
- Sword Slam (Used after Charge slash or as part of the Combo): Rears up and slams sword straight down in front of himself. Powerful attack with long reach, but easily dodged by moving to the side.
- Hopping about, Sif's paws can hit you as they jump, but this does minimal damage. Still, if you're down to a sliver of life, it's something to consider.
Strategy
Dodging and Blocking
- All Sif's attacks are very easy to block, simply lock on (take care as Sif will often jump out of lock range and you'll have to retarget) and hold up your shield. You can then walk/run underneath them or otherwise position yourself accordingly. Note Sif's double horizontal slash attack will drain a lot of stamina so if you are still early in the game or do not have a good shield and a fair amount of endurance (about 70 stability, 30 endurance) then you should roll at least the second attack if you cannot get out of its range. You should try to avoid the final vertical attack of Sif's 3-hit combo either way.
- To dodge Sif's attacks it is easiest to roll through them and underneath; Sif is unable to hit you here. Sif will jump away after various lengths of time and re-engage so you will likely have to do this multiple times during a fight. Note the backflip attack usually does not provide you with an opening to get under Sif. You can watch a video of a shieldless strategy here.
- As you can engage Sif much later in the game, you can equip a very heavy armour such as the Stone Set, use Iron Flesh and just tank up Sif's attacks. With a good weapon and a bit of Vitality you can easily take Sif down before they kill you. Havel's Ring is recommended but not necessary.
When Sif jumps away it is a good chance to heal up, but be ready to block or dodge the next attack as soon as you finish.
Melee
As soon as you are able, get underneath the body and hack away at Sif's legs. If/when Sif backs up, make sure you stay under them, eventually Sif will jump away and re-engage you. Repeat as necessary. You can watch a video here
- For a longer but safer alternative, you can get a hit or two in at the end of some of Sif's combos. Learn Sif's moveset and get a hit on him/her in the appropriate windows. A good window is during the final vertical attack of Sif's three-hit combo as if you are right up against Sif it will not hit you.
Ranged
- Recommended spells are Combustion, Great Chaos Fireball, Soul Spear or Dark Bead. Homing spells such as Homing Soulmass tend to miss due to Sif's high mobility.
- Do everything you can to keep yourself out of the range of the sword, but still within target lock range.
- Keep a lock on the wolf and attack whenever they jump back, or after they start to swing. Be sure you are ready to move again before Sif's next attack. The double circular swing gives you your widest window for tossing long-range damage at Sif.
Other
- Bow Cheese - Just walk into the Boss area and get killed by Sif. Run back to the fog and and before you enter, turn left. There you will see a destroyed wall that slopes upwards, jump on it and start shooting at Sif. Your vision may be obscured by some leaves, but you can shoot arrows through them. You can also poison Sif using Poison Arrows. You can watch a video here.
Information
Strategies
Drops
Lore
Notes
Trivia
Iron Golem
 Iron Golem (アイアンゴーレム) is a Boss encountered in Sen's Fortress.
Description
This iron giant, created by using a bone from an Everlasting Dragon, is the guardian of Sen's Fortress, and acts as the gatekeeper of Anor Londo.
Location
Sen's Fortress
At the top of the fortress, before the spiral staircase leading to the firebomb-throwing Giant.
| Playthrough | HP | Souls |
|---|---|---|
| New Game | 2,880 | 40,000 |
| NG+ | 5,270 | 120,000 |
| NG+6 | 6,588 | 150,000 |
Drops
- Core of an Iron Golem
- Humanity
Resistances
Physical resistances
| Regular | Strike | Slash | Thrust |
|---|---|---|---|
| 408 | 306 | 510 | 408 |
Elemental resistances
| Magic | Fire | Lightning |
|---|---|---|
| 326 | 305 | 245 |
Auxiliary resistances
| Poison | Toxic | Bleed |
|---|---|---|
| ∞ | ∞ | ∞ |
Sourced from the Future Press Official Dark Souls Strategy Guide
Summoning
Black Iron Tarkus
In the room across the bridge to the right of the boss' fog gate.
Notes
- After killing it, Domhnall of Zena will start selling the Golem Set.
Bug Notes
- It is possible to be picked up and thrown off the arena and survive, resulting in the player being stuck down off the main area.
Attack Patterns
- Energy Blast - Swings his axe horizontally, releasing a wave of energy that knocks the player back. Uses only while at range, deals magic damage.
- Horizontal Slash - Swings his axe horizontally at the target, sometimes followed with a backwards slash if the target moves behind him.
- Vertical Slash - Swings his axe vertically in front of him.
- Grab - Stretches his arm out and grabs in front of his legs. If a target is caught, he picks them up and throws them to the ground. Both being caught and hitting the ground cause damage.
- Stomp - Stomps 2-3 times in a row.
- Punch - Punches the ground in front of him.
- If the player is too close, the Golem will jump away from the player.
Strategies
Kill the firebomb-throwing Giant up the stairs opposite the Fog Gate first or he will make the fight a lot more difficult.
Do not use target lock for this fight. Angle the camera so that you can see where you are on the platform and can tell which attack the golem is using, and aim it towards his legs. They are broad enough that it is difficult to miss attacks. Locking on will aim the camera far higher and often cause you to miss or walk off the edge. Players still unfamiliar with the game may wish to use lock-on only when using a vertical attacking weapon such as the Iaito Sword.
Dodging and Blocking
Blocking is highly ill-advised as the platform you get to fight the golem on is tiny and his attacks confer huge knockback even while blocking. More often than not you will find yourself knocked off the edge to your death.
Dodging is a far more viable strategy, and the golem is nice and slow to facilitate that. Moving around towards his axe side will cause him to use his axe attacks, which are easy to dodge. Moving towards his unarmed side will generally trigger a grab attack which is very dangerous if it catches you but provides a long window for attack if it misses. Provided he is not doing a horizontal attack, you can run through his legs to get behind him and avoid damage while he turns around. At all times you should be able to run behind him to avoid everything. You can watch a video here.
His attacks are slow enough that it is perfectly viable to run up to him, get a few hits in and run away before he has a chance to hit you.
Try not to fight him with the edge too close to your back, if he grabs you he is guaranteed to throw you off. If thrown off the edge, you may find that your souls and humanity can not be recovered.
Melee
As you will not be blocking, two-hand your weapon for extra damage (except perhaps to block his initial projectile attack).
You can either try a hit-and-run method of waiting for an attack to miss then running up, getting a few hits in (a running attack by using a light attack while sprinting is a good way of launching straight into an attack) and run away again as he starts his next attack. If he starts walking towards you, you will need to get a bit closer to bait out an attack then back up again.
Note that if you deal enough damage to his legs in a short period of time (heavy weapons such as Greatswords or the Black Knight Sword are ideal) he will stagger, swaying from side to side. Dealing enough damage to his legs during this stagger will cause him to fall down, giving you a long time to just stand there and attack.
Note that the Lightning Spear is effective but difficult to hit. Its strike area is very narrow so proper positioning can be tricky to achieve quickly. It is best used when he has been staggered or has fallen over.
Ranged
The golem is slow and as such you can bait out an attack, run back and fire your projectiles. Beware of the small arena you have to fight him on and his energy blast attack. Summoning assistance is advised.
For a ranged solo kill you can kite him across the narrow walkway until your back is to the wall, then run between his legs and kite him in the other direction.
Stealth and Diversion
Summoning Black Iron Tarkus makes this fight a lot easier, he will deal a lot of damage and can take a huge amount of punishment. Melee players can stand behind the golem (watch for his stomp attack) while ranged builds have it easy at a distance.
Items and Status Effects
Gold Pine Resin adds lightning to your weapon for greatly increased damage. It should also make it a lot easier to stagger him.
Stagger Mechanism
The Iron Golem has its own mechanism for staggering. This mechanism uses damage dealt against his legs instead of poise like regular enemies.
The mechanism has two phases, in the first phase attacks have to deal enough damage towards his legs to bring him in a stagger pose. This damage can be dealed over time.
The second phase starts as soon as Golem changes in the stagger pose. Further damage in a short amount of time, before he regains his balance, will knock him over.
| Playthrough | HP of legs - Phase 1 | HP of legs - Phase 2 |
|---|---|---|
| NG | 400 | 200 |
| NG+ | 732 | 366 |
| NG+6 | 915 | 458 |
The HPs of the first phase are about 13.89% of his max HP. The HPs of the second phase are only about 50% of the first phase.
Other
Staggering and subsequently knocking over the golem while he has his back to an edge or while he is on one of the narrow paths either sides of the platform will cause him to fall off for an instant kill. You can watch Tarkus do it here.
A simple method of knocking him off yourself is using Great Combustion with Power Within active, run up to him at the start of the fight, do not let him onto the platform, and cast away.
Black Iron Tarkus, left to his own devices, is capable of killing the golem solo on the first playthrough.
The grab attack is subject to a bug which causes it to deal no damage when multiple players are grabbed.
Information
Strategies
Drops
Lore
Notes
Trivia
Crossbreed Priscilla
Description
 Priscilla is a crossbreed of a White Dragon and another creature (possibly human), cast into the Painted World of Ariamis due to her immense power. The power she possesses, known as Lifehunt, is said to have the ability to seek out life and destroy it at will. Sensing the imminent threat not only to themselves but to all of Lordran, the Gods imprisoned her permanently in the parallel plain known as the Painted World of Ariamis, ultimately disconnecting her powers from the world.
The player can discover her doll in the Undead Asylum on their second visit, which allows them to enter the portal to the Painted World - the massive painting in Anor Londo. She stands in the tower at the edge of the ruins in the Painted World and watches over all who share the world with her. She is said to have acquired an unexplained power called Life-Hunt, an ability only she can wield, and she is said to be so powerful that the gods feared her, presumably the reason for her exile.
Priscilla is not hostile, and she does not have to be defeated to leave the Painted World of Ariamis, but once aggroed, she will remain so and killing her is necessary to leave.
Location
Painted World of Ariamis
At the end of the area, behind the Heavy Knight.
| Playthrough | HP | Souls |
|---|---|---|
| First | 2,300 | 30,000 |
| NG+ | 3,611 | 60,000 |
| NG+6 | 4,513 | 75,000 |
Drops
- Soul of Priscilla
- Priscilla's Dagger - added to your inventory automatically after you cut her tail
Physical resistances
| Regular | Strike | Slash | Thrust |
|---|---|---|---|
| 324 | 324 | 324 | 324 |
Elemental resistances
| Magic | Fire | Lightning |
|---|---|---|
| 291 | 195 | 195 |
Auxiliary resistances
| Poison | Toxic | Bleed |
|---|---|---|
| 370 | 370 | 125 |
Sourced from the Future Press Official Dark Souls Strategy Guide
Notes
- If you choose to attack her during your first visit to the area, you will be unable to leave until she has been killed. Make sure you're up to the task before attacking, or you will forever be stuck in the painting.
- Attacking and killing Priscilla is counted as a sin, but it can be absolved.
- If you keep her alive, you will have an area that will always allow you to be invaded in.
- If you want to obtain all rare weapons, you'll have to kill her, for her unique soul as well as for the dagger dropped when cutting her tail off. Only once is necessary.
- It is possible to attack her and obtain her dagger without killing her. Warping into the Painted World once you've obtained the Lordvessel allows you to use Homeward or a Homeward Bone to exit the world provided you do not rest at the bonfire. Use the bone after cutting her tail.
- Requesting absolution from Oswald will de-aggro her for subsequent visits as well.
- Very rarely, when you kill her with only one hit, the game will enter a softlock, where Crossbreed Priscilla will endlessly repeat her last lines of dialog "Ahh… But, why… What seeketh thee?", preventing the cutscene that plays when you leave the Painted World from playing, making your game unbeatable if your last bonfire was the Painted World bonfire, as you can never leave the painted world again. PC players can use tools such as Cheat Engine to teleport themselves out, however.
Attacks
- Invisibility: Casts a blizzard attack in the beginning that turns her completely invisible. This can be solved by hitting her, while invisible, with a fireball pyromancy.
- Scythe swing: Swings her scythe and sometimes a follow-up swing or two, it has a decent range and causes massive bleed buildup.
- Blizzard: Blows a blizzard type attack, medium-range, and is easily dodged by running to the side.
Strategies
Priscilla is initially not aggressive which allows you to get several hits in, make it count. If going for her tail, you should aim to hit that. You can utilize Power Within or Red Tearstone Ring to maximize this initial damage. A strong enough weapon two-handed may even kill her outright.
Once aggressive, she will go invisible, but her footprints are visible in the snow, use these to determine her location to attack. She will break out of invisibility once staggered, which is not too difficult to achieve.
High bleed resistance is recommended as her scythe will deal tremendous damage if you take too many hits.
Dodging and Blocking
While she is invisible, it is impossible to determine what attack, if any, she is performing, making it very difficult to dodge. Most Normal Shields and Large Shields should be sufficient for blocking; however, your objective here should be to go all-in and stagger her.
Once she is visible, she can be blocked or dodged as normal.
Melee
A Spear, preferably lightning (such as that found in Sen's Fortress) is perfect for this fight. The lightning makes it very easy to stagger her to break her stealth, and you can keep your shield up to block any attacks. You may wish to stand in the middle and wait for her footprints to appear or you can run to the edge to keep all avenues of approach on your screen.
If you prefer a more direct approach, two-hand your weapon and the moment you see her footprints, roll up and hit her. You should stagger her after a few hits and will have an easier fight from that point. Some decent armor is recommended for this.
A third option is to block and face her footsteps (or stand with your back to the fog gate), wait for her to bounce off your shield and then retaliate. Depending on the range of your weapon, you may need to step forward a bit.
A weapon such as the Caestus that deals light and fast attacks may not stagger her but allow you to kill her without her breaking invisibility.
Ranged
If you have any variation of Firestorm or Wrath of the Gods, you can cast this once she turns invisible. She will be staggered and will turn visible for you to fight as per normal. Other spells such as Force may also work, but you will need to wait for her footsteps first.
If not, you are best off using a melee weapon to stagger her, see the previous section. Once she is visible, it is a simple matter of backstepping from her attacks and hitting her with your strongest projectiles.
It is worth noting if you can hit her with a bow, the arrow will remain visible and telegraph precisely where she is. Apart from aiming above her footprints, you can also hold a shield up with the fog gate to your back and when she attacks, run to the other side of the arena and fire an arrow back at the fog gate. A few arrows can even stagger her, depending on the strength of the bow.
Magic
Crossbreed Priscilla can be quite easily cheesed by Sorcerers by running across from her towards the plank that leads you back to Anor Londo (opposite the fog gate you enter the arena from) and waiting on the small bridge-like platform for her footprints to appear in the snow.
As soon as you see her footprints appear in front of you, cast your strongest spell, run a little further back, and repeat. She has a chance to get caught behind the ledge, but don't count on it. You should be able to hit her with 3-4 spells before she closes the gap between you, at which point you should run past into the main arena and either wait for her to follow you back and repeat the process, or simply keep hitting her with spells as her footprints appear.
Note that it is possible for her to body-block you in the narrow pathway leading to the ledge, so be sure to utilise her attacks to your advantage as they give you an opportunity to move or roll past her.
Dung Pies
You can apply Toxic to her with dung pies without making her hostile. You can then watch her die in peace.
Tail Cut
To cut off a tail, it's necessary to deal a certain amount of damage against it. The HP of the tail increases with higher NG cycles and is based on the HP of the respective enemy.
| Playthrough | Tail HP |
|---|---|
| New Game | 395 |
| NG+ | 620 |
| NG+6 | 775 |
In case of Priscilla, the tail has about 17.17% of her HP.
You can watch a video here.
The targetable area of her tail is rather small, so it can be difficult to target. You have two main windows to cut it;
- The first is while she is passive; this allows you to prepare as much as you like and get a perfect hit in with your strongest attack. Using damage boosts such as Power Within and perhaps Red Tearstone Ring will improve your chances of cutting it in a single hit.
- The second is while she is using her ice breath, block or dodge her scythe attacks until she uses it then run around behind her. Her tail should remain still for the duration of this attack.
- Additionally, if using any version of Firestorm, this has a chance of cutting her tail while she is invisible, particularly if you did a lot of damage to it before she went invisible.
One hit using Pyromancy
With +5 Ascended Pyromancy Flame and Great Combustion, equip Crown of Dusk, Bellowing Dragoncrest Ring and Power Within (can replace any of those with Red Tearstone Ring on low hp). You can sever her tail in a single cast and follow up with any variation of Firestorm to finish her. Warning: this strategy may break your game!!!
Contingency for a missed first try
Crossbreed Priscilla ceases to be invisible after taking high amounts of poise damage. A non-upgraded Ultra Greatswords, Greataxes, and Great Hammers all do 76 Poise damage with a two-handed R1. In a sample size of 1, two subsequent hits from a non-upgraded Greatsword of the class Ultra Greatswords caused Crossbreed Priscilla to drop invisibility while dealing a total of 144 damage, a fairly small portion of her total health. This data suggests that doing between 77 and 152 poise damage will cause Priscilla to drop her invisibility. Refer to the Poise page for reference to high poise damage options if you have insufficient strength to two hands an ultra greatsword, greataxe, or greathammer. Punching is one option. If you did not get the tail cut on your first try, this seems to be a reliable way to gain visibility of her tail if you missed the first opportunity to cut the tail before she becomes aggro.
Dialogue
First Interaction
Who art thou?
One of us, thou art not.
If thou hast misstepped into this world,
plunge down from the plank, and hurry home.
If thou seekest I,
thine desires shall be requited not.
Second Interaction
Thou must returneth whence thou came.
This land is peaceful, its inhabitants kind, but thou dost not belong.
I beg of thee, plunge down from the plank, and hurry home.
When Attacked or Killed
When attacked:
I expected as much from thee.
Why dost thee hurry toward thine death?
When killed:
But, why? What seeketh thee?
When player is killed:
Why could thou not let us be?
Didst thou not see why Ariamis created this world?
Voiced by: Clare Corbett
Lore
Notes
Trivia
Dragonslayer Ornstein and Executioner Smough
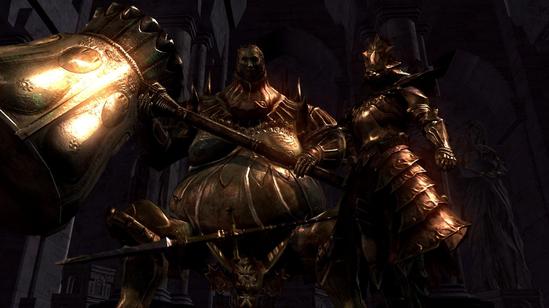 Dragonslayer Ornstein and Executioner Smough (竜狩りオーンスタインと処刑者スモウ) is a duo boss encounter taking place in Anor Londo.
Description
Ornstein is the captain of the Four Knights of Gwyn, and presumably, the leader of Gwyn's knights. To slay the dragons, he wields lightning power and imbues his Dragonslayer Spear with it. Despite his large size he is extremely agile, using his spear and projectiles to reach great distances with his offensive onslaught.
Smough is the royal executioner of Anor Londo. He longs to be ranked with the Four Knights, but his cruelty, including using his victim's bone as his food's seasoning, forever denied him the position. He is far slower than Ornstein, but extremely strong, and his attacks are difficult to avoid at close range.
This boss fight has two stages, with the second stage conditional on whom you defeat first.
If you defeated Smough first, Ornstein will pray and absorbs Smough's power, becoming twice his size while retaining his lightning power and speed. If you defeated Ornstein first, Smough will simply kill the dragonslayer himself with his hammer and imbues it with Ornstein's lightning power.
Location
Anor Londo
In the room next to the hall where the Royal Sentinels are.
| Playthrough | Ornstein HP | Smough HP | Super Ornstein HP | Super Smough HP | Souls |
|---|---|---|---|---|---|
| New Game | 1,642 | 2,645 | 2,981 | 4,094 | 50,000 |
| NG+ | 2,873 | 4,630 | 5,218 | 7,166 | 150,000 |
| NG+6 | 3,592 | 5,788 | 6,523 | 8,957 | 187,500 |
Drops
- Kill Ornstein last:
- Soul of Ornstein
- Leo Ring**
- Humanity
- Kill Smough last:
- Soul of Smough
- Humanity
**NOTE - In the EU version Ornstein will drop the Leo Ring irrespective of when killed.
+ Orstein's resistances - hide this content
Ornstein:
Physical resistances
| Regular | Strike | Slash | Thrust |
|---|---|---|---|
| 349 | 349 | 349 | 349 |
Elemental resistances
| Magic | Fire | Lightning |
|---|---|---|
| 226 | 263 | 1747 |
Auxiliary resistances
| Poison | Toxic | Bleed |
|---|---|---|
| 130 | 130 | 240 |
Giant Ornstein:
Physical resistances
| Regular | Strike | Slash | Thrust |
|---|---|---|---|
| 339 | 339 | 339 | 339 |
Elemental resistances
| Magic | Fire | Lightning |
|---|---|---|
| 221 | 256 | 1657 |
Auxiliary resistances
| Poison | Toxic | Bleed |
|---|---|---|
| 130 | 130 | 240 |
Ornstein takes extra damage from the Occult auxiliary effect in both forms
Sourced from the Future Press Official Dark Souls Strategy Guide
+ Smough's resistances - hide this content
Smough:
Physical resistances
| Regular | Strike | Slash | Thrust |
|---|---|---|---|
| 180 | 224 | 180 | 180 |
Elemental resistances
| Magic | Fire | Lightning |
|---|---|---|
| 153 | 125 | 108 |
Auxiliary resistances
| Poison | Toxic | Bleed |
|---|---|---|
| 120 | 120 | 120 |
Lightning Smough:
Physical resistances
| Regular | Strike | Slash | Thrust |
|---|---|---|---|
| 180 | 224 | 180 | 180 |
Elemental resistances
| Magic | Fire | Lightning |
|---|---|---|
| 153 | 125 | 359 |
Auxiliary resistances
| Poison | Toxic | Bleed |
|---|---|---|
| 240 | 240 | 120 |
Sourced from the Future Press Official Dark Souls Strategy Guide
Summoning
Solaire of Astora
At the room with the Royal Sentinels, on the top of the first set of stairs near where the Silver Knight archer is.
Notes
- Other than weapons in Occult upgrade paths, there are also three unique weapons that have Occult property as well, and therefore do bonus damage against Ornstein (but not Smough). These weapons are:
- Dark Hand (130 Occult aux.)
- Priscilla's Dagger (110 Occult aux.)
- Velka's Rapier (110 Occult aux.)
- After killing them, Domhnall of Zena will start selling Ornstein's Set or Smough's Set depending on whom you kill last.
Bug Notes
- Possible PC/PS3/Xbox 360 glitch - there appears to be a bug on the PS3 version. If you summon Solaire of Astora and run through the fog wall (he has materialized in the world, and is following you in the previous room but hasn't caught up with you yet) then sprint further into the room (say you were trying to recover souls from a previous attempt) Solaire will not follow you into the boss area. The bosses will both focus on you making the fight much harder. Solaire may never appear in the room, but during the fight the message "The phantom Solaire of Astora has been vanquished" appears. Even though the previous room had been cleared out of all enemies.
- Be aware of fighting Ornstein in Phase 2 near any of the Fog Walls in the room. If he performs a jumping attack, he may clip through the wall.
Attack Patterns
Ornstein
- Homing Lightning bolt - He will charge the bolt over his head and shoot a bolt that moves very slowly and homes in very well. Do a lateral roll just before impact or hide behind a pillar. The damage happens roughly when the middle of the bolt hits you and not the spear's tip.
- Lightning Bolt - He will charge the bolt at waist level and shoot a bolt that moves straight, does less damage, and is much quicker. Dodge similarly to any other projectile attack arrow or hide behind pillar.
- Lightning Lunge - This move looks nearly identical to the aforementioned quick lightning bolt move when he is preparing to use it, at waist level. When he lunges and stabs you with his lightning spear, dodge laterally.
- Charging Stab - Very similar to the lightning lunge, however this goes much farther and homes in. It is best to block this hit with your shield and counter-attack (situation allowing of course). Alternatively, you can simply dodge laterally. With this move Ornstein will move across the room very quickly, and can cause your lock-on to be lost.
- Lunge - Basically a short range version of the above attack which he uses when you are mid-close range away.
- Various spear attacks - Ornstein also has various spear attacks, which are similar to an enemy wielding a large two-handed weapon: big left to right and thrusting attacks. He is vulnerable at this time, assuming you can dodge/block his attacks, and Smough isn't harassing you.
Additional second phase attacks:
- Lightning Stab Attack - At close range, Ornstein will charge his spear with lightning and stab you with it. If hit, he will skewer you, lift you up, and shock you with lightning.
- Butt Slam - Similar to Smough's, this lightning-charged butt slam has high damage and AoE range.
Smough
- Left to right Hammer Swing - He will only use this while you are very close. This attack will miss you while you are very close to him as he will smash right past you.
- Vertical Hammer Smash - Smough generally uses this move when you are mid-range away from him. Simply take a couple steps backwards or sideways. Alternatively you can hug up to him to avoid the attack much like his double swing.
- Charge Attack - Also known as his "shovel" attack. He will run at you with his hammer prone, and swing upward sending you flying if you are caught. Sometimes for unknown reasons he will chase you much farther than usual. Backpedaling and then dodging backwards as he begins his swing can reliably avoid this at most ranges. It may also be blocked by the surrounding pillars.
- Butt Slam - Similar to the Asylum Demon's butt slam. The biggest difference is the increased range. The damage is vast but quickly diminishes with distance. A few steps back nullifies the damage completely. In the second phase of the fight, this butt slam will be charged with lightning, adding massive damage and AoE range, similar to super Ornstein's.
General Strategy
- Whichever one you do not kill in phase 1 will begin phase 2 with full health, so choose one and focus on killing only them. Their deaths cannot be processed simultaneously, so they cannot be killed together - one will always die first and empower the other.
- Ornstein is generally far easier to kill first and Smough's second phase is easier than Ornstein's, so unless you want the Leo Ring or the Knight's Honor achievement, this is the way to go.
- Summoning Solaire of Astora is highly recommended as he can take a lot of hits and can kill Ornstein on his own if you distract Smough (he is, however, not so helpful in the second phase). This does however require a reserve of Humanity for repeated attempts. If you intend to use Solaire, you should try to summon another player as well.
- * If you summon Solaire he will invariably attack Ornstein in phase 1, and as such killing Smough first (if you want to) can be difficult. A weapon that causes Bleed (e.g. Priscilla's Dagger, Gold Tracer, Great Scythe) is ideal.
Dodging and Blocking
Full Dodging Video / Killing Smough First
Full Dodging Video / Killing Smough First
First Phase
Solaire of Astora makes this a lot easier as he will fairly reliably take aggro from at least one of the pair, usually Ornstein. Smough's attacks are fairly easy to roll and most can be blocked in a pinch. Medium or light armour is recommended.
If you aren't using or can't use Solaire, keep your lock on Ornstein irrespective of whom you intend to kill first; his dash and jump attacks have the potential to hit you even when he's far away and sometimes, if he dashes into a pillar (or into Smough), his dash will shoot wildly off to the side and hit you from behind. This is very unpredictable and hard to block if you aren't locked on. By contrast, Smough's attacks are predictable, easily avoided, and most importantly, easy to see even if you're not locked on.
If you are very confident you can run the whole fight without lock on (see above video) however this requires in-depth knowledge of all their attacks so you can recognise and react to everything appropriately. Do not attack one boss without knowing where the other is and what he is doing.
If you have to retreat, keep your camera facing them. Ornstein can close distances very quickly and immediately attack, so be ready to lock on or turn around to block his attack, or roll it.
- Smough - When he levels his hammer at you, you ideally need to get behind a pillar so try to stay near one. Otherwise backpedal, and roll only when he swings at you. Block or dodge his swings, step/roll back from his butt slam, and roll to the side when he does his vertical slam (this provides a good opportunity to attack).
- Ornstein - He's fast and if blocking, he can stagger you into taking an attack from Smough (usually resulting in death) so get Smough behind a pillar before engaging, or do not engage at all if killing Smough first. Summoning Solaire will usually distract Ornstein for the majority of the phase. If you want to block, use a high stability shield such as the Greatshield of Artorias.
Second Phase
Solaire is not so much use in this phase as his attacks rarely hit and he dies very easily to either boss' butt slam attack. It may even be worth waiting for him to die so the ascended boss behaves more predictably.
- Smough - The easier option for phase 2. Essentially the same as the first phase, his butt slam now deals a lot of lightning damage in a large area so back up if he jumps, and he will now deal lightning damage as well so you will still lose some health if blocking.
- Ornstein - The more difficult option. Light armour highly recommended. Keep your health as high as possible at all times (remember to hide behind pillars to heal).
- You are safest between his legs so block or roll through his first attack and get under him. Alternatively, stay right up against him and strafe around him as he attacks. Only two attacks can hit you - if he jumps, run or roll back. Two rolls' distance should be enough. If he charges his spear with lightning, you can either try to get out of range, or jog against his left leg (the one on your right while facing him - see above video).
- A heavy shield such as the Eagle Shield (or other shield with high lightning defence and decent stability) will allow you to block his attacks except for his overhead smash (roll sideways), and his new impale and butt slam attacks. The pauses between attacks are difficult to take advantage of but after a little while he should stop attacking for a few moments and allow you to land a hit or two.
- He will occasionally step back and start throwing lightning projectiles at you. The safest and simplest way to deal with this is to hide behind a pillar until he starts meleeing again.
Environment
Pillars, even after being destroyed, are your best friend in this fight. Standing behind them will provide a brief respite in the first phase giving you just enough time to heal, and in the second phase will usually provide a long respite. If your health gets low, get behind a pillar before healing.
Try to stay several paces away from a pillar, however, because although it will halt their movement both bosses have attacks that will hit through a pillar, and on rare occasions Ornstein in his second phase can dash over broken pillars.
Notable Equipment
- Regardless of strategy, high stamina regeneration is recommended. Mask of the Child and Cloranthy Ring are fairly universal, while Grass Crest Shield is good either on your back or for blocking (as it has a high lightning resist).
- Thunder Stoneplate Ring will help to mitigate some of the extreme lightning damage Ornstein (and Smough only in his ascended form) can deal.
- Havel's Ring helps to get your encumberance down by raising your maximum load capacity.
- Ring of Sacrifice can be used to preserve humanity for repeated summoning of Solaire of Astora. The two Royal Sentinels outside the fog gate will more than pay for each one you use. Bear in mind, however, that there is a limited quantity of Rings of Sacrifice and Rare Rings of Sacrifice available per playthrough, between the ones you can buy, find and trade with Snuggly the Crow.
- Ring of Steel Protection will provide mitigation against all damage except each boss' butt slam attack.
Melee
For lack of a better weapon, the Lightning Spear is effective against Smough, and Quelaag's Furysword is effective against Ornstein, due to them being weak to lightning and fire respectively. A fast weapon is recommended (especially for Ornstein's second phase) although is not required. Leap attacks (Forward + R2) can be used with slow weapons in relative safety at the right moments.
- Killing Either First
- A tank strategy is to equip Iron Flesh, a good weapon, and your best strike-resistant equipment (but stay below 50% encumberance). Upon starting the fight, get behind a pillar and cast Iron Flesh, then lock on to your target and hammer away at him two-handed. Staying close to Ornstein, he should mostly use physical attacks which Iron Flesh and your armour will reduce significantly. If Iron Flesh runs out, get back behind a pillar and cast it again. It is easier to take down Ornstein first with this method but it should be viable either way.
- Killing Ornstein First - Note this assumes you are not summoning Solaire of Astora since if you are, all you have to do is distract Smough and Solaire will kill Ornstein unassisted.
- You can try to put Smough behind a pillar (don't stray too far or he'll walk around sooner) to give you some dueling time with Ornstein. Block or dodge his attacks and get an attack in where you can (again, highly recommend a fast weapon, preferably with range such as a Spear). Keep an eye on Smough for when he starts walking around.
- Ornstein can close distance quickly while Smough is slower. With care you can use this to briefly separate them to get an attack in.
- Wait for Smough's vertical hammer smash, dodge roll towards Ornstein and block immediately. He may attack you once or not at all, then hit him once and roll twice in the direction away from Smough and run to the other side of the room. Just repeat this as Smough won't use his charge attack if you're running towards him.
- Smough Ascended
- With Ornstein dead, Smough is relatively simple. His overhead attack gives you the biggest opening to land some damage and can simply be sidestepped. Dodge or block his attacks and attack as he recovers.
- Killing Smough First
- If you can kill him quickly (Bleed weapons work well to stagger him and deal massive damage - see Status Effects and Items), you can summon Solaire of Astora to distract Ornstein. Dodge or block Smough's attacks and land a few of your own as he recovers
- Without summoning Solaire, keep Ornstein behind Smough as much as possible and land some damage while Smough recovers from an attack. Ornstein can hit you through Smough so be very careful. Holding a shield up while using a spear is highly recommended for this tactic.
- With Ornstein in front of you and Smough to the side, move towards Smough and bait his attack. If he does any attack except his charge-and-lift attack, roll through it towards him. 90% of the time this will put him between you and Ornstein and give you plenty of time to attack.
- Ornstein Ascended
- Get under his legs - see the Dodging and Blocking section - two-hand your weapon and hack away while he swings over your head. Be ready to react quickly if he uses his jump or impale attacks, and if he hits you then run behind a pillar and heal.
- If you used Priscilla's Dagger or Gold Tracer against Smough in the first phase, you can use either against Ornstein as well as they are fast and may sometimes inflict Bleed (although not as easily as Smough).
Ranged
- Any Phase
- A very simple ranged strategy is to get yourself or your target behind a pillar (preferably a broken one) and just shoot them. This is especially effective against Ornstein's second phase as he will often sit back and shoot lightning which is blocked by pillars. Can be used in conjunction with a melee strategy. Solaire can be summoned to distract a boss while you apply this strategy to the other boss in the first phase.
- Kill Ornstein First
- Equip Soul Spear and Homing Soulmass (crystal versions okay too) and your best catalyst (other than Tin Crystallization Catalyst). Cast Soulmass and wait for the moment that it is just about to fire and cast soul spear. If you time it right, the soul spear should be BEHIND soulmass, so that if Ornstein dodges the soulmass, he will still get hit by Soul Spear.
- Smough Ascended
- Pyromancy is effective against Smough, dodge or block his attacks and throw Fireballs and Fire Orbs at him while he recovers. This is advantageous to melee as you do not have to get too close to him and you can be more ready to dodge away. Attuning Fireball twice and Fire Orb once should be sufficient to kill him. *Edit*: At 50 Faith and 30 strength, an Occult Bastard Sword +5 dealt slightly more damage than a Divine Claymore +10 (432 vs 460, approx.).
Status Effects and Items
- Bleed is exceptionally effective against Smough (not so much against Ornstein) and a fast weapon such as Priscilla's Dagger or Gold Tracer (DLC) can keep him staggered as long as you have stamina.
- Dung Pies can be utilised to inflict Toxic on either boss in both stages, either for additional damage or allowing you to just worry about dodging them. Note Ornstein can easily dodge them so time your shots while he's landing or attacking. Four or five will be required to inflict the status.
Further Reading
- Souls Lore: Executioner Smough
Information
Strategies
Drops
Lore
Notes
Trivia
Dark Sun Gwyndolin
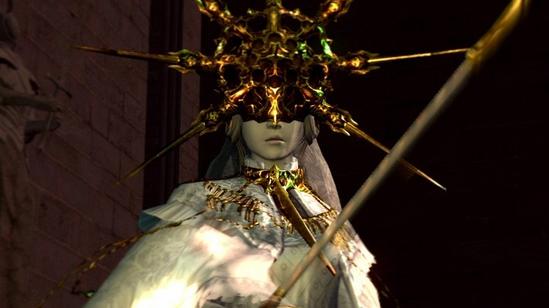 Dark Sun Gwyndolin (陰の太陽グウィンドリン) is an optional Boss encountered in Anor Londo.
Description
Gwyndolin is Gwyn's youngest child and is the only god who remains in Anor Londo. Because Gwyndolin was born with an affinity of the moon, Gwyn raised his youngest child as a daughter. Gwyndolin executes sinners with the help of his followers, the Blades of the Darkmoon. Gwyndolin guards the honorary tomb of Gwyn, created an illusion of Gwynevere, and is the source of sunlight over all Anor Londo. If Gwynevere's illusion is destroyed, the sunlight dispels, leaving Anor Londo in twilight.
You can join the Blade of the Darkmoon covenant by kneeling in the center of the candles near the fog door. If you enter the fog door (thus trespassing the tomb), a boss battle commences.
Location
Darkmoon Tomb
Behind the illusory wall near the Darkmoon Tomb bonfire in Anor Londo, equip the Darkmoon Seance Ring to make the statue disappear. Alternately, the statue automatically disappears if the illusion of Gwynevere is destroyed.
| NG | 2,011 | 40,000 |
| NG+ | 3,520 | 120,000 |
| NG+6 | 4,400 | 150,000 |
Drops
Soul of Gwyndolin
Resistances
Physical resistances
| Regular | Strike | Slash | Thrust |
|---|---|---|---|
| 251 | 251 | 251 | 251 |
Elemental resistances
| Magic | Fire | Lightning |
|---|---|---|
| 251 | 155 | 251 |
Auxiliary resistances
| Poison | Toxic | Bleed |
|---|---|---|
| 318 | 318 | 160 |
Notes
- Other than weapons in Occult upgrade paths, three unique weapons have Occult property as well and therefore do bonus damage against Gwyndolin. These weapons are:
- Dark Hand (130 Occult aux.)
- Priscilla's Dagger (110 Occult aux.)
- Velka's Rapier (110 Occult aux.)
- By entering the fog, you make Gwyndolin hostile, therefore breaking the Blade of the Darkmoon covenant, although you can request absolution to revert hostility. When Gwyndolin is hostile:
- You are kicked out of the covenant if you are currently a member.
- You cannot kneel in front of the fog door to access the covenant.
- The Lady of the Darkling becomes hostile too and attacks you on sight.
- When Gywndolin is defeated, Domhnall of Zena starts selling Moonlight Set.
Attack patterns
Upon entering the fog, the corridor stretches far ahead of you, seemingly infinite owing to an illusion cast by Gwyndolin. In reality, the hallway is not as long. Gwyndolin constantly teleports backward during the fight, but the hallway does not stretch on forever, and Gwyndolin can be boxed in if the fight goes on long enough.
- Stretches upwards and shoots a chain of arrows at you. Zigzagging can easily avoid this, as does hiding behind the columns.
- Summons many soul arrows/magic missiles to then home in on you. These curve toward the player in mid-flight. Hiding behind the pillars will protect you from them.
- Charges up a powerful energy ball and fires it in a straight direction. This ball doesn't curve while in flight and is avoidable, but it's fast and not blockable. When you see Gwyndolin's weapon move, and blue smoke appears, start zigzagging and get ready to roll. Columns will not protect you; the attack passes straight through them. The ball does a lot of damage.
- Gywndolin teleports away once you get close.
Strategies
Gwyndolin teleports away once you get too close, so you have to attack before that happens (preferably after Gwyndolin uses the darts while levitating and needs to descend, giving you more time) or not get too close.
Dodging and Blocking
In the tomb, pillars stand on the sides of the hallway. These pillars can shield you from all of Gwyndolin's attacks except for the charged magic attack. Any kind of magic resist helps during this fight, i.e., Crest Shield. The Great Magic Barrier can allow you to take Gwyndolin's magic attacks point-blank.
Dodging is easy enough. Hide behind a pillar during the tracking magic ball attacks, and roll out for the charged magic ball. There is a slight delay that lets you run to the next pillar on the other side of the room. Once Gwyndolin rises to attack with arrows, zigzag to avoid them.
With enough running and Gwyndolin's teleports, you eventually reach the end of the extended hall, allowing you to attack without Gwyndolin running away. Note that Gwyndolin still attacks you so be prepared to dodge. You can watch a video here.
Melee
Equip your best weapon, a slow weapon is good with a jumping attack to deal a large amount in one hit, and a light weapon is useful to keep dealing damage as long as the boss is targetable. Under 25% Equip Burden is recommended.
Wait until Gwyndolin starts firing arrows, then run up and attack. You can watch a video here.
Ranged
You can use a Greatbow without any response, upon entering the fog gate move forward to at closest 6 pillars away from Gwyndolin and fire away. The Hawk Ring will help deal more damage. For other Bows, Poison Arrows may be necessary. It will take 7-8 shots to poison Gwyndolin and will require several rounds. Bring lots of arrows.
For any magic, you will need to get closer. You can either get close enough to trigger a teleport, giving you a few free attacks, or you can sit far back enough and dodge attacks. Homing Soulmass is great for getting some extra damage in as you can cast it before you run up and cannot be dodged. You can watch a video here..
If fast enough, you can use Dark Bead to stagger him, allowing you to cast up to three spells before the boss teleports.
Dialogue
When you approach the fog gate
Halt!
This is the tomb of the Great Lord Gwyn.
Tarnished, it shall not be, by the feet of men.
If thou art a true disciple of the Dark Sun, cast aside thine ire,
hear the voice of mineself, Gwyndolin, and kneel before me.
Greeting (kneeling in front of the fog door) if you are not a member of the Blade of the Darkmoon
O, Disciple of the Dark Sun.
Thou hast journeyed far; hear my voice.
If thou shalt swear by the Covenant, to become
A shadow of Father Gwyn and Sister Gwynevere,
A blade that shall hunt the foes of our Lords;
Then I shalt protect thee, safeguarding thy person with the power of the Darkmoon.
Answer "yes"/Joining the covenant
Very well. Now thou art a Blade of the Darkmoon.
Hunteth the enemies of the Lords, by the power of the Dark Sun.
Answer "no"
Very well.
We shall not need speech.
Exit here, and follow thine own design.
Greeting if you are a member of the covenant
Welcome back, Blade of the Darkmoon.
If mine power be need'st, I shall assist thee.Very well, Blade of the Darkmoon.
Please state thy wish.
After killing Gwynevere
Thou that tarnisheth the Godmother's image.
I am Gwyndolin.
And thy transgression shall not go unpunished.
Thou shalt perish in the twilight of Anor Londo.
If you enter the white fog gate as a non-Darkmoon member
What foolishness…
Why trespasseth upon the Great Lord's tomb, whilst thou art a disciple of the Dark Sun?
Mark the words of mineself, Gwyndolin!
Thou shalt not go unpunished!
If you enter the white fog gate as a Darkmoon member
What foolishness…
Why would a Blade of the Darkmoon trespasseth upon the Great Lord's tomb?
Mark the words of mineself, Gwyndolin!
Thou shalt not go unpunished!
If you enter the fog gate after killing Gwynevere
Heretic…
First thou offendeth the Godmother, and now thou see fit to trample upon the tomb of the Great Lord.
I am the Dark Sun, Gwyndolin!
Let the atonement for thy felonies commenceth!
When killed
O Heretic, swathed in Dark…
An eternal curse upon thee…
Voiced by: Harry Lister Smith
Information
Strategies
Drops
Lore
Notes
Trivia
Pinwheel
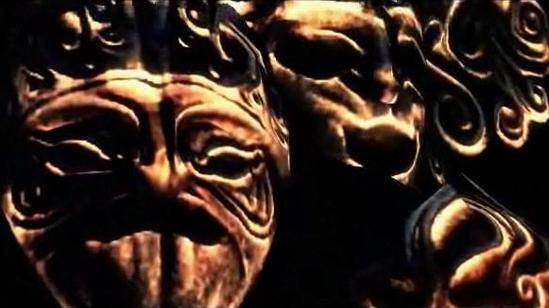 Pinwheel (三人羽織) is a mandatory Boss encountered in The Catacombs.
Description
A flying, multi-masked necromancer who stole the power of the Gravelord and reigns over the Catacombs. Spawns multiple copies of itself and attacks the player with projectile blasts.
Location
The Catacombs
At the end of the area, after the Skeleton Wheel valley.
| Playthrough | HP | Souls |
|---|---|---|
| New Game | 1,326 | 15,000 |
| NG+ | 2,691 | 60,000 |
| NG+6 | - | 75,000 |
Drops:
One of the following three masks:
- Mask of the Child 34%
- Mask of the Mother 33%
- Mask of the Father 33%
Guaranteed drops:
- Rite of Kindling
- Humanity
- Homeward bone
Resistances
Physical resistances
| Regular | Strike | Slash | Thrust |
|---|---|---|---|
| 151 | 151 | 151 | 151 |
Elemental resistances
| Magic | Fire | Lightning |
|---|---|---|
| 128 | 121 | 99 |
Auxiliary resistances
| Poison | Toxic | Bleed |
|---|---|---|
| 200 | 200 | 200 |
Sourced from the Future Press Official Dark Souls Strategy Guide
Summoning
Paladin Leeroy
On the ledge overlooking Skeleton Wheels' area, near the corpse with a Large Soul of a Nameless Soldier.
Notes
- It is possible to skip Pinwheel by using an exploit:
- Enter the coffin which brings you to the Gravelord Servant covenant.
- From there, use a Homeward Bone.
- Quit the game during the loading screen.
- If you load that character, you should end up right at the beginning of Tomb of the Giants.
- From there, you can turn around and fight Pinwheel, or simply continue down the Tomb of the Giants.
Attack Patterns
- Fireball - The lanterns hanging around him start glowing and he summons a fireball, launching it at the player after a short delay.
- Flamethrower - A powerful flamethrower spell, short ranged but deals high damage and can easily stagger.
- Clone - Creates clones of himself that can cast any of his attacks, they can deal damage but are dispelled by any attack. Typically Pinwheel casts this at the start of the fight, shortly after all his clones have been dispelled, and randomly through the fight.
Strategies
Pinwheel barely has more health than the enemies you fought through to get to him, but his damage potential is very high if his clones are allowed to attack. Either burst him down or take care of the clones before they can charge up their own fireballs.
You can watch a video on getting to Pinwheel here.
Fighting at the start of the game
If you want something from the Tomb of the Giants or perhaps a mask to start the game, fighting Pinwheel can be done the moment you land in Firelink Shrine.
Use the first bonfire and make your way down, you can use shortcuts and land near where you'd summon Leeroy to avoid the Bonewheels.
Drop into the fight and run forward and get a few attacks in, you won't do much damage as your weapon will likely be un-upgraded.
When he summons clones, focus on them first, it's much easier to dodge one Pinwheel shooting fireballs over four of them. Use fast running attacks to take out the clones without using much stamina.
Stay locked off, roll to the side of fireballs and cut away Pinwheel slowly, after a few minutes you should have defeated him.
Dodging and Blocking
A single fireball doesn't do too much damage but simultaneous hits from clones can instantly kill even high level players. Evasion is simple as they do not track but they can be blocked given your shield has good fire resistance. Try to ensure that the clones are not able to surround you as it makes both strategies much more difficult.
Note between the flamethrower's damage and holding you in place for the clones to surround you it is advisable not to stay in close quarters.
Any Build
Hit Pinwheel with your strongest attack. His health is nothing compared to other bosses and even many standard enemies throughout the game, and he is easily staggered. The biggest threat is the clones, either you want to kill him quickly before anything has a chance to attack you, or eliminate his clones first ideally with ranged attacks such as from a bow (any damage is enough to dispell them).
Melee builds should approach with a running attack and be able to kill him before he gets an attack off. Ranged builds should just lock on and fire away.
Paladin Leeroy can kill Pinwheel in just a few hits provided you take care of the clones first, this is recommended if you wish to kill Pinwheel immediately after reaching Firelink Shrine, or he can deal with the clones while you hit Pinwheel. The fight is not difficult but he does make it easier. If you want him to join the fight immediately you will need to take care of the Skeleton Wheels outside or he will be distracted by them for a short time.
Information
Strategies
Drops
Lore
Notes
Trivia
Gravelord Nito
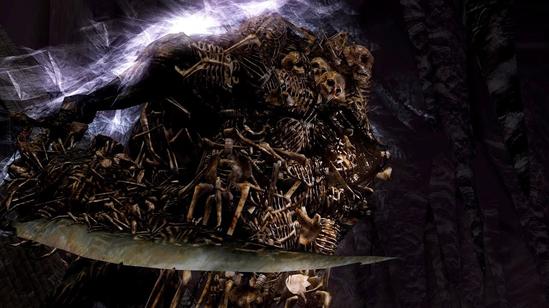 Gravelord Nito (墓王ニト) is a mandatory Boss encountered in the Tomb of the Giants.
Description
Gravelord Nito, First of the Dead, is one of the four beings who found the Souls of Lords within the flame. He administers the death of all life, and offered much of the energy of his own soul to death itself. He, along with the other Lords (Gwyn, The Witch of Izalith and Seath the Scaleless) waged war against the Dragons, unleashing a miasma of death and disease upon them. When the Age of Fire began, he ventured deep underground.
He acts as a god of death and disease, and is the master of the Gravelord Servant covenant. The player can join this covenant by interacting with Nito, but killing him (which is mandatory) will not break the covenant.
Location
Tomb of the Giants
After the Pinwheel Servant area.
| Playthrough | HP | Souls |
|---|---|---|
| First | 4,317 | 60,000 |
| NG+ | 7,076 | 120,000 |
| NG+6 | 8,845 | 150,000 |
Drops
- Lord Soul (Gravelord Nito)
- Humanity
Resistances
Physical resistances
| Regular | Strike | Slash | Thrust |
|---|---|---|---|
| 317 | 317 | 317 | 317 |
Elemental resistances
| Magic | Fire | Lightning |
|---|---|---|
| 238 | 221 | 317 |
Auxiliary resistances
| Poison | Toxic | Bleed |
|---|---|---|
| ∞ | ∞ | ∞ |
Sourced from the Future Press Official Dark Souls Strategy Guide
Notes
- He is the only covenant master that must die in order to finish the playthrough. Killing him doesn't break the Gravelord Servant covenant, but you can't upgrade its level until the next playthrough.
- Gravelord Nito cannot be harmed when you access him by using the catacombs' coffin next to the titanite demon. However, you can find the Paladin Set and your bloodstain (if you died while fighting him) and can still join the Gravelord Servant covenant provided he was not killed.
- The Gravelord Sword, Sword Dance, and Greatsword Dance are unavailable once Nito is dead, so if you wish to obtain these you'll need to do so before killing him.
Attack Patterns
- Slam - Raises his weapon above his head, then slams down in front of him.
- Horizontal Swing - Swings his sword horizontally, does not connect at extreme close range.
- Miasma - Curls up and begins to glow, then after a brief time releases a shockwave that deals high damage and will at the very least stagger you.
- Grab - Raises his hand and attempts to grab you dealing high damage, alternating shoulder buttons will reduce duration and damage.
- Gravelord Sword - Screams and raises his sword, then thrusts it into the ground to summon a single Gravelord Sword from beneath you causing knockup and heavy Toxic status.
Strategies
Upon entering the area you will be attacked by three Skeletons, a Divine weapon is recommended for killing them so they do not interfere with your fight. Additionally there are three Giant Skeletons at the other end of the arena that will not engage unless you approach them, these can be ignored as long as you don't venture too far. Any remaining at the end of the fight will permanently die as you kill Nito.
The recommended approach is to kill the three skeletons and wait for Nito to come to you, then fight him in the small area you landed in. You should still be able to run far enough to escape his miasma without pulling the three Giant Skeletons.
An alternative, if you don't have better rings to use, is to equip the Slumbering Dragoncrest Ring AND the Ring of Fog which will prevent any skeletons from attacking you as long as you don't get too close. This does reduce your effective arena in which to duel Nito however.
Occasionally with this method, Nito becomes unable to escape the ring of skeletons around him, and will constantly walk into them, unable to reach you. This allows you to position yourself close enough that the skeletons won't notice you while still able to shoot arrows or spells at him, and the only attack he is able to use is Gravelord Sword. Provided enough healing items are present, and enough arrows or spells, it is incredibly simple to take him down.
For NG plus, if you have havels shield and a heavy weapon, you can stand in front of him, let him attack and be able to withstand his hits. This will make him kill his own servants and allow you to hit him a few times before he attacks again and before his servants come back alive. Rinse and repeat. This is recommended for tank characters though. Be sure to have quite a few high healing items(20 estus fully upgraded, divine blessing, humanity, Elizabeth's mushroom, etc.)
Dodging and Blocking
- With high poise (such as using Havel's Set or Iron Flesh) most of his attacks will have no effect with the exception of his grab and miasma attacks, which should be avoided. His Gravelord Sword attack will still knock you up but he will not use it once you are up against him. You can watch a video here.
- For medium builds, a shield with high magic resist is recommended to block his miasma. Poise will assist with blocking his sword attacks, and his grab needs to be avoided. Staying right up against him should prevent you from being staggered if you are hit.
- Light builds should have little trouble rolling or even side stepping all his attacks except the Gravelord Sword and miasma.
The Gravelord Sword is easy to roll through if you can see Nito's hand, otherwise you'll need to time it according to the sound (which is hard) or simply sprint (which is inconsistent) and hope that he misses.
If timed correctly, Nito's shockwave can be cancelled while drinking an Estus Flask. Try this as a last resort if he has you pinned against a wall, otherwise it can easily be run from. The visual extends further than the actual area of effect so don't be worried if you're caught at the edge.
Melee
Being in melee range will cause Nito to primarily use his sword attacks, with an occasional grab and miasma. Avoid getting tied into long attack animations to give you time to react and try to stay behind him. Note that being right up against him will cause most of his attacks to miss or do very little damage.
To gain cumulative damage, Quelaag's Furysword deals good fire damage with fast attacks.
Ranged
Nito moves very slowly so when using ranged attacks you only need to worry about his miasma, Gravelord Sword, and running into the Giant Skeletons.
Pyromancy is also an option to consider, preferably Great Combustion, as being in medium range will put you at high risk of his sword attacks.
The Great Lightning Spear miracle is very effective and on NG should require about ten uses to kill him. Having a few casts of Lightning Spear in reserve is recommended should any further damage be required. Sorceries are all very effective but visiting The Duke's Archives first is recommended.
Bugs
It is possible to have Nito throw you into the rock formations in the center of the room, right in front of where you drop down. While hard to do, it will cause you to stay in a falling animation and performing the plunge attack. Every time he moves near you, he will take damage and can be staggered. You can still die here but his attacks seem to do less damage. You will have to save and quit after killing him to get out of the position.
Information
Strategies
Drops
Lore
Notes
Trivia
Seath the Scaleless
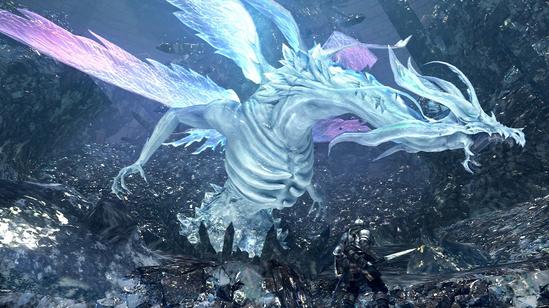 Seath the Scaleless (白竜シース) is a mandatory Boss encountered in The Crystal Caves.
Description
An albino dragon without scales, granted the title of Duke by Lord Gwyn for his assistance in defeating the Everlasting Dragons and given a fragment of a Lord Soul. Seath was driven insane by his research, which revealed that it was scales that made dragons immortal. Ironically, he is now an immortal himself, specifically Undead, by means of his research into the Primordial Crystal, which he stole from the dragons when he defected.
His servants, the Channelers, assist him in his research by kidnapping undead to be experimented upon. The Pisaca is the result of one of those experiments. He can also create life from scratch using sorcery, resulting in the Moonlight Butterflies.
He is the area boss of the The Duke's Archives and Crystal Cave.
Location
The Duke's Archives
At the topmost floor accessed by an elevator. The narrow corridor leading to him is guarded by the Crystal General. This fight cannot be won, as his HP keeps regenerating. Because death is required to progress, Ring of Sacrifice or Rare Ring of Sacrifice can be useful. The players can exit the fog gate and put it on outside if needed
Crystal Cave
This is where you properly fight him. The boss arena is at the end of the path, behind the area with the Man Eater Shells. Initially the boss arena will be open, but after you approach the Primordial Crystal, a cutscene will play and the boss fight commences. After the cutscene plays, the next time you fight him (after you died or teleported back to the bonfire), a normal boss fog will be there as he's already in the arena.
| Playthrough | HP | Souls |
|---|---|---|
| First | 5,525 | 60,000 |
| NG+ | 8,674 | 120,000 |
| NG+6 | 10,842 | 150,000 |
Drops
- Bequeathed Lord Soul Shard (Seath the Scaleless)
- Moonlight Greatsword - automatically added to your inventory after you cut his middle/back tail
- Humanity
Resistances
Physical resistances
| Regular | Strike | Slash | Thrust |
|---|---|---|---|
| 345 | 345 | 345 | 345 |
Elemental resistances
| Magic | Fire | Lightning |
|---|---|---|
| 690 | 207 | 207 |
Auxiliary resistances
| Poison | Toxic | Bleed |
|---|---|---|
| ∞ | ∞ | ∞ |
Sourced from the Future Press Official Dark Souls Strategy Guide
Notes
- Although the item description of the Six Eyed Helm of the Channelers notes that Seath is blind, avoiding making noise using the Slumbering Dragoncrest Ring or casting Hush has no effect during the boss fight. Seath simply attacks where you last attacked from.
- The dragon Seath and the Moonlight Sword are based on From Software's earlier King's Field series. In addition, the Moonlight Sword's special ability (exploding energy wave) may be based from Armored Core series' Moonlight laser sword's signature energy wave.
Bug Notes
- During the first time you fight Seath, there's a rare bug where the boss fight doesn't start, and Seath just sits there doing nothing. He still regenerates health, however, but will not start a battle when you attack him. In order to fix this bug, just quit and reload. The bug can be found here: http://www.youtube.com/watch?v=_vcXwdJmUEc
- The "Seath doesn't attack" bug can be reproduced reliably, though it has no real use because he is still invincible. Encounter him once, normally. Play through the Archives until you reach the back bonfire. Rest there, return to Seath's room, start the "fight," then leave the room through the fog door you came in from. Run back to the rear bonfire, rest, and return to his room a third time. The third visit resulted in no healthbar appearing and Seath not attacking at all.
Attack Patterns
- Pauses and unleashes a breath attack right around his torso. This breath attack carries the curse status effect and is unblockable because it comes from beneath the player.
- Pauses and unleashes a breath attack from (player) left to right (heavy damage on the left, there is space between Seath and the emerging crystals).
- Minor (side) tails lash.
- Primary tail lash that does more damage than his minor tails. This is the tail behind Seath, not visible from its front.
- Lashes and swipes with all three tails for a short duration, causing heavy damage in an area behind him.
- Bends down and swipes with his left arm in front of him.
- "Nova"-style area-of-effect crystal wave attack centered on himself. This can be dodged easily by backing off some paces. Deals heavy physical and curse damage if the player is not fast enough to get out of range.
Strategies
In The Duke's Archives
- When you encounter Seath for the first time in The Duke's Archives, he regenerates all damage dealt to him. Do not waste arrows or consumables on this fight.
- Equip Ring of Sacrifice with high curse resistance or equip a Rare Ring of Sacrifice if you want to keep your humanity and souls.
- If you entered the boss room without making proper preparation (as you're intended to die here), there are several places in there for you to be able to safely customize your equipment or quit your game (you'll spawn outside the fog gate after you load your game):
- You are able to turn right around and go through the fog gate, thus exiting the room if you feel this isn't a good time to fight him
- Immediately in front of the fog, after you enter the boss room; provided you do not move, Seath does not initiate his attacks
- In the far upper left corner, at the bookshelves
- A slight gap just in front of Seath (you need to get really close). if you stand here, most of Seath's breath attacks will not hit you
- If you don't have a Rare Ring of Sacrifice it's fairly easy to be killed by the attacks themselves as long as you don't stand on the crystals. It is advised to bring a Purging Stone just in case.
In Crystal Cave
- The first time you encounter Seath in the Crystal Cave, there is no fog wall and the Man Eater Shells sometimes make their way into the fight if not killed, although Seath can kill these Man Eater Shells with crystal breath quite quickly. Stay near him and be wary of any enemies you didn't kill.
- The Primordial Crystal (the glowing crystal shard on the far side of the room) must be destroyed to keep Seath from regenerating his health. You can destroy it yourself, or let Seath destroy it himself with his crystal breath. On subsequent attempts to kill Seath, you need to run behind Seath at the beginning of the encounter to destroy the crystal.
- It is strongly recommended that you equip curse-resistant equipments, as Seath's main attacks inflict curse.
- If you don't mind going in heavy, Havel's Set provides high resistance to both Magic and curse. If you have the Strength to wield it, Havel's Greatshield can help you block Seath's crystal breath. However, the crystal breath is fairly easy to avoid in light armour, and lack of mobility can result in death.
- If you want to cut his tail for Moonlight Greatsword, when you start the fight, run to the crystal, but don't destroy it right away. Wait for Seath to approach and bait his breath attack. He will destroy the crystal himself. Once the crystal is destroyed by Seath, he pauses momentarily, which gives you time to run around him and attack the very tip of his middle/back tail. Seath's tail is about 15% of his total HP, so use a powerful weapon with a long attack.
- Seath always attacks if and when he stops moving or turning. If you stand at mid range, he will attack accordingly and breath in the mid range, use this to run in (or out if you were close to him) and deal damage. Works especially well if you aren't worried about cutting his tail.
- His attacks don't quite reach his smaller leg/tails on the side, and will constantly adjust to face you. Follow them, attacking as you go, and none of his attacks will hit you. (As long as you dont get stuck against a wall)
Melee
Using this method you will take little damage and if you are caught it will likely be the curse that kills you anyway, thus armour is almost completely useless. For this fight equip whatever light armour you have with curse resistance and two-hand your weapon. If you picked up the Maiden Set after Seath's first encounter it is perfect, even without upgrades. Even better is the Crimson Set from Blighttown if you have it handy. You can also equip the Grass Crest Shield for some extra stamina regeneration while it is on your back.
If you get cursed don't worry about curing it, you should be taking little damage anyway, you can run past all the enemies straight to the boss fog, and the two options of curing it are expensive or difficult. Wait until you kill Seath and then cure it.
If this is the first time you are entering the area, simply back up near the crystal and wait for him to approach and start his breath attack. It will break the crystal and halt his regeneration. If you're entering through the fog door, approach him until he starts his breath attack and then run around him on your right to the crystal and either break it or bait out another breath attack to break it.
Now when he starts using a breath attack, run up to him and get a few attacks on his chest. Run back when you see or hear the crystals (that his attack left on the ground) start to shatter. He will either use a melee attack and miss or will start charging a light to his chest. If you see the light, RUN as far away as you can, then once those crystals shatter you can get close enough to bait out another breath attack and repeat.
Faith Tank
Using this method you will tank everything he can throw at you. Recommended gear includes: replenishment or bountiful sunlight, high magic resist armor(Havels is good, shield included. The curse resist is a huge bonus), the Spell Stoneplate Ring along with the Ring of the Sun Princess. Sun Princess ring is less important if you can use Bountiful Sunlight.
Before you begin the fight cast replenish/sunlight. This along with the high magic resist should keep you alive and well through all of his magic attacks. Once you have replenish up, melee him to your hearts content. Blocking when he does his Nova attack, if he does, is highly recommended. Most of his melee attacks should whiff if you are close enough to him, but it's a safe idea to block if you're not confident in your luck. Have fun!
Bow
Seath's attacks are short-ranged enough that you can stay out of range and retain lock-on with a bow. Bring a bow and approximately 100-200 arrows. Keep Seath in the middle of the area, lock on and circle around him, firing arrows as you go. Be sure to stay out of range, and if he comes too close, dash past him to the other side of the area, where you will be out of range again. Seath doesn't speed up or become more dangerous as he gets closer to dying. With a Raw Black Bow of Pharis +5, you can deal approximately 42-45 damage per hit with a Hawk Ring equipped, and killed Seath with a little over 100 arrows. This method works for any character build, not just archers.
Alternatively, it is easier to run to either side of the arena and get a few headshots as he makes his way back to the other side. Run back and forth from the fog wall and the area where the glowing crystal was. With 40 dexterity and a Black Bow of Pharis +14 it takes less than 50 Large Arrows (headshots). This strategy prevents his attack animations.
Tail Cut
To cut off a tail it's necessary to deal a certain amount of damage against it. The HP of the tail increases with higher NG cycles and is based on the HP of the respective enemy.
| Playthrough | Tail HP |
|---|---|
| New Game | 825 |
| NG+ | 1,295 |
| NG+6 | 1,619 |
In case of Seath, the tail has about 14.93% of his HP.
Equipment load under 25% is highly recommended to cut his tail.
Lure Seath as close as possible to the crystal. It is ideal to kite Seath close to one of the walls, so that when he attacks with his breath, you have plenty of room to move around his other side. Once Seath is close enough to you he will pause and begin his breath attack; immediately run behind Seath. Run to his left side (your right), as he breathes his crystal breath from his right to his left. Seath will destroy the crystal with his own breath attack and be stunned temporarily. Without locking on to him, target the tip of his back (middle) tail and attack it while two-handing your highest damage weapon or using fast strong spells.
Use weapons that have vertical slash when two-handed: katanas, straightswords, greatswords, ultra greatswords, etc. Slash the tip once or twice, then run away. Provoke him to attack with his crystal breath, run to his tail, slash once or twice again, then repeat.
You can also use fast spells to cut his tail. Unlike using weapons, it is recommended to retreat from the boss battle (Homeward, Homeward Bone, or quit game) if you fail to cut it on the first try after breaking the crystal.
- Great Combustion:
on NG, with Pyromancy Flame +10, you can cut his tail in about three Great Combustion casts. on NG+, an Ascended Pyromancy Flame +5 is recommended. Wear Crown of Dusk and Bellowing Dragoncrest Ring for stronger pyromancies.
- Wrath of the Gods:
Maximize Wrath of the Gods' damage by using Darkmoon Talisman with 50 Faith and wearing Crown of Dusk and Ring of the Sun's Firstborn.
Make sure you don't attempt to cut it at the base or middle of the tail, but rather the tip, as this is the only place where it can be cut off, plus he will likely kill you with tail slams, tail swipes, and his Nova crystal attack if you are close/mid range behind him.
Information
Strategies
Drops
Lore
Notes
Trivia
The Four Kings
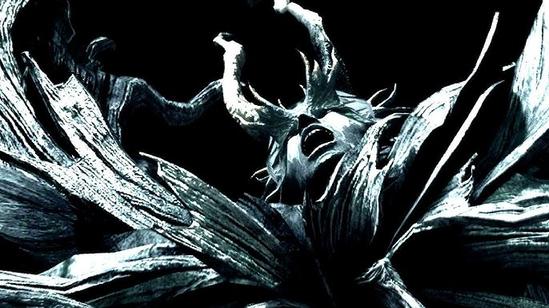 The Four Kings (四人の公王) is a mandatory Boss encountered in New Londo Ruins.
Description
Lord Gwyn recognized the foresight of these four great leaders of New Londo, and granted them their ranks and fragments of his Lord Soul. Sadly, they fell into the Dark after a primordial serpent offered them the Art of Lifedrain.
Location
The Abyss
At the center of the (previously) submerged New Londo Ruins. To get to this boss you must first drain the water in the New Londo Ruins and have the Covenant of Artorias ring equipped before dropping from the stairs past the Fog Gate.
| Playthrough | HP | Souls |
|---|---|---|
| New Game | 2,353 each King (9412 total) (9,504 in the shared health bar) | 60,000 |
| NG+ | 4,015 each King (16,061 total) | 180,000 |
| NG+6 | 5,019 each King (20,077 total) | 225,000 |
Drops
- Bequeathed Lord Soul Shard (The Four Kings)
- Humanity (x4)
Resistances
Physical resistances
| Regular | Strike | Slash | Thrust |
|---|---|---|---|
| 299 | 299 | 299 | 299 |
Elemental resistances
| Magic | Fire | Lightning |
|---|---|---|
| 205 | 192 | 177 |
Auxiliary resistances
| Poison | Toxic | Bleed |
|---|---|---|
| ∞ | ∞ | ∞ |
Sourced from the Future Press Official Dark Souls Strategy Guide
Summoning
Witch Beatrice
You must have summoned her for the Moonlight Butterfly fight if you want to summon her here. Her Soul Sign is on the other side of a large pillar (to your right while facing the bridge to the Fog Gate).
Notes
- Even though you are fighting "The Four Kings," more than four total can spawn if you take too long.
- Only four can spawn at a time, but additional Kings will continue to spawn regardless of how many you've already killed.
- It is possible to complete the fight with less than four Kings spawning if you have a high enough damage output.
- Since a King's HP is less than a quarter of the boss total HP, you can actually fight a total of 8 Kings in a fight.
- Be wary that if using the Lifehunt Scythe, the self bleed effect is multiplied during this boss fight, so that just two hits can take half your HP.
- It's not possible to fight this boss before you have the Covenant of Artorias, because you will die when you jump to The Abyss without it. You must also wear the ring throughout the entire fight, removing it will kill you immediately, but once the boss is defeated it is no longer necessary.
- If you die during the boss fight, getting back to The Abyss can be hard since there are no bonfires in New Londo Ruins. Once the water has been drained out, the quickest way to get to The Abyss from the Firelink Shrine bonfire is as follows:
- Head down the elevator (it is advisable to send it back up once at the bottom) and into New Londo Ruins using the suspended wooden bridges.
- Upon reaching the small area where the very first two Ghosts appear, run behind the stairs and drop down into the shallow pool to the left just behind them. Beware of the Darkwraith that will engage you shortly.
- From there, run to the right, up into the building, and take the left exit. The entrance to the abyss will be on the left as you exit the door. You can run past all of the enemies blocking your way to The Abyss, light encumbrance is recommended. Occasionally, a Darkwraith may get a backstab on you, but don't heal until you're through the foggate.
- Note: If you have the Ring of Fog, it reduces the detection range of the Darkwraiths and the Mass of Souls (if you haven't killed it yet). The Hidden Body spell can prevent some from aggressing altogether. Ghosts are unaffected by either.
- Note: The ghosts can and will attack you through the fog door, so if you plan on healing / reequipping, walk down a flight of stairs or two before doing so.
- Another fast route is to use the bonfire in the tunnel that connects Darkroot Basin and the lift to the gates of New Londo.
- Take the lift, run across the bridge dodging drakes, and hang a hard left once inside.
- Take the lift up, then run up the steps to the first doorway.
- Walk out on the ledge and drop down to the floor below. You should be right in front of the fog gate to the abyss.
- This boss has the highest health in the game in the shared health bar (excluding Frampt and Kaathe, who technically have 11120 HP each).
Attack Patterns
- Horizontal Swing - May be followed up with another swing. Long recovery time if a follow-up occurs.
- Thrust attack - Long range thrust attack with poor tracking. Easily sidestepped by moving right.
- Vertical swing - Poor tracking, easily sidestepped by moving right, but precise timing is needed if you want to roll into it from far away since the sword lingers in the air. Does not have a follow-up swing.
- Diagonal swing - Can have a follow-up swing, especially if you are in front of him. The follow-up swing has significant forward momentum, try rolling to the right to avoid it.
- Lifedrain Grab - The King rotates completely with his sword extended pointing to the ground, then homes in and grabs the player dealing moderate to high damage over time and taking one Soft Humanity. Very difficult to dodge or get out of range, run directly away as soon as you see it. In Co-op, this attack makes the King invulnerable if a player is grabbed, but hitting it will still reduce the total boss health.
- Shockwave - The King rotates completely while covering himself with his wing, then after a short delay creates an explosion for heavy damage. Like the grab attack, running directly away is the best strategy, but can be blocked.
- Slow Homing Projectile - Creates a very slow homing projectile, will often then move ahead of it to attack you. Very difficult to dodge, recommend blocking but will disperse after about 15 seconds. If you're close enough to the King when this attack occurs, it's possible to have it circle around you harmlessly until it dissipates because its angular tracking is very poor. Note that it will turn invisible for a few seconds before properly dissipating. If trying to fight the boss without taking any damage, it might be worth just quitting and reloading when you see this attack come out (putting you outside the boss fog)
- Homing Projectiles - Fires a circle of purple projectiles that are easily avoided and individually deal little damage, but add up to a lot if allowed to land. If you're close enough you can literally ignore them and sprint directly at the King, since they have quite a long minimum range before they come together. Has a very long punishable recovery if you can get close to the King in time.
Strategy
The first thing to be aware of is the additional Kings. Keep an eye on your surroundings to ensure there is not another King sneaking up behind you. All four Kings are identical so if you are fighting more than one at once, target the one with the least health.
You should aim to kill each King as quickly as you can so you are not fighting more than two Kings at once. Up to four Kings can be in the fight if you allow it.
Each King makes up about a quarter of the total boss HP and most of the time killing the fourth or taking him very low will end the battle, but sometimes a fifth King may need to be engaged.
Attack a King during its death animation (assuming there are no other Kings currently in the fight) as even with no health you can still deal damage to the overall boss health.
Dodging and Blocking
Stay as close to the King you are currently fighting as possible. Their melee attacks will do much less damage and are easier to dodge when standing right on them. Only back away when they begin to spin.
Staying close to the King you are fighting will usually keep additional Kings from engaging you, but still keep your target between you and other Kings.
- To block, Use a shield with a high magic resist such as the Crest Shield or Dark Hand (beware of their low stability), or a large shield such as Havel's Greatshield, Cleansing Greatshield or Stone Greatshield. Note you will still take a small amount of damage from each attack so be prepared to occasionally heal back up. Iron Flesh is useful to stop yourself being staggered but greatly restricts your movements, and the Spell Stoneplate Ring will greatly reduce all damage taken.
- All sword attacks can be dodged, however if you see him spinning around you need to quickly back up. He will either attempt to grab you or will use a powerful shockwave attack. For the vertical slash and the forward thrust you can simply sidestep for a slightly larger window to attack. A light armour with high magic resist is ideal. This strategy is required if you wish to utilise the Red Tearstone Ring. Note the homing magic attack cannot be dodged, but it will disappear after a while if it does not hit you. You can watch a video here.
- Having high poise and magic defense (Havel's Set and Spell Stoneplate Ring is ideal) you can just tank each King while you hit them with your best attack (two-handed if melee). This is a recommended strategy for NG+ if your build allows for it. Staying right up against the King will further reduce damage taken as his attacks are less effective at extremely close range.
Melee
Attack while the King recovers from his attacks and be back on the defensive before he launches his next attack. Note to watch for him spinning around as it can be difficult to get out of range of either possible attack that will ensue.
Melee Pyromancer Video
- A Chaos weapon such as Quelaag's Furysword and ten humanity will deal good damage. Equip the Grass Crest Shield for stamina recovery and two-hand your weapon, but watch out for the grab attack as it will lower your humanity and thus your damage.
- Sorcerers can use a melee weapon buffed with Great Magic Weapon or Crystal Magic Weapon, and Clerics can use a melee weapon buffed with Sunlight Blade or Darkmoon Blade for additional damage. Faster weapons will benefit more from the buff than slower ones. With only one cast (assuming you can't use both) you may need to bring a backup.
- The kings' attacks have specific zoning, similarly to halberds and scythes in Dark Souls 2, in that if you are close enough to one of the kings, instead of actually getting hit by the sword itself, their arm will hit you first for far less damage than taking the full sword hit.
Ranged
The Kings can close distance very quickly so staying at range is not entirely viable. Your best approach is to dodge back as the King attacks and get an attack in while he recovers. The abyss has invisible walls at its perimeter, be careful about getting pinned against them and unable to dodge the sweeping attack. Note you want to finish each King as quickly as possible so if using ammunition, use the best you have available. Most spells are effective however if using homing attacks it is best to be reasonably close before casting. (Note that Dark Bead and Pursuers are extremely effective against the kings at point-blank range.)
- An easy Pyromancer strategy if you have a +15 or ascended Pyromancy Flame (Crown of the Dark Sun or Crown of Dusk recommended, but beware of the 30% decrease in magic defense from wearing Crown of Dusk) is to block his attack while running behind him then cast Combustion or Great Combustion. Each King can be killed very quickly in this manner.
Status Effects and Items
- Power Within can be considered for most strategies as there are many opportunities to consume Estus and a quick fight is to your advantage. Note it cannot be cast while Transient Curse is active.
- Gold Pine Resin can give a decent damage boost to many weapons - especially fast ones.
Stealth and Diversion
You can let Witch Beatrice tank for you while you land ranged attacks on the distracted King. She does decent damage but do not rely on her to win the fight for you. Note you may have to kill a ghost floating near the ceiling of the room just before the Fog Gate or Beatrice will not follow you. Also note that summoning her will cause the Kings to spawn faster so do not do so lightly.
Information
Strategies
Drops
Lore
Notes
Trivia
Ceaseless Discharge
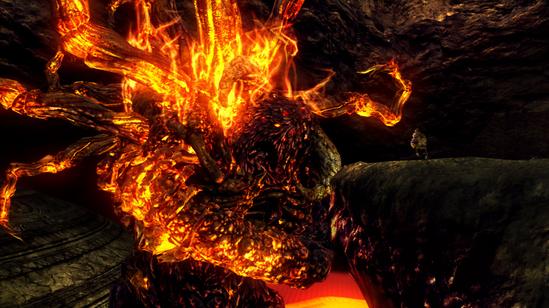 Ceaseless Discharge (爛れ続けるもの) is a mandatory Boss encountered in Demon Ruins.
Description
The only son of the Witch of Izalith, Ceaseless Discharge was born with sores inflamed by lava. His sisters made him the Orange Charred Ring to ease his pain, but he lost it not long after. Now a gigantic lava demon with fiery tentacles distorted by the flame of Chaos, he is currently guardian to one of his sister's corpses. He will attack you if you steal his sister's Gold Hemmed Black Set. He is the source of most of the lava below; only his death causes the lava to harden.
Location
Demon Ruins
Just after the first bonfire of Demon Ruins. Cross the bridge to get to his boss fog.
| Playthrough | HP | Souls |
|---|---|---|
| New Game | 4,200 | 20,000 |
| NG+ | 6,720 | 40,000 |
| NG+6 | 8,400 | 50,000 |
Drops
- Humanity
- Homeward Bone
Resistances
Physical resistances
| Regular | Strike | Slash | Thrust |
|---|---|---|---|
| 315 | 315 | 315 | 315 |
Elemental resistances
| Magic | Fire | Lightning |
|---|---|---|
| 220 | ∞ | 252 |
Auxiliary resistances
| Poison | Toxic | Bleed |
|---|---|---|
| ∞ | ∞ | ∞ |
Attack Patterns
His attack patterns change depending on his distance to the player. You can easily see it by his color. If he "cools" down to a darker red, he is in close range and won't do his fire breath anymore, but instead his tentacle hits.
- Slams down on the ground with his tentacles, leaving them there before pulling them back
- Frontal cone of fire — only done when far away — which deals a lot of damage and also does a knock-back
- Stabs ground multiple times with tentacles directly in front of it
- Swipes tentacle across the arena
- Double swipe then smashes arena with tentacles
Strategy
Dodging and Blocking
Straying too far causes him to use his fire attack which is practically impossible to dodge or block, so staying close to him is recommended. His tentacle slam attacks are quite difficult to avoid and cannot be blocked but leave him vulnerable long enough to get back up and land some damage. Wait to drink Estus until he retracts the limb to maximize damage. Be wary of his double-slam attack as you will need to dodge the second attack, which lands next to the first giving you only just enough time to recover and roll out of the way.
Rolling at just the right time can avoid his attacks but need to be timed perfectly as all his attacks have excellent tracking. Keep an eye out for his double-slam attack as you will need to roll a second time.
Good physical defense and the Ring of Steel Protection is recommended. Flash Sweat and Iron Flesh will further assist in defending against his attacks.
Ranged
One of his upper tentacle-limbs can be shot from the back corner of the crevice. If you sit in the spot that is safe from his melee attack, he will walk back and face his original resting placet. From there, only two of his limbs will be visible. Zooming in with a longbow, you can time your shot on the upper appendage, just as the lower one cycles towards its lowest point, and does not cause him to aggro. At around 27 points of damage per shot, it should take under 200 arrows.
A Sorcerer can very quickly take him down with a few Soul Spears (attuned twice) either by hitting his limb or walking right to the edge and hitting his body. This can be a tricky strategy due to that his smash attacks will likely kill you in one hit, get a hit or two in to aggro him, dodge his attack, and with 40 int you should be able to take him down before he can attack again. It is preferable to hit his body rather than his limb so that you are guaranteed the hit but do what is easiest for you.
Dark Bead is a good alternative as it does great damage and is very easy to hit all the beads, either on his tentacle or when he leans forward.
Environment
The stairs can be used to dodge his attacks, wait at the bottom until he starts walking past. Run to the top of the stairs, bait out an attack, and run back down the stairs. He should miss, allowing you to run back up and attack. You can watch a video here.
Other
Flash Sweat is an effective pyromancies at reducing the damage taken.
You can force him to fall to his death using a neat little trick that can be difficult to pull off but does not require any special equipment. You can watch a video here.
- a) Make him hostile by stealing the Gold Hemmed Black Set, and he'll take out his big limb, creating a gaping fiery hole in his chest. If you make him hostile by attacking him, he won't take out the limb.
b) If you failed the first time and you already got the Gold Hemmed Black Set, you must return to the altar where you loot the corpse to make him take out his limb again. Be aware that he will attack you on your way to the altar from the fog door. - Run back to the fog door.
- If done correctly, he will leap to your position and throw his big limb on the cliff. This attack hurts, so make sure you avoid it.
- Attack either arm until you see his entire life bar spontaneously turn yellow. He will release the ledge and fall to his death.
Notes
It is possible to roll through the lava and skip the boss. This is known as Ceaseless skip. It helps to have high vitality, the Dark Wood Grain Ring, Flash Sweat, and high Fire defense armor. If you are not using the DWGR, de-equip your weapons to lower your roll recovery time. The second bonfire in the Demon Ruins won't appear, but you can kill Demon Firesage to make it appear.
If you return with the orange charred ring, you can walk right up to his legs and attack them, but he will not take any damage or respond in any way.
Information
Strategies
Drops
Lore
Notes
Trivia
Centipede Demon
 Centipede Demon (百足のデーモン) is a mandatory Boss encountered in Demon Ruins.
Description
A demon born from the ground where the Son of Chaos dropped the ring from his sisters intended to ease his pain. A somewhat humanoid demon with a centipede-like tail.
Location
Demon Ruins
At the lowest point of Demon Ruins.
| Playthrough | HP | Souls |
|---|---|---|
| New Game | 3,432 | 40,000 |
| NG+ | 5,491 | 80,000 |
| NG+6 | 6,864 | 100,000 |
Drops
Orange Charred Ring - 100% drop after you kill him, but you can also get the ring while fighting him by cutting his tail
Resistances
Physical resistances
| Regular | Strike | Slash | Thrust |
|---|---|---|---|
| 269 | 269 | 269 | 269 |
Elemental resistances
| Magic | Fire | Lightning |
|---|---|---|
| 174 | ∞ | 215 |
Auxiliary resistances
| Poison | Toxic | Bleed |
|---|---|---|
| 230 | 230 | 195 |
Sourced from the Future Press Official Dark Souls Strategy Guide
Summoning
Solaire of Astora
Several steps before the boss entrance, next to a root.
Notes
- The tail will grow back repeatedly given enough time. Each tail killed yields 500 souls.
- You can see him from near the second bonfire in the Demon Ruins. Easily seen up close by the corpse with the Soul of Proud Knight.
- He is entirely immune to Fire damage.
- Solaire has the Orange Charred Ring equipped, so fret not if he does walk into the lava.
Attacks
- At range - Sends out a single arm which can be easily dodged by rolling sideways. Ranged players can then attack him, but melee players will have to wait it out until he moves in close.
- Low health - releases three homing fireballs when you are at range. His high jump attack also gains an explosion (identical to the Demon Firesage) directly beneath him.
- Close range - High jump attack which can knock you into lava and removes your targeting reticule. Standing too close in front of him (or under him) will cause him to grab you and chew on you, dealing a large amount of damage; however, it can be dodged. The grapple damage can be reduced/avoided if you press the shoulder buttons in rapid succession once grabbed. He also possesses the ability to stomp his feet alternately to make sure you do not do too much damage to his vulnerable legs. The stomp always starts with his right foot. Stay closer to his left foot and keep the right one in view. You should have time to roll out of the way when the right foot starts. After a while, he will return to the open lava and begin his cycle again.
Strategies
Melee Strategy
Take a right onto the area with the dead body, as it is much easier to stay out of the lava here. Now get the Centipede demon to follow you by dodging his grab and arm swing attacks. Once on the section of land with the dead body, run underneath it while it is standing on its hind legs, and start continuously swiping at its hind legs, and if you want to attack the tail for the Orange Charred Ring. This ring will help you greatly if you are having issues with the lava damage.
Usually, the centipede should not be able to hurt you at all down here, especially if you have a hard-hitting weapon.
Crystal Halberd
For this strategy you need: Crystal Halberd and magic weapon buff(And the necessary intelligence.)
Cast the spell before the battle.
First roll across to the small island, then the large one. Don't jump. Proceed to attack the demon with the halberd. You should dodge most of his attacks but occasionally block them.
http://www.youtube.com/watch?v=m0Kxqk-jxto
Tail Cut
To cut off a tail, you need to to deal a certain amount of damage against it. The HP of the tail increases with higher NG cycles and is based on the HP of the respective enemy.
| Playthrough | Tail HP | Arm HP |
|---|---|---|
| New Game | 228 | 300 |
| NG+ | 364 | 480 |
| NG+6 | 456 | 600 |
In case of the Centipede Demon, you can cut off his tail and his arm. The tail has about 6.64%, and the arm has about 8.74% of Centipede's HP.
Bug Notes
- If he grabs a phantom or a player near the wall close to the entrance, he may disappear through the wall. He then dies, awarding the player with his drops.
Information
Strategies
Drops
Lore
Notes
Trivia
Demon Firesage
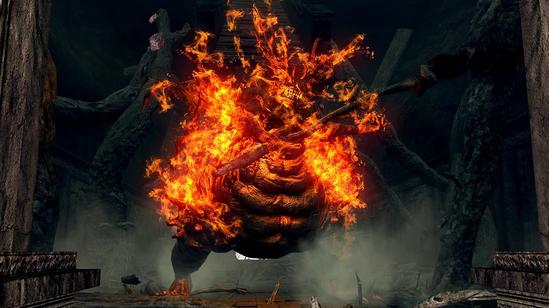 Demon Firesage (デーモンの炎司祭) also known as the Firesage Demon, is a Boss encountered in the Demon Ruins.
Description
An ancient demon and the last master of the ancient fire arts. Looks like the Asylum Demon and the Stray Demon, except that its skin is on fire.
Location
Demon Ruins
The second boss of the Demon Ruins, after the Ceaseless Discharge. His boss fog is right next to the shortcut tunnel leading to Lost Izalith, guarded by a Minor Taurus Demon and two Demonic Statues.
Stats
| Playthrough | HP | Souls |
|---|---|---|
| New Game | 5,448 | 20,000 |
| NG+ | 8,716 | 40,000 |
| NG+2 | 9,529 (1,140*8+409) | 42,801 |
| NG+3 | 10,010 (910*11) | 44,000 |
| NG+6 | 11,216 | 50,000 |
Drops
Demon's Catalyst
Resistances
Physical resistances
| Regular | Strike | Slash | Thrust |
|---|---|---|---|
| 255 | 318 | 191 | 255 |
Elemental resistances
| Magic | Fire | Lightning |
|---|---|---|
| 192 | 203 | 166 |
Auxiliary resistances
| Poison | Toxic | Bleed |
|---|---|---|
| 104 | 104 | 75 |
Sourced from the Future Press Official Dark Souls Strategy Guide
Attack Patterns
- Horizontal Swing - Swings his weapon horizontally, twice.
- Vertical Smash - Powerful vertical smash (usually after it runs towards you). Blockable, but requires a shield with Heavy deflection to do so. Up to two smashes consecutively.
- Leap Smash - Jumps towards player and smashes down vertically (when player is far away). This attack has great reach.
- Magic Blast - Raises his weapon above his head, then smashes down creating a large explosion (dealing Magic damage, in spite of the appearance) surrounding the area of impact.
- Ranged Magic Blast - Swings his weapon horizontally that does no damage, but creates a large explosion (also dealing Magic damage) in front of him.
- Butt Slam - Flies upwards to turn and face the player, then stomps back down on the ground.
Strategies
This boss is very similar to the Asylum Demon and practically identical to the Stray Demon, the strategy is much the same.
Dodging and Blocking
The safest place to be is almost directly behind him, his attacks will all miss apart from the magic blast. If you see him winding up this or the butt slam, run back a little way, wait for the danger to pass and resume attacking.
For a slightly riskier play, run right up against his front. He will nearly always use his butt slam attack allowing for large windows to attack, but beware if he uses anything else.
Note that Firesage starts at the other side of the room and is likely to use the leap slam attack as you approach. This attack is difficult to avoid as it lands slightly later than expected and tracks very well, so be sure not to roll too early.
If blocking, note that his magic blast attacks do not originate from Firesage but from the centre of the sphere, meaning you need to face that direction to successfully block it. This is mostly evident when he uses his ranged magic blast while you are in front of him as you will have to turn your back to block.
Melee
Any weapon type is capable of taking down Firesage, although all Black Knight weapons are particularly effective against demons so use one if you can.
His attacks are slow but heavy so ensure you do not get locked into a lengthy attack, leave enough time to run out of range or raise your shield.
If not blocking, two-hand your weapon for extra damage. If not using a heavy shield, blocking is entirely pointless so equip the Grass Crest Shield and have it on your back for the stamina regen.
Ranged
Due to the nature of the map, a ranged battle is very dangerous. His leap and magic blast attacks are lethal to light builds and can cover most of the arena.
Use ranged attacks behind him at close range to reduce risk, he is slow enough to allow most attacks to land with time to dodge his next attack.
Environment
The arena is narrow and while it looks long, the range of Firesage doesn't leave much room for kiting. The branches littered about can also inhibit your movement, catching you while you try to run from an attack.
Firesage is also subject to this impairment, if you can lure him you can get him stuck on a tree in one of the four corners allowing you to take him down easily with ranged attacks.
Also, often after dodging an attack he will jump back attempting to put some distance between you, if he is already backed up against a wall he will repeatedly attempt to jump back and be vulnerable to ranged attacks. Note he may break out of this loop and attack.
Status Effects and Items
Bleed has a significant effect although not as strong as on other bosses. It is still a good tool for staggering him and allowing you to get additional hits in.
Toxic and Poison are possible to inflict but as the map is so enclosed there is no way to safely kite him around. Use only as additional damage.
Information
Strategies
Drops
Lore
Notes
Trivia
Bed of Chaos
b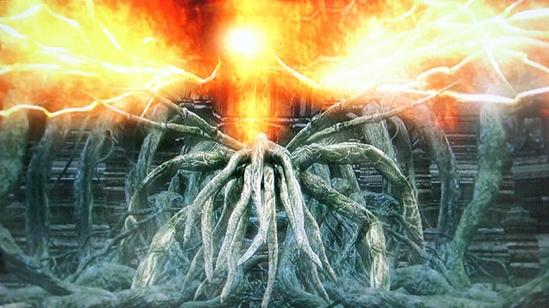 Bed of Chaos (混沌の苗床) is a Boss in Dark Souls, encountered in Lost Izalith.
Description
The Witch of Izalith attempted to duplicate the First Flame from a soul, but instead created a distorted being of chaos and fire. Its power formed a bed of life which consumed the witch and her followers: The Bed of Chaos, source of all demons.
The Bed takes the form of a huge, gnarled tree, with a humanoid body shape. It attacks with two arm-like limbs, and eventually sprouts flaming limbs that resemble wings from an apparition on its back, with which it also attacks. An insect-like creature is seen to scuttle into the tree upon the player's approach, and must be slain to defeat the boss. The insect-like creature contains the Lord Soul belonging to the Witch, suggesting it is what remains of her after millenia spend in the Bed.
Location
Lost Izalith
| Playthrough | HP | Souls |
|---|---|---|
| First | 1 | 60,000 |
| NG+ | 3 | 120,000 |
| NG+6 | 4 | 150,000 |
Drop
- Lord Soul (The Bed of Chaos)
- Humanity
Resistances
Physical resistances
| Regular | Strike | Slash | Thrust |
|---|---|---|---|
| - | - | - | - |
Elemental resistances
| Magic | Fire | Lightning |
|---|---|---|
| - | - | - |
Auxiliary resistances
| Poison | Toxic | Bleed |
|---|---|---|
| ∞ | ∞ | ∞ |
Sourced from the Future Press Official Dark Souls Strategy Guide
Notes
- Killing this boss will prevent Quelana of Izalith from appearing. If you want to upgrade your pyromancy to ascended, you have to do that before killing this boss.
- This fight works purely in phases, rather than incremental damage, and dying during it will not reset the phase.
- Dying will not restore the glowing roots, they are permanently destroyed, so you can destroy one root, die, then come back and destroy the other, die again, and then kill its heart. Quitting the game and reloading works too, you can simply kill one root, quit the game and, when you reload, you'll start outside the white light door again.
- After you defeat the boss, a Bonfire will appear which will allow you to warp out.
Attack Patterns
- Attacks with its hands in a horizontal direction.
- After destroying one object, a large appendage will appear on the boss's back, this has a longer range than the boss's hands and will attack the player with vertical swings.
- After destroying both objects, the two appendages that appeared can surround the player on both sides and create a flame pillar between them.
- After destroying both objects sporadic pillars of flame will burst from the ground. The location of these pillars is telegraphed by glowing orange circles appearing on the ground prior to activation. This attack is of particular noteworthiness as it may hit the player even inside the path to its "heart".
- The boss may occasionally rain many small fireballs from the sky
- An attack similar to the Demon Firesage's magic area of effect attack. It will activate when the player is standing in the area outside of the branches leading into the Bed of Chaos' heart.
Dodging and Blocking
The main attack is the horizontal sweep attack, usually followed up by another attack in the opposite direction. This can be blocked with a high-stability shield, it can be rolled through but you run the risk of it dragging you with it (you will not take damage or be staggered).
The scythe-like arms are best avoided, make note of where they are hitting as they can only hit certain spots. Watch for orange circles on the ground to avoid the fire pillars. Note these may appear anywhere on the map but only after both glowing roots are destroyed.
Whilst inside the glowing orbs surrounding each root you are safe from harm.
General Strategy
A three stage battle - first need to destroy each glowing root in the spheres, then drop into a hole in front of the boss to approach and destroy the core, a small insect. A glowing scythe-like appendage will grow as you kill each root, and after the second root is destroyed the boss gains extra abilities. The core of the boss will not damage you and will die to most attacks (Will take more than one hit on ng+6 and beyond, on sl1 with the bare fist).
A shield with high stability such as an upgraded Black Iron supported by the Sorcery spell Magic Shield and the Wolf Ring for extra Poise is recommended. This greatly reduces the chance of being staggered by the Boss attacks.
Environment
Once you destroy a glowing root, the floor will begin to give way, sticking to the non-tiled band is a good rule of thumb to avoid falling. You can try to make your way back or immediately quit the game and reload it to be placed back outside the fog gate. The root will still be destroyed upon re-entering. This can be repeated for the second glowing root.
Melee
Run to each glowing orb, roll or hack through the roots to get to the glowing root and hit it.
Note it is preferable to do the quit-load technique to avoid having to navigate your way across the crumbling floor as falling will mean a long run from the bonfire.
Ranged
The left glowing root can be destroyed with a bow and the Hawk Ring - as you will not have to travel the distance to get to it this is preferably done after the right root is destroyed. Run along the wall towards it, you will pass under a root and come to a point where another root is blocking your path. From the corner before that point, you can take out your bow and shoot the root. View an image here.
Approaching the Heart
Getting to the heart of the boss is the trickiest part of the "fight". You need to fall into the hole directly in front of the boss onto a narrow root-path that leads up to the core. The boss will attempt to knock you off as you are falling with its sweep attack, and as it repositions its right appendage (on your left) it can knock you off as you approach the entrance to its core.
- The standard technique is to approach head-on, run as far up as you can (not too close to the edge) and block or dodge the two sweeping attacks. You may have to wait for a second pair of attacks if you did not make it close enough the first time. If blocking you will need to turn to block each attack.
- Once you are close enough and have just blocked or dodged the second sweep, roll onto the branch below. This is easiest to judge by running off the little platform of tiles sticking out just to the right.
- Wait a moment for the second sweep to finish, you will note its right appendage will brush over the top of the path and will knock you off if you are too far up.
- Proceed into the heart of the boss.
- Another approach is to use the big root as cover first.
- From where you land at the beginning of the fight, look to your left, there is a big root coming out from the ground. Run for it and stay behind it, the boss can't hit you here.
- Wait for the scythe attack and run forward, once the boss starts swing his arms get back a little, once she is done with the arms swing attack, sprint forward (aiming for the root inside the hole) and jump. You should land right on the root that takes you to the boss's heart.
Bug
Sometimes the game freezes when trying to jump down to the branch to get to the heart. Whenever you go back to fight it, there is still a hole in ground but the game doesn't fully register it so when you approach the boss at the point where the floor is supposed to break, you can see debris falling (although the floor has already collapsed) and the game freezes.
To fix this problem, go back to Firelink Shrine then warp back to Daughter of Chaos and make your way back to the boss. This seems to reset the floor, so when you go back the hole is sealed, and then collapses successfully with no freezing and you may continue the game.
Information
Strategies
Drops
Lore
Notes
Trivia
Gwyn, Lord of Cinder
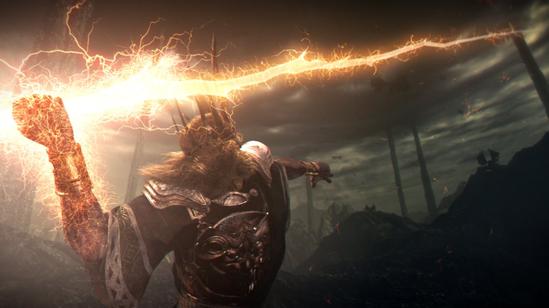 Gwyn, Lord of Cinder (薪の王グウィン) is the final Boss in Dark Souls, encountered in The Kiln of the First Flame.
Description
Gwyn is one of the gods that defeated the Everlasting Dragons long ago. His Lord Soul granted him deific power over the sun and lightning, earning him the epithet Lord of Sunlight. He had three children to an unknown mother; Gwynevere, Gwyndolin, and a male firstborn, a war god whose name has been lost by the time of Dark Souls owing to his godhood being rescinded by Gwyn.
Thousands of years before the events of the game, the First Flame began to dim. The Witch of Izalith attempted to duplicate the First Flame from a soul, but failed and her actions eventuated in the creation of a hellish wellspring of chaos and fire, known as the Bed of Chaos. After the war against the chaos demons ended, Gwyn departed from Anor Londo to rekindle the First Flame, bringing his Black Knights with him, while his Silver Knights stayed behind to guard Anor Londo. Before he departed, he bequeathed most of his power to the Gods. After linking the Fire, the First Flame consumed his Black Knights and made Gwyn himself its fuel. Thus, he became known as Lord of Cinder.
He is the final boss in the game, and is inaccessible until all Lord Souls have been gathered.
NOTE: You will have to progress to NG+ or the next NG level after you defeat Gwyn. Do everything you want to do in the current playthrough beforehand.
Location
Kiln of the First Flame
At the end of the area, behind the final Black Knight
| Playthrough | HP | Souls |
|---|---|---|
| New Game | 4,185 | 70,000 |
| NG+ | 6,444 | 140,000 |
| NG+6 | 8,056 | 175,000 |
Drops
Soul of Gwyn, Lord of Cinder
Note: In the New Game Plus, Domhnall of Zena will start selling the Set of the Great Lord armor
Resistances
Physical resistances
| Regular | Strike | Slash | Thrust |
|---|---|---|---|
| 354 | 354 | 354 | 354 |
Elemental resistances
| Magic | Fire | Lightning |
|---|---|---|
| 267 | 249 | 1770 |
Auxiliary resistances
| Poison | Toxic | Bleed |
|---|---|---|
| ∞ | ∞ | ∞1 |
Gywn also takes extra damage from the Occult auxiliary effect
Sourced from the Future Press Official Dark Souls Strategy Guide
Summoning
Solaire of Astora
You must have saved Solaire by killing the red Chaos Bug in Lost Izalith shortcut (the one that needs +2 Chaos Servant covenant to unlock) to be able to summon him here. His Soul Sign is after the third Black Knight (straightsword-wielder). Look to your left before you walk down the staircase.
Attack Patterns
- Leap Strike - Jumps towards the player when at range, performing a large overhead slash.
- Lunge - Lunges and stabs forward with his sword when the player is just out of range or attempting to consume Estus.
- Slash Combo - Attacks in quick succession (up to 4 one-handed slashes)
- Strike Combo - Wields his sword in both hands, performing a slower succession of blows.
- Grab Raises his free hand and attempts to grab the player. If successful he becomes invulnerable as he launches his target away with a fire blast dealing high fire damage. Cannot be mitigated by alternating shoulder buttons.
- Kick - Kicks the player when close dealing high stamina damage if blocking, usually followed by a grab.
Strategies
This is the final boss of the game, and can make for a very difficult fight if the necessary precautions aren't taken.
-Equip a fire resistant shield and armor set.
-Buff with or use Fire or Magic.
-Upgrade weapons fully. The black knights outside the arena commonly drop chunks of all varieties.
If running past all the black knights, note that the two closest to the Fog Gate can attack you as you pass through it so killing them is advised.
Parry
Equip the Hornet Ring and the Black Knight Shield. Walk directly up to Gwyn and wait for him to swing his sword from his right side and proceed to parry and riposte. He should get back onto his feet and do the same attack, leading to an easy chain attack. Depending on your weapon, it shouldn't take more then 15 hits to kill him. If you want to speed up this strategy further, equip the Red Tearstone Ring and buff with fire or magic. Make sure to avoid his other attacks.
This strategy is arguably the easiest and simplest to pull off, due to Gwyn wanting to use the same attack over and over. With practice, this fight can be easily done without taking any damage.
Dodging and Blocking
Dodging all his attacks is practically impossible due to the speed at which he can swing his sword, the best you should hope for is a combination of dodging and blocking.
The Black Knight Shield is often dropped by the Black Knights in the Kiln of the First Flame and is highly effective in this fight, offering both high poise and fire resistance. Havel's Ring can be used by lighter builds to equip it without sacrificing mobility. Stamina regen (either Mask of the Child or Cloranthy Ring) greatly improves your ability to sustain a shield, and briefly dropping your guard between his attacks keeps your stamina healthy.
If you are capable, a medium or heavy build is recommended. Dodging his attacks does not give you an opportunity to counter and he can easily wear your stamina down and get in a hit or two. Especially for newer players, blocking is more effective and far more reliable.
A very heavy build with high Vitality and Iron Flesh or Flash Sweat is capable of tanking his hits without being staggered or taking too much damage. You can then use a heavy two-handed weapon to keep him staggered which gives you opportunities to heal when you need to.
The Ring of Steel Protection and Flame Stoneplate Ring provide excellent defence from all Gwyn's attacks, if you can only choose one then consider how he is most likely to hit you. If you find yourself getting grabbed a lot then take the fire defence, and physical defence is better against his sword attacks. If your equipment is severely lacking in either defence then take whichever brings up the lower stat.
Flash Sweat can be used to further mitigate his fire damage but note there are few opportunities you will get to cast it during the fight unless you have summoned assistance.
Keeping Gwyn on higher ground will cause most of his attacks to miss, simplifying a melee approach.
Melee
A heavy weapon to stagger Gwyn will make this fight a lot easier, and some health and sturdy armour to survive a few hits. Failing these (for example if you are a light build Cleric) you are safest holding him off with a decent shield and being patient, getting a single attack in when safe. The best opportunity is right after he misses a kick or grab. A fairly easy strategy against Gwyn is to use a greatshield with high stability (ideally the greatshield of Artorias) and a good spear (Silver Knight spear was used for this) and to simply let him hit with his attacks, while exchanging with the spear. If using the Silver Knight spear or a Pike, you can hit him from outside the maximum range of most of his attacks.
Occult weapons get a damage bonus against Gwyn. In addition to enchanted normal weapons there are three Unique Weapons that hold this property:
- Dark Hand (130 Occult aux.)
- Priscilla's Dagger (110 Occult aux.)
- Velka's Rapier (110 Occult aux. - highly recommended for Intelligence builds, note it can be used with a shield up but watch your stamina)
For a slightly riskier but rewarding play, all his attacks except the grab attack can be parried allowing you to deal high counter damage. With good timing he can be killed very quickly in this way. The Hornet Ring will further improve your damage, and the Target Shield makes parrying easier although blocking will be far less effective. His lunge attack is simple to bait by getting a little distance and one of the easiest to parry. Note that due to the long reach of his sword, it is easy to parry an attack without being in range to riposte, so step forward first. You can watch a video here.
Great Combustion will usually cause him to attempt to dodge the attack. Lock on and you can follow him around forcing him to dodge for a simple fight (have your shield ready).
Ranged
Gwyn is fast and his leap attack closes a lot of distance very quickly, so keeping him at range is not an option. Additionally his attacks are very fast and generally do not give you enough time to safely cast a spell. Note that lightning has little effect so Clerics will predominantly have to rely on weapons.
A bow or crossbow is fast enough to get a hit in here and there, particularly the Avelyn which staggers him after two successive rounds. Stay locked on and roll back from his attacks - a shield may still be necessary as his sword has a long reach and his combos are fast. Dark Wood Grain Ring gives you a bit more time to shoot.
A Sorcerer will get almost no chances of casting any Sorceries during the fight without assistance. It is highly recommended to summon help, online or Solaire of Astora to distract Gwyn while you cast. Note he will occasionally switch focus so be prepared to block or dodge his attacks. If online play is not available or there are no summon signs, and Solaire was killed, you are better off using Velka's Rapier.
A risky solo Sorcerer play is to use Homing Crystal Soulmass as Gwyn will usually try to dodge as you cast it. The delay will allow him to land before hitting him for full damage, staggering him and allowing you to cast it again.
Environment
Pillars can be used to disrupt Gwyn's attacks, forcing him to walk around to engage you. This gives you time to cast buffs, heal, or you can even hit him through the rock with a Spear (or other long reach weapon) if he is close enough. He also cannot leap or lunge through pillars so you can take advantage of a distance between you.
With good timing, Great Chaos Fireball can be used while he is circling around a pillar to hit him just as he comes into view and deal extra damage with the lava, and Fire Tempest or similar can be used while on the other side of a pillar. Note that long cast times carry a risk as he can sprint around to hit you.
Stealth and Diversion
Solaire of Astora, if he is alive, does not do much damage but is great for taking hits while you hit Gwyn with projectiles. Not recommended for melee approaches as this often makes bosses unpredictable.
Ending
After defeating Gwyn, you get to choose an Ending. Please see the corresponding page for more details.
Footnotes 1. Has a Bleed Resist of 240, but is immune
Information
Strategies
Drops
Lore
Notes
Trivia
Sanctuary Guardian
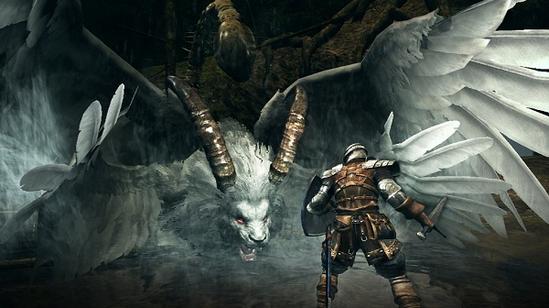 Sanctuary Guardian (霊廟の聖獣) is a Boss in Dark Souls Artorias of the Abyss DLC, encountered in Oolacile Sanctuary.
Description
A chimeric demon resembling a manticore. It guards the Oolacile Sanctuary from invaders utilizing lightning powers and its own various body parts. The first enemy encountered in the Additional Content.
Location
Sanctuary Garden
Just after the first bonfire.
| Playthrough | HP | Souls |
|---|---|---|
| New Game | 2,560 | 30,000 |
| NG+ | 4,019 | 60,000 |
| NG+6 | 7,921 | 75,000 |
Drops
- Guardian Soul
- Guardian Tail - tail cut
- Humanity
Resistances
Physical resistances
| Regular | Strike | Slash | Thrust |
|---|---|---|---|
| 300 | 300 | 300 | 300 |
Elemental resistances
| Magic | Fire | Lightning |
|---|---|---|
| 768 | 480 | 1056 |
Auxiliary resistances
| Poison | Toxic | Bleed |
|---|---|---|
| 250 | 250 | 100 |
Notes
Return to this boss arena once you've killed Knight Artorias to find two Lesser Sanctuary Guardians waiting.
Attack Pattern
- Lightning blasts - Fires lightning shots in three manners (as the arena is filled with shallow water, all lightning that hits the ground will have an area of effect):
- One single, large blast from a ground position.
- One single, large blast whilst flying either directly overhead or strafing in the air.
- Four smaller consecutive blasts from a ground position.
- Poisonous tail swipe.
- Melee flurry - Short distance melee attacks. Up to four consecutively.
- A strong double swipe with its front claws.
- Back kick - Kicks with his hind legs if the player is positioned behind him.
- A single, powerful ramming headbutt attack straight ahead.
- Flies directly towards the player.
- A jumping pounce right on you, then flips back to mid-range.
- Shockwave - Rears onto his hind legs and slams into the ground before releasing a single wave of energy traveling forward along the ground, depleting stamina if your shield is raised (if the Guardian successfully breaks your character's guard with this attack expect a followup charge and ramming headbutt from the Guardian).
Strategy
Weapons that cause bleeding seem to work well. Give yourself room to move and heal, and get the occasional hit in. Learn all of his attack patterns.
Melee
Equip - Any upgraded weapon that can land quick hits (ie. Uchigatana) and any shield with good stability, physical resistance and decent lightning resistance (ie. Silver Knight Shield). The Cloranthy Ring is useful to speed up stamina recharge. Eagle Shield is also very useful due to its high lightning damage reduction as well as 95% physical damage reduction.
Dodge his lightning blasts (sometimes 3-4 times in a row). Stay close and block most of his physical attacks. The safest moment to attack and land a few strikes without having to fear immediate retaliation is after dodging his shockwave attack. Only attack once or twice and then retreat. Two-handing your weapon might be advantageous - if your weapon is powerful enough, you can stun him with a few hits, allowing time for an extra hit and a moment to retreat.
The shockwave does not do any damage, your character is simply pushed back a little bit. Do not block the attack, either roll out of the way or take the brunt of it. The guardian will still do his followup headbutt, though you should have time to block it (this may even give you time to cut the tail if you're lucky).
Be wary of attacking him from behind since he can kick with his hind legs and put his poisonous tail to use, which will penetrate most shields (Even his sides are not safe! His tail has a very wide range).
This boss likes to jump around a LOT. Even if you are used to playing without enemy lock, as many melee players are, it is recommended to lock on to the boss. This will make tracking him much easier and avoid wasting precious hits and stamina. It's also very useful for blocking and many a times you might already take 2 hits by the time you manage to face him.
Iron Flesh Melee
Equip - Iron Flesh, Lingering Dragoncrest Ring, Ascended [Pyromancy Flame, (Cursed) Greatsword of Artorias, Effigy Shield.
Cast Iron Flesh in the first few seconds of the fight and get your shield up. When he gets close, switch to two-handed and start attacking. The Sanctuary Guardian has only 90 poise and he takes 5 seconds to regenerate. As such, two-handing any fairly heavy weapon and landing 2-3 hits will practically stun-lock him (make sure to land those hits without any delay in between, ignore any hits you take as Iron Flesh can take care of it). Expressly for this purpose Cloranthy Ring can be equipped, and the boss fight ends in practically a matter of seconds. If you do not have a good heavy weapon, keep wailing on the boss until Iron Flesh runs out. Repeat.
Pyromancy with fire-based weapon
Equip - Fire Uchigatana or Fire Claymore. Fully upgraded Pyromancy Flame and Great Combustion. Eagle Shield or Silver Knight Shield. Havel's Ring and Thunder Stoneplate Ring. Painting Guardian Set for lightning protection and light weight.
Use Great Combustion on the guardian to burn off most of its life. Finish up with melee.
Pyromancy strategy
This battle, for a Pyromancer, will be a damage-per-second ordeal: you want to pelt the Sanctuary Guardian with as much damage as you can in as little time as possible, and avoid damage as much as you can, since he has quite a few attacks that will either insta-kill you outright or leave you in a bad way . You should equip Lightning reducing gear, but heavy armor won't do much against the Guardian's physical attacks, so a lighter armor with better mobility is recommended. You should have your Pyromancy Flame as high as it can go, and you want high-damage close range Pyromancy spells, like Great Combustion and Fire Whip. Resist the temptation to use Ball-type Pyromancy spells: the Guardian is very good at avoiding them, and the long casting times give it more than enough time to jump away from them and making you waste them. You should also equip the Eagle Shield, Thunder Stoneplate Ring and Wolf Ring. The Eagle Shield and Thunder Stoneplate Ring will help you survive if you get hit by the Guardian's thunder attacks(though it's much preferable to avoid them), and the Wolf Ring will help give you high poise so the shield will also protect you better from the Guardian's physical attacks.
You want to close distance with the Guardian as soon as possible, since its deadliest attacks are from long- to mid-range. The large lightning blast will probably kill you instantly if you don't block it or avoid it, and if blocked will hit pretty hard, but the smaller blasts probably won't hurt you much if they hit thanks to all the lightning protection you have, and the damage is negligible if blocked. Unless it takes flight, the Guardian won't attack with lightning from up close. Nearing mid-range, it might try its pounce attack, which will pretty much insta-kill you, and if you survive blocking it you'll be pretty hurt. However, like the lightning blasts, it doesn't do it if you're up close, hence you wanting to close the distance.
Once you're close to the Guardian, you want to start advancing and strafing left (the Guardian's right) with your shield raised, so that if it does any of its melee attacks, they'll either miss outright or hit your shield for minimal damage. It's melee combo will usually connect with your shield, but the double swipe misses a lot when you're strafing, either landing to your side safely or going over your head. Once you have the Guardian's flank, start pelting it with your Pyromancy spells. The closer-range spells hit hard and come out fast, so you'll probably be doing very good damage against it, and you can take a hit or two from its combo if you're caught while casting and still survive and hit the spell. If you're to its flank and it does a physical attack that misses, that's your window to use your Estus Flask to heal if you've been hurt. If you see it lower its tail, raise your shield to block the tail swipe attack, which will hit for minimal damage and not poison you. If it manages to get s a little distance and go for its shockwave attack, let yourself hit by it. The shockwave merely stuns you for a second if it hits, but if you block it it'll sap all your stamina away and you won't be able to block it's ramming headbutt attack, which will probably insta-kill you. Let yourself be hit by the shockwave, let it dissipate completely(if it hits you and you immediately raise your shield, it might still hit your shield and sap your stamina), then raise your shield to block the ramming headbutt.
If you follow all these steps, you should be able to dispatch the Guardian with a little effort. While its speed and attack variety can be troublesome, good preparation and a meticulous gameplan should see you victorious.
Tail Cut
To cut off a tail it's necessary to deal a certain amount of damage against it. The HP of the tail increases with higher NG cycles and is based on the HP of the respective enemy.
| Playthrough | Tail HP |
|---|---|
| New Game | 500 |
| NG+ | 785 |
| NG+6 | 981 |
In case of the Sanctuary Guardian, the tail has about 19.53% of his HP.
- Once in a while (could be very long while) the Guardian will fly high up, then drop down towards you for a powerful melee attack. When the Guardian drops down, roll left and it will miss, that gives you a chance to rush up and attack the tail. You will most likely land one attack on the tail. A more surefire method is to bait out the Guardian's shockwave attack and stand directly in front of him with your shield raised. You will be staggered, but he will not have recovered from his attack, giving you ample time to recover instead. Roll to either side of his charging headbutt and you will find his tail vulnerable for a quick attack (Great Combustion will help shorten the fight).
- Be careful not to dodge too early; the Guardian spends a good while gaining elevation before diving. If you dodgeroll too early, he will simply dive into your dodgeroll destination.
- He may also charge in and attempt to gore you for a powerful melee attack (be careful not to mistake this for his quick headbutt). Roll out of the way and attack his tail.
- Trying to cut the tail after dodging his attack can be frustrating with melee, using strong ranged or magic attacks can cut his tail even if he doesn't lower it. Wait until he uses the shockwave attack and run to his side, do not use lock on and point your camera manually at his tail. I managed to cut his tail off this way with 1 crystal soul spear on new game.
- If you missed the tail the first time and are struggling with the two Lesser Sanctuary Guardians, you can cut their tails by shooting them with a bow from the tunnel near the Sanctuary Garden bonfire. Be wary, the lesser guardians will still be able to hit you with lightning if you move up in the tunnel to get a better shot but, if you don't move up you will have a hard time hitting the tail because you will hit the elevation instead.
Information
Strategies
Drops
Lore
Notes
Trivia
Artorias the Abysswalker
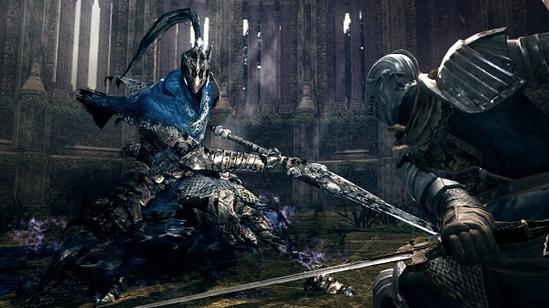 Artorias the Abysswalker (騎士アルトリウス) is a Boss in Dark Souls Artorias of the Abyss DLC.
Description
One of Gwyn's Four Knights, Sir Artorias is a holy warrior with an unbendable will of steel and unmatched skill with a greatsword. His personal symbol is a wolf, as depicted in his ring, and he later gains a wolf companion named Sif. He makes his formal appearance in the Additional Content.
Artorias was present during the fall of New Londo. The home of the Darkwraiths, the Abyss, can only be traversed by the creatures of the Dark. To be able to destroy it from the inside, Artorias made a covenant with the creatures of the Abyss, symbolized by a ring. But in doing so, his greatsword became cursed. In recognition of his actions in the New Londo crisis, he gains the moniker "The Abysswalker" and awarded one of Anor Londo's treasures, a blessed pendant that allowed him to repel the Dark of the Abyss.
When Oolacile woke Manus, Manus' influence corrupted the citizens of Oolacile against their will and made them the forces of the Abyss. Artorias, accompanied by Sif, arrived there to save Oolacile as well as Princess Dusk, who was captured from the present day. However, the two were overrun by the creatures of the Abyss. Artorias sacrificed himself to protect Sif using his greatshield to raise a barrier around the wolf pup. Defeated by the Abyss, the knight became corrupted against his will. His already-cursed sword became corrupted by the Abyss as well. But even with one arm broken, Artorias is still a formidable swordsman (some of his technique is later used by Sif in Sif's boss fight), as you will find later when you fight him before entering Oolacile Township.
His grave, marked with his greatsword, is placed at the Oolacile Sanctuary area (later known as the Darkroot Garden) and is guarded by Sif, Alvina's clan of Forest Hunters, and possibly also Lord's Blade Ciaran.
Location
Royal Wood
Inside the huge stone building near where Marvellous Chester is.
| Playthrough | HP | Souls |
|---|---|---|
| First | 3,750 | 50,000 |
| NG+ | 5,887 | 100,000 |
| NG+6 | 7,359 | 125,000 |
Drops
- Soul of Artorias
- Humanity
Note: After killing him, Domhnall of Zena will start selling the Set of Artorias armor
Resistances
Physical resistances
| Regular | Strike | Slash | Thrust |
|---|---|---|---|
| 399 | 359 | 479 | 479 |
Elemental resistances
| Magic | Fire | Lightning |
|---|---|---|
| 687 | 636 | 591 |
Auxiliary resistances
| Poison | Toxic | Bleed |
|---|---|---|
| ∞ | ∞ | ∞ |
Attack patterns
- Performs a straight lunge with his greatsword. Roll towards him, but slightly to the right, towards his unarmed hand.
- Somersaults into the air and slams his sword down vertically. He can repeat this up to three times which can stunlock you. He only uses this when in close-to-mid range from you. This is one of the few attacks in the game that completely ignores iFrames, meaning that it will damage the player even mid-roll or on the ground if the sword connects with the player. Rolling to the side is the best way to avoid it.
- Crouches, then leaps into the air and will attempt to hit you. He uses this when the player is further away. This has an area of effect around him. Dodge or run towards him as soon as he jumps.
- Two circular slashes like Sif. However, it is faster and has a shorter radius.
- A jump slash like Sif. This is very powerful and happens almost immediately. This seems to be used exclusively when you stand behind him, most likely after dodging his big jump-attack.
- Throwing black sludge in an arc in front of him.
- The black sludge he leaves behind as he moves around will slowly deplete your health. They will disappear after a very short time.
- Can roll to dodge your attacks.
- With every fifth of his health depleted, he will roll away and surround himself with a dark aura, as he prepares to cast an explosion. Standing in this aura does not cause damage, but the explosion can deal a lot of damage. His casting can be interrupted with enough damage. After the explosion, his attacks will become stronger and deplete significantly more Stamina for about a minute. This effect can be stacked multiple times if he is allowed to power up repeatedly.
Strategies
- Resistant to magic, fire, and lightning.
- Dodge or keep distance from his attacks, blocking takes up too much stamina, which is important for this fight. [Note: If you use a decent stability shield with Strong Magic Shield, you will lose no stamina from most of his attacks, while the buff is active] To get a better hold on the timing needed, the Stone Guardians that litter the area are good practice.
- His long ranged jump slash is very easily avoided— dodge and counter-attack or heal.
- When he changes from walking to running, he will commence attacking. Use the walking time to regen stamina and raise your guard appropriately.
- Both the jumping overhead slash and the ranged jump slash have a small time interval where you can dodge.
- Video: Melee (Dodging)
Melee Dodge any weapon
While this boss is really difficult to predict, he does have a few tells for his attacks and a quick roll is very important. Place yourself away from him by about twice his reach at all times (even for melee).
**Video Tutorial**
- Aerial Attacks
When he uses his Somersault slam attack you will want to roll to the right as the camera tilts upward while locked onto him. You want to do this three times and then get in 1 or 2 attacks (based on your weapon) after the third attack lands. Avoid attacking after his Steadfast Leap. Instead use that opportunity to heal or get some distance from him.
- Standing Attacks
When he uses his Overhand Smash, roll to the right. While he leaves himself open for a frames, he will usually follow up with his Spinning Slash attack. Therefore it is best to get some distance from him instead as the Spinning Slash attack is difficult to get away from when it begins.
- Charging Attacks
With his Charging Slash move you will always want to roll backwards from where he intends to land the attack. After successfully dodging this attack, you will be able to get 1 or 2 hits on him.
His Heavy Thrust attack will need to be side dodged. Depending on which way he turns during the charge, you will need to dodge the opposite way. After you dodge he has a long recovery time and you should be able to get 2 or 3 hits in.
- Other Attacks
When you are behind Artorias he may use his Abyss Sludge attack. This move does little damage but can stun you. If timed right, you can roll forward through the attack and get a hit on him then immediately retreat.
After Artorias has lost 1/3 of his health he will start to use his Wrath of the Abyss power up. If left alone, he will do much more damage after he completes the power up for a limited time, potentially one shotting you. If you can get close fast enough, you can stun him out of his power up before it's completed by hitting him repeatedly. If you don't do enough damage fast enough then he will hit you with an AOE blast attack that will knock you on your back. Your best bet is to use a heavy, high damage, weapon and stop him from gaining his attack buff.
High Poise defensive melee
Equip armour with decent poise (50+ is good), a mid shield with 100% physical and a decent weapon (sweeping swords such as the Black Knight Sword are good as he moves around quite a bit and can be hard to hit with a thrusting weapon). Most importantly, patience, patience is key! Keep your shield up when he is standing near you, only lowering it to recharge Stamina. Right after he performs any of his basic attacks, hit him once, then shield back up. If he tries any of his aerial attacks, roll just before he hits you and attack him once. If he starts performing his aura blast, use that opportunity to get back a safe distance and restore stamina and/or heal. If you're close enough, rush and hit him 2-3 times to interrupt the power-up and score damage. Be careful after his aura blast. His attacks do more damage (and chew up your Stamina) for a while, so do not let your guard down.
Spear dodge
Thrusting weapons like the Silver Knight Spear are perfect for this fight, especially for Dex builds. If you attack at the appropriate times he generally won't dodge. Keep your equip load below 50%. Warning the boss appears to have very high thrust defense.
Greatshield
The Greatshields have high stability and will block most of his attacks with a minimum loss of stamina. You will still need to dodge his high leaping attack. Block his attacks and pick your spots to strike afterwards. A spear or halberd is a good choice due to their range and quick poking movement. Before you strike be sure the attack won't deplete so much stamina that you'd be unable block the next hit if Artorias attacks again quickly.
Interrupting his charge-up
If you are a lower level and unable to find a means of staggering during Artorias' charge-up, you can place a headshot and force him out of his animation using a bow. At lower levels this can make the difference between life and death; his attacks become too powerful to block for the next 60 seconds if he succeeds. If the aura surrounds him from failing to stop the charge-up, you may simply want to wait and dodge his attacks until it goes away. Beware that he will soon enter the animation again, so be ready with your bow. If you succeed in hitting him in the head, he will stand up and continue the fight. To help time this tricky attack, watch for Artorias to roll backwards twice, as this is the only time that he will do it before attempting to charge up; use this time to arm and aim your shot. The power of the bow and arrow need not be high.
The Avelyn is very good for interrupting his charge-up, you'll be able to shoot twice before he completes it,
Sunlight Spear
It is possible to channel a Lightning/Great Lightning or Sunlight Spear after his long range jump attack. For this it is recomended to keep your distance, for him to perform this attack and wear Miracle boosting items. Wrath of the Gods is a possibility to finish him off, which can be channeled after his long range slide attack too.
Artorias 2.0
Artorias' own sword and shield are fairly effective against him, should you get your hands on two Souls of Sif to make the weapons. Since the Greatshield of Artorias has such high stability, it enables you to simply sit there and block every strike he throws at you. Picking your opening is important, as the Greatsword of Artorias has a fairly slow swing, and a criminally slow heavy attack. Good openings to strike are after his slide (if it misses), after his standing vertical strikes (if they miss), after any standing combo (provided the final blow misses), and after his leaping blade plant, provided you get behind him mid-flight, but stay close enough to smack him in time. The fight will take quite some time, but you will hopefully only take one or two hits. Furthermore, almost all of the strike openings can also be used to drink a flask.
Berzerker Dragon Greatsword
This strategy only works with NG. A Dragon Greatsword+5 does 809 damage against Artorias with the 2H energy wave attack when Power Within is activated. This means someone would only need to get in 5 clean hits to defeat him since his HP is only 3,750.
Notes
- Within the game files there are a number of unused audio files which seem to be Artorias. They can be listened to here.
- A Sunlight Spear will stagger Artorias during his charge-up animation.
Information
Strategies
Drops
Lore
Notes
Trivia
Manus, Father of the Abyss
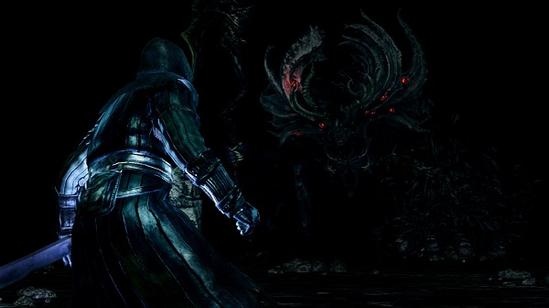 Manus, Father of the Abyss (深淵の主マヌス) is the final Boss in Dark Souls Artorias of the Abyss DLC.
Description
The main antagonist of the Additional Content, Manus is a primeval human and may or may not be the Furtive Pygmy himself, whose Humanity went wild. According to Marvellous Chester and Hawkeye Gough, Oolacile awakened him at the urging of a Primordial Serpent. Upon awakening, he flew into a rage, seeking to expand his domain while also seeking out his precious Broken Pendant. His influence corrupted the citizens of Oolacile, whose humanity was warped in turn, mutating them into ghastly creatures. His first appearance is in the Darkroot Basin, where his hand appears from a temporal portal and drags the player into the past.
Sometime before the player's arrival into the past, Artorias and his young wolf Sif faced off against Manus. However, Manus was able to overpower them. At the last moment, Artorias sacrificed himself to protect his compatriot. Manus, having defeated Artorias, corrupted him against his will.
Location
Chasm of the Abyss
At the end of the Humanity Phantom-infested area.
| Playthrough | HP | Souls |
|---|---|---|
| New Game | 6,665 | 60,000 |
| NG+ | 10,464 | 120,000 |
| NG+2 | 11,196 | 128,400 |
| NG+3 | 11,510 | 132,000 |
| NG+6 | 13,080 | 150,000 |
Drops
- Soul of Manus
- Humanity (x10)
Resistances
Physical resistances
| Regular | Strike | Slash | Thrust |
|---|---|---|---|
| 324 | 324 | 324 | 324 |
Elemental resistances
| Magic | Fire | Lightning |
|---|---|---|
| 768 | 624 | 720 |
Auxiliary resistances
| Poison | Toxic | Bleed |
|---|---|---|
| ∞ | ∞ | ∞ |
Summoning
Sif, the Great Grey Wolf
You need to find Sif behind an illusory wall in the Chasm of the Abyss and save them first to be able to summon them. Their Soul Sign is in the center of the room you fight Manus in, on the lighter grey stone floor within the circle of pillars.
Notes
- Manus has the highest HP of any boss in the game. (Not including the total health of the Four Kings)
- Though he has a tail, it cannot be cut off
Attack patterns
- Sweeps with his giant hand in a wide arc. This can happen at any range, so roll back to avoid it.
- Slams the ground with his hand. Like his sweeping attack, he can hit you at any range.
- Reaches around with his hand if you are behind him.
- Performs a jumping smash that has a long range and tosses you back if you're blocking (Not that it matters as the whole area is surrounded by walls of black flame)
- Performs a three-hit combo. If you are a melee class focus on strafing him until the final hit of his 3-hit combo. You should be able to get 1-2 hits in on his back.
- Performs a six-move combo. You can escape from parts of it in a fast moving character with a good shield (+5 Silver Knight Shield, was able to back out of the combo while taking hits maybe 3-4 times instead of all 6, especially easy to dodge the last hit). With a good great shield the whole combo can be blocked (Greatshield of Artorias or Havel's Greatshield) without trouble.
- His left, oversized hand glows, and will use any three Dark magics: he will launch black orbs at you, summon them from above, or around you. Use the Silver Pendant to deflect his attacks. It is sometimes more advantageous to simply try and block the attack where he shoots orbs straight at you as it is difficult to use the Silver Pendant in time.
Strategies
- He will start using his dark magic attacks once he is below 60% HP.
- It is highly recommended that you obtain the Silver Pendant before facing Manus, thus enabling you to defend yourself against his Dark Magic attacks.
- The Crest Shield blocks most of his Dark Magic attacks, and the Cloranthy Ring makes sure that one has enough stamina to block most of his attacks.
- If you do not intend to block his magic attacks, this could be an effective approach using the Silver Pendant (assuming you cannot tell immediately which attack he's going to use): if you are in front of him when you see him start casting magic, immediately roll once sideways (roll to his left if you are already on his left, and vice versa). If it is the cone blast, make another roll and you should be safe. If it is one of the other two magic attacks, go ahead and use the Silver Pendant (remember that you can spam the Pendant continuously). You might want to just use it once then keep rolling backward, away from Manus. That should usually be enough to escape from one magic attack. If you are not in front of him when he starts casting magic, just hack away at him until he releases the spell. If it is not the cone blast, stop attacking and use the Pendant.
- Without the use of the Silver Pendant, you can dodge his magic attacks by just rolling (his casting animation does vary depending on which attack he is about to use). If it's the cone blast, roll sideways (roll immediately when he starts casting). If it's the attack where dark orbs rain down on you from above, just keep rolling in a straight line and the orbs should miss (but make sure you have enough room in the direction you roll). If it's the attack where dark orbs form a large ring around him then fly towards the center, get close to Manus because there is a small area around him where the orbs will not hit. Alternatively, it is possible to just block the magic attacks with a shield that has good magic damage reduction, such as the Crest Shield, the Cleansing Greatshield, or the Crystal Ring Shield.
Bow cheese
From the right-side ledge in the cave just before the white boss portal that leads to Manus, if you look downward into the darkness, you can see Manus's red eyes glaring back at you. Manus can be damaged before you enter the portal, and damage taken by him remains even after you enter the portal. In short, you can take Manus down effortlessly with a ranged weapon from this ledge. Equip a bow or crossbow and aim at his red eyes. Just be sure to carry enough arrows or bolts with you. The recommended equipment for this tactic with the lowest requirements are: Light Crossbow and dozens of Sniper Bolts, plus the Hawk Ring and Red Tearstone Ring (don't forget to bring down your health below the threshold for the ring to take effect).
Melee
This guy is extremely aggressive, much like the Flamelurker in Demon's Souls. You'll need a stable shield with 100% physical, armor with some good poise, a decent weapon, and the Silver Pendant if you have not obtained it already.
Stamina is key to this fight. Lower your shield to recharge stamina. Do not raise it unless he's about to attack. However, sometimes it's better to dodge his attacks. Strafe him at all times, only pulling back to recover. Note that even if you are behind him, he can still hit you with his hand. When he roars, get away from him immediately; the first half of his six-strike combo can be blocked, but he'll likely smack you around silly on the second half. When you've knocked down a fifth to a sixth of his health, he will start using his Dark sorceries. Use the Silver Pendant to deflect them. If you don't have enough time to use the Silver Pendant (casting time is about one second and the duration of the barrier is about three), either get away from his line of fire when he's shooting Dark orbs right at you or from above, or look for an opening when you're surrounded by a ring of orbs.
Take it slow with this guy. If you have Sif summoned, it may make the fight easier, since you can use him as a distraction while you're healing or attacking.
Manus has three very strong attacks that can burn a lot of your stamina: 1) He sweeps his buffed-up left arm in a very wide arc from left to right; this attack sends you flying backward even if you block it; 2) He lowers his left arm for half a second then does an uppercut; 3) He raises his left arm, "charging" it up, then slams down on you. If you can block these attacks entirely, then this fight could simply be a test of patience: keep strafing around, blocking, then getting in a hit or two (when you are sure he is not beginning his next attack). Play safe; don't try to get in more hits than you should. Note: the slam attack deals more damage at maximum range, i.e. within his palm. You might be able to block the attack entirely when you're close to Manus, but you might not if you are caught beneath his palm. Safest approach is to either dodge it entirely, or move closer to Manus before blocking it.
A spear is a good choice for this fight, due to its long range and good attack speed. It could reach Manus even after he has hopped away from you. Most other weapons will likely miss. Additionally, when you are unsure whether he is about to attack or not, you can keep your shield up while doing a thrust (just remember to watch your stamina).
Another strategy is to simply roll through every attack. This will keep you from losing too much stamina, and will make attacking when he is open easier. The Dark Wood Grain Ring is very helpful if you want to be even more safe, and fast rolling is pretty much needed. The dark magic attacks can be rolled through quite easily; for the raining attack, roll backward, for the one where the orbs close in on you, run towards manus, as they don't reach him, and for the horizontal attack, dodge quickly to the left (you may still be hit by one or two of them). Once you have the timing down, you should be able to roll through or simply get out of range of 90% of his attacks. A longer ranged weapon definitely seems to make a difference here, as his opening for attacks can be short.
Sorcerer
This strategy requires precise timing, so you will likely have to practice this a lot. These are the recommended sorceries for this tactic:
- Crystal Soul Spear or Soul Spear
- Homing Crystal Soulmass or Homing Soulmass
Cast Homing Crystal Soulmass and wait until around a second before it blasts after Manus. When that moment comes, cast Crystal Soul Spear as a follow-up so it hits him directly after the previous spell. With different dexterity levels, the moment you have to cast the follow-up spell may vary. The reason Crystal Soul Spear should hit after Soulmass is that he still gets hit even if he dodges Homing Soulmass. Despite him having more health in NG+, more spells being available will make the fight even easier. Make sure to have light armor to dodge. Summoning Sif won't help much, but will be somewhat more effective than for a melee class for instance.
Ranged
Recommended equipment:
- Dark Wood Grain Ring as well as staying below 25% equip load.
- Black Bow of Pharis helps to do more damage while being farther away, though any bow should work.
- Silver Pendant for his dark magic.
Simply stay just out of his reach. Just keep moving backwards and keep good distance between you. Try to keep in mind where the edge of the arena is and prevent getting backed into it. Also be ready to move around any pillars/debris you might back into early on, until he destroys it all. All his melee attacks are easy to dodge, just roll/flip just before he attacks. Watch for the attack when he raises his arm in the air and holds it there. This is the hardest attack to time, just pause a few seconds longer than normal and be careful that this attack has much more reach than the others. Immediately after rolling/flipping fire one arrow or heal. Patience is key here. When he strafes to the side, fire as many arrows as you can until he starts coming after you again. When he growls and goes for his combo attack roll/flip backwards 2-3 times and start firing arrows until he finishes with his final jumping attack. Once he is under 60% life he will start using his dark magic. Equip the Silver Pendant and be careful to keep an eye on him and roll/flip backwards when he is done as the pendant's usage tends to block your view.
Information
Strategies
Drops
Lore
Notes
Trivia
Hellkite Dragon
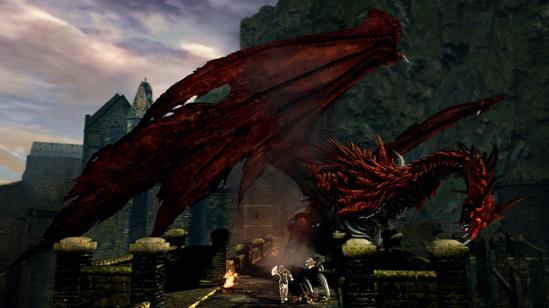 Hellkite Dragon (飛竜ヘルカイト) is a Boss in Dark Souls, encountered several times throughout Undead Burg.
Description
A huge red drake that is guarding the bridge to Altar of Sunlight in the Undead Burg. He is more powerful than most bosses in the game, and his attacks are relentless and ruthless. Though the player has to pass that bridge at least partially to advance, it is not necessary to kill this enemy to complete the game.
Though it is named the "Hellkite Dragon", its relationship to the dragons is clarified in the Drake Sword's item description:
Drakes are
seen as undeveloped imitators of the dragons,
but they are likely their distant kin.
Location
Undead Burg
Hellkite Dragon will make a brief appearance early on, where it won't engage in combat. It'll then appear at the large bridge after Taurus Demon, next to where Solaire of Astora is. Here, the dragon will fly across, engulfing it in fire, and then perch itself on top of the gate at the end of the bridge, blocking access to the Altar of Sunlight. It can be triggered to fly away and reappear here as long as the player hasn't killed it.
| Playthrough | HP | Souls |
|---|---|---|
| New Game | 2,208 | 10,000 |
| NG+ | 5,520 | 50,000 |
| NG+6 | 6,900 | 62,500 |
Drops
Drake Sword - tail cut, automatic pick up.
Notes
- The dragon heals when his HP drops below 50%, signified by him covering himself with his wings and will not attack. The healing process is slow, so you can pass safely beneath the dragon to access the altar.
- When you get to the Sunlight Altar without killing him, he'll fly away but, he will not disappear forever. Upon returning, depending on how you approach the bridge, he will repeat his encounter cycle.
- With a little bit of Vitality and armor, you can viably survive a hit from its wide-area fire breath attacks, which will knock you down, preventing further damage and letting you survive. Blocking it with a weapon or shield however will prevent you from being knocked down, which will increase the fire damage and most likely kill you.
- Unlike most of the game's enemies, the drake's fire breath can damage invading phantoms, so be wary of running onto the bridge during PvP.
- The dragon's behavior depends on whether you've unlocked the shortcut below the bridge by kicking the ladder. Until you've done so, he'll have a shorter aggression range for his fire breath attacks, and will never leave his perch unless attacked.
Strategy for Skipping the Dragon
First section of the bridge
The dragon will appear from above and behind once you start stepping onto the bridge, with a few seconds delay, covering the bridge with its fire breath. If you run onto the bridge and then back, you can safely take cover from the fire, as well as actually see the dragon swooping in. Partway across the bridge, on the right side, is a staircase that leads to an unlockable shortcut back to the previous bonfire, and one of the two paths ahead that proceed into Undead Parish. Once the drake has appeared and landed, it's safe to run over to the staircase. The hollows will likely die to the fire, otherwise you can just run past them.
If the drake hasn't spawned, you can also sprint across the bridge as fast as you can (you can remove all of your equipment to run faster here) and dive to cover behind the corners shielded from the fire. This is easier to do with a bit of Endurance. However, you risk getting hit by the flames for Counter Damage seeing as you're sprinting, so you could risk dying.
Second section of the bridge
Once you've reached the halfway point, to cross the remaining section of the bridge, run to the corners closest to the drake, where you're shielded from the flames.. If you're below the staircase, run up, leading the dragon to breathe fire, and then back down the stairs to dodge it. The moment the fire disappears, run up again, sprint, and then immediately take cover behind one of the corners facing the dragon. After standing in the corner for half a minute or so, or if you attack it with a bow or throwing knife, the dragon will jump down onto the bridge. The moment it starts doing this, sprint across the bridge; the drake won't be attacking you for a few seconds. Sprint into the doorway, and you'll have enough time to light and rest at the bonfire there before the drake will attack you again, which will prompt it to fly away.
Lower Undead Burg jump
You can skip the dragon's first appearance in the Undead Burg, which will permanently stop the dragon from spawning at the larger bridge, until you trigger its first apperance.
There are two methods of doing this. The fastest method is to enter the Undead Burg, and when you reach the fog gate, don't walk through it. Instead, there's a high-precision jump you can make which will take you all the way down to the Lower Undead Burg (video). Facing the fog gate, turn right. Using the stairs for extra height, jump over the fence, aiming alongside the wall. If the jump is made correctly, you'll land all the way down in Lower Undead Burg. There, you'll be attacked by two dogs and three Undead Assassins. You can fight them or run from them; next you'll head left and run upwards, away from the foggate. There are three more dogs and three more Undead Assassins here; again you can fight them or run straight up the stairs here to unlock the shortcut back to Upper Undead Burg. Head through the left exit here to reach the Undead Burg bonfire; be careful not to step near the bridge further below to avoid spawning Hellkite.
Undead Burg skip
You can also skip Hellkite's first appearance, stopping it from appearing at the bridge, by only entering the Undead Burg through the Undead Parish. This is most viable to do if you have the Master Key, as a starting gift or by being the Thief class.
With the Master Key, go down the stairs in Firelink Shrine to get to New Londo Ruins. Then, immediately go up another set of stairs, where there is a doorway that can be unlocked with the Master Key. This'll take you to Valley of Drakes. Ignore the tunnel entrance nearby; instead run alongside the mountain wall, past the Undead Dragon and two drakes, then turn right once you're at the bridge, by the collapsed tunnel, to reach an elevator that goes to Darkroot Basin and a bonfire. If you don't have a Master Key, you can do the same thing by killing Ingward in New Londo Ruins and unlocking the Seal, though it will be far more difficult and most likely not worth it.
After reaching the Darkroot Basin bonfire by either method, continue past a Halberd Black Knight, and keep running upwards until you reach Darkroot Garden. Take a left turn and run into the stone entrance to reach Undead Parish. From here, run past the blacksmith, all the way up the stairs past the bonfire, through the church and all the way down the steps, then down a ladder through three rats and you'll reach the staircase below the bridge. Walk up the stairs and the Hellkite Dragon will not appear.
Strategy for Killing the Dragon
For first time players, it is highly recommended to avoid attacking this dragon until you've leveled up a bit.
Ranged
- Remember that the dragon can regenerate himself when his HP drop below half, so your damage-per-second must be able to overcome his regeneration. In NG, a bow damage of about 50 per shot can overcome his HP regeneration if you shoot consistent enough.
- Try levelling up your Strength/Dexterity or upgrading the bow first if you think you can't do it consistently, to make room for errors.
- Equip Hawk Ring to be able to shoot him from longer range. The farther you are from him, the more time you have to escape from his fire. If you use Composite Bow, the Hawk Ring may be mandatory to use because of its short range.
- Equip Red Tearstone Ring to boost damage. Especially useful if you shoot from under the bridge, as you are in no risk to get damaged.
- 3 places to shoot him from. Clear the enemies first and learn the timing.
- The bridge - easier to target (and can get headshots) but you need to be quick on your feet. Shoot him not only when he's landing or perching, but also when he's moving, getting down from his perch, and jumping up to his perch.
- Under the bridge, near the sword-wielding Undead Soldier - 100% safe, but much smaller target, mostly the wings and tail. This is the preferred place to shoot him from if you just want to get the Drake Sword. Aim at the upper part of his tail instead of the tip (it's easier this way). He'll hop to the bridge, swinging his tail to your right side. Without getting out of aiming mode, move your reticle to the right, his tail will enter your line of sight. Shoot his tail here too (usually only enough for 1 shot, though) before he's back to his perch.
- Under the bridge, near the door to the Small Undead Rats - 100% safe, even smaller target, but can get headshots. When you shoot from here, always start with a headshot. Then, you can get several shots (1-2 with greatbows, potentially even more with normal bows) when he hop to the bridge and back to his perch. This spot is also within soul sorceries range, however manual aim is required.
Note: The easiest way to defeat the dragon is to use a bow, however this is not your only option, you can use the Binoculars to make aiming easier for projectiles other than arrows.
Melee
- Either go full Fire-resistant heavy, or go unarmored. Middle-weights will only get killed because the flame is too strong for medium armors, while the weight makes rolling not fast enough to roll to safety. You won't need a shield because you'll be two-handing your weapon and blocking the flames will only get you stun-locked to death.
- Full armor: Black Iron Set +5, Flame Stoneplate Ring, Flash Sweat pyromancy (this cuts the fire damage greatly).
- Light armor: Havel's Ring to offset heavier weapons. Dark Wood Grain Ring also helps as you can roll a little bit faster than normal fast rolls. Use weapons that have a reasonably fast attacking speed, not ultra greatswords or great hammers.
- At the top of the stairs, on the right (assuming facing dragon) side, running all the way forward to the rail is a safe spot against the dragon flames when they're breathed from the front. Moving backwards from that spot to the wall is a safe spot against the rear flames. Moving between these two spots avoids the horizontal bridge flames, and it is close enough to the stairs that one can roll down them and avoid the overhead flame move.
- For light armors: Once the dragon has been lured with a bow shot, it will breathe flame and then will take 4-6 steps forward onto the bridge. Wait until a talon is exposed then hit the claw from a position just above the stairs with a 2-hander or you can attack his head with 2-handed attacks (even with heavy weapons) as soon as he landed, when he's still in the "landing" animation. Then quickly retreat down the steps to avoid the overhead flame. After the overhead flame, let him take about 3 steps and then run back up. If you don't, the dragon will fly back to his perch and potentially heal himself. If you run back up too soon, he'll do another overhead flame, so you need to be careful here. If your timing was about right, he'll return to his horizontal flame + walking on bridge pattern. Repeat with two handed attacks to the claw until he dies. Be wary that there's very little time between your strike and his retaliatory flames.
- For full armors: You can challenge the dragon directly after luring him to the bridge, as the armor's physical resistance and Poise will take care of the claw attack, while the high Fire resistance in addition to Flash Sweat will make the flames do insignificant damage. Just remember not to fight the dragon when the Flash Sweat expires.
NG+
In NG+ the Hellkite Dragon's health regeneration will become a very significant obstacle for most players, but it is still possible to kill him. Players have found that it is possible to time hits just right, not triggering this animation.
Tail Cut
To cut off a tail it's necessary to deal a certain amount of damage against it. The HP of the tail increases with higher NG cycles and is based on the HP of the respective enemy.
| Playthrough | Tail HP |
|---|---|
| New Game | 240 |
| NG+ | 600 |
| NG+6 | 750 |
In case of the Hellkite Dragon, the tail has about 10.87% of his HP.
Several methods can be used to obtain the tail.
- Ranged for new players: get a Short Bow and 50+ Wooden Arrows at the Male Undead Merchant in the Undead Burg. Go to the bridge segment below the drake, above the shortcut to the bonfire, where you can see its tail hanging down. Shoot it until it falls off.
- Melee: with any basic weapon, pick up the Gold Pine Resin from the locked room in the Undead Burg, you need either the Master Key or the Residence Key from the Male Undead Merchant. On the bridge where Hellkite sits, from the staircase partway across, run to one of the corners where you're shielded from the flames. Wait there until the drake jumps down, or attack the drake with a ranged weapon to trigger it to jump down. Once it starts moving, run out from the corner, and *then* apply the Gold Pine Resin to your weapon. You need to stand in front of it for this long to trigger an attack. Run forward along the right side of the bridge, and attack its tail 3-5 times, depending on your weapon, and it will be cut off. You can then run to the safety of the bonfire in the room behind it.
- Halberd: If the Halberd weapon has been acquired, players can shoot at the tail from underneath the bridge, switch to the Halberd, and perform the heavy attack for a large amount of damage when the drake lands in the middle of the bridge.
- Miracle Users: From underneath the bridge you can shoot at his tail with a bow but after he is hit with an arrow he leaps from his perch and walks along the bridge for a small distance. While he does this, his tail is dragged along the left side of the bridge with respect to the sunlight altar bonfire. While the tail is being dragged along the side you can cast an area of effect ranged miracle like Wrath of the Gods to quickly destroy the tail. Use the red tearstone ring to increase your damage.
- Alternatively to the above you can use binoculars and the lightning spear. Use the binoculars to aim at it's tail when it's farthest to the right and fire when it's at the same position.
- When it jumps down run and hit it one or two times depending on your weapon then run past the sunlight alter bonfire, through the gate to the left then head down the ladder to the right. Keep moving until you get to the stairs that lead you back up to the top of the bridge. From there repeat until the tail is cut.
Extra Hits
If you quickly run through the shrine after you have baited the dragon into landing on the bridge, you can score a few extra whacks at the tail. Its tail should be to the right of the sunlight altar when it perches. When the tail is hit, the dragon may fly to the bridge as normal or may fly away instead, make the strike count!
Information
Strategies
Drops
Lore
Notes
Trivia
Hydra
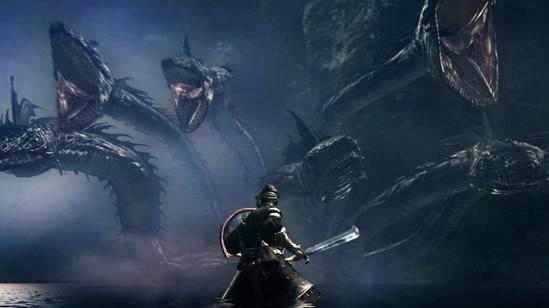 The Hydra (湖獣) is a Boss in Dark Souls, encountered in Darkroot Basin. A variant, known as the Black Hydra, also can be found in Ash Lake.
Description
A giant aquatic serpent with many heads. Serves as a miniboss in the two areas it appears.
Location
Darkroot Basin
By the waterfall near the Crystal Golems.
| Playthrough | HP | Souls |
|---|---|---|
| New Game | 2,520 | 5,000 |
| NG+ | 5,770 | 20,000 |
| NG+6 | 7,213 | 25,000 |
Ash Lake
Shortly after the Great Hollow exit.
| Playthrough | HP | Souls |
|---|---|---|
| New Game | 3,863 | 10,000 |
| NG+ | 6,336 | 20,000 |
| NG+6 | 7,921 | 25,000 |
Drops
- Darkroot Basin Hydra
- Dragon Scale
- Dusk Crown Ring
- Ash Lake Hydra
- Dragon Scale x2
Attack Patterns
- Water projectiles - At very long to short range, five of the Hydra's heads will shoot a large magical water projectile. However, these attacks do solely physical damage.
- Bite - When near the Hydra, it will attempt to ram the player with its many heads. They will lunge and swipe with a few different patterns and will occasionally slam directly above the player when the boss is at low health.
- Bombardment - The one in Ash Lake can fly to the other side of the lake (while bombarding the ground below with water blasts) if you run from it to the other side of the area.
Strategies
- Individual heads can be cut off if they receive enough damage
- Both the heads, and the overall health regenerate after visiting a Bonfire. However, once every head is chopped off, regardless of how much health the Hydra has remaining, the creature will die.
In Darkroot Basin
- Ring of Fog can be used to close the distance against the Hydra in Darkroot Basin as it cuts its aggro range by about half.
Melee Strategy
Video Strategy
video
First, if you have the Rusted Iron Ring from returning to Undead Asylum, make sure you equip it, as it will make closing into melee range much less dangerous.
Approach the Hydra from the left side of the level after clearing all of the golems. Once you are close enough, the Hydra will begin shooting the magical water projectile. Run toward the boss, taking cover or blocking between these attacks. There are two rocks you can hide behind: one on the other side of a ridge and one closer to the boss, next to a glowing item. Be sure to keep some distance away from the rocks though, as you can still be hurt by the projectile's splash damage. Run forward when the boss shoots, and with some luck all the shots should go over top of you. Approach the boss, taking care not to get too close as there is an underwater cliff surrounding it. Once you are close to the Hydra, hold up your shield and make sure you are near enough to be attacked by its heads. Simply block and retaliate after every strike (a shield with 100% physical block is ideal). After several hits to the boss, its heads will begin to disappear. Once this has happened you may need to maneuver closer to specific heads as they may not be close enough to attack. Alternatively, once the middle few heads are gone the Hydra's lunge will no longer be able to hit you from directly in front. At this point you can shoot it with arrows at your leisure.
If you cannot be bothered dealing with the golems, you can run past them to the boss. Not only are they susceptible to the water attacks of the hydra, but additionally will stop following you once you have run far enough into the lake (about level with the ladder leading to Darkroot Garden)
Safe dodging strategy (melee or ranged)
This tactic is ideal for melee fighters as well as for casters. A shield is not necessary, so characters with low endurance don't have to worry about being staggered by blocking the bites. What most people don't know is, that the hydra has a blind spot :
At first you have to get directly in front of the beast, standing at the edge of the underwater cliff. The Rusted Iron Ring is recommended for better movement in the water. Wait for the hydra to do its bite attack ( signalized with a roar). Then, make one step backwards and one step to the left, both about 3/4 of the length of your character. (Be sure not to lock-on, as this hinders your attacking possibilities significantly. Especially for casters it's mandatory to be able to aim manually at the heads in order to do damage! ) If done correctly, all heads are going to miss the attack, which gives the opportunity to hit back. If one head hits you nonetheless, slight adjustments for the length of the steps are needed. Rinse, repeat.
Another Pure Melee strategy
This works for both Hydras, the one in Ash Lake and Darkroot Basin. The strategy for avoiding the water projectiles is a bit different however. For the Hydra in Darkroot Basin, you should run (not sprint) towards it in one direction, and when the projectiles are fired, roll in the opposite direction 2-3 times to avoid the brunt of the impact. Enter the water and approach as close to the Hydra as possible without falling into the deeper waters to force it to engage in melee. For the Ash Lake Hydra, all you need to do is sprint to it and enter the water to force it to melee.
You should wear the strongest armor you have and equip a shield with the highest stability possible. Mobility is unneccessary. Also, you should equip a weapon with the highest damage per hit - speed doesn't matter. Cloranthy Ring that increases stamina regeneration is useful to have. Giant Club +9 worked well. What you'll want to do is to stay in the water close to it and have your shield up when it attacks - try to have maximum stamina when it does. You should block its attack without breaking your guard and have a little stamina left. Don't lock-on the Hydra, and when its heads are stuck in the ground, attack it with R2. Rinse and repeat. One of the annoyances when fighting the Hydra in pure melee is that the last few heads can be difficult to run to and attack in time before they withdraw - however, with a strong impact weapon, it's possible to kill the Hydra while it still has 3-4 heads left, as they seem to take overkill damage to the total. Make sure to stay in the water at all times to prevent it from shooting the water projectiles. You don't neccessarily need the Rusty Ring - both areas have a portion of the water where you won't be slowed down if you stay shallow enough, while still forcing it to melee.
Tactical Strategy
Clear all the Golems in the area by using arrows to lure them away from the Hydra to avoid being hit. Once all the Golems are slain, run toward the Hydra in a zig zag fashion. I recommend starting from the center, and when the hydra begins shooting water, quickly sprint to the left ( An easy way to think about it is that you're baiting him to shoot in the center and then you are quickly able to dodge by running to either side.) Once you are close enough, stand in the water next to the floating body where you pick up the Knight Armor. Use it as your marker. From here, the Hydra should not be able to hit you, but use a shield to protect yourself at the beginning until there are fewer heads, since he might graze you. When a head strikes to the ground, attack the head that is closest and then run back to the body to keep him from shooting water. Repeat until the final head is left. Normally for me, the final head is the farthest right that tends to curve left into the water close to the fatal ledge. Do no follow the head and attempt to hit it with your sword. Instead, I recommend using a long range attack to avoid slipping off.
Bow Strategy
As you approach, you will find a rock by a tree. The water attack will splash on the rock when you are behind it, and there is a wide area of safety 3 or so paces behind it. The water attack will never vary. Have a ton of cheap arrows with you. From perfect safety you just spam arrows into it. One by one the heads come off, left to right. Keep aiming for the heads for better damage but you can also target the body. Eventually the heads may choose to strike towards shore but the attacks will be all on the right of the rock. The heads jam into the ground when they miss, and you can hit them with a sword if you want or just continue to spam arrows. I used a short bow +2 and wooden arrows and consumed about 200 arrows.
Bow Strategy
You need the Crest of Artorias, a good bow and some arrows. After you entered the basin, go right to the bridge from which you can see the Hydra, go down the ladder and walk along the pathway stand above the ladder and start shooting on the heads.
In Ash Lake
- Video Strategy
Ranged
Any arrows will work on this beast, but the stronger they are, the better. Wooden arrows will take a long time to kill him, if they kill him. Bring a lot of spares in case. It WILL shoot magic water blasts at you, so make sure you can adsorb and heal the damage, or find good cover. There is a hollowed log near the start of the beach. It might work.
(Confirmed. I killed him easily with a +10 composite bow and wooden arrows. Took about 15 direct hits to kill a head. I used the log to hide between volleys.)
Directly left of the entrance to the beach on Ash Lake there are what look to be twigs/branches sticking straight up from the ground. The twigs/branches can be used to hide behind and shoot arrows through much like the rock and tree in Darkroot Basin. I tried this only 10 minutes ago as long as you position yourself right you won't get hit once and will be able to shoot heads off until you kill it.
Another Ranged place to go is just after the hydra jumps over the beach to get better shots at you, there is a hill on one side it leads to a corpse with loot if you go to that side of the hill the Hydra's shots will hit the hill and not effect you. You can pop shots off at it until it dies a little bit harder to get shots then the plan I put above but easier to position yourself to not get hit so what ever is easier for you
Melee
Similar to Darkroot Basin's Hydra, this one will attack with head slams at the player when very close. You must be in the water in order to make it melee you, but after 2-4 heads come off, it starts hitting way behind you. Bring a ranged weapon to damage it if you cannot damage him by meleeing it. A strong shield is recommended.
Another Melee
Another melee strategy is to run until reaching the big hollow tree, which has three Basilisks and a Mushroom parent inside. The Hydra will jump to the other side of the lake in order to reach you while on your way to the tree. There is a little space between the tree and a high part of the sand. You can reach this area by dropping to it when the tree is near you or by following the path that goes around and into the tree. In this area the sand will protect you from the hydra's water blasts and if you stand close to the lower part of the sand where the hydra is closest, it will perform its lunge attack. You should have a high defense gear with a high stability shield to absorb its attacks. Also, you can run back to the tree's lower opening to avoid its attack. Then its a simple process of taking one head at a time.
Pyromancy
Fire Orb and/or Great Chaos Fireball (acquired after joining Chaos Servant covenant) is a great way of dealing with this water loving creature. You will need a shield with 100% physical resistance and enough stamina to be able to block it's attacks (if you don't want to evade). There are two ways of doing it - the simple fire-brute-force and one involving some melee chopping. For the one with melee intro - walk with the shield up to the shallow water (watching out not to drown) and as the Hydra attacks with the head thrust hide the shield and use the light two handed attack on a head. It should be a matter of 4-6 attacks per head with a not upgraded Drake Sword. When you've chopped off two of its heads, you should have enough space to stand safely without the risk of getting hit wit the head thrusts, making the later pyromancy part easier. Now, you could have skipped this part and simply go for the pyromancy technique right away, but I recommend melee intro to the fire finish. Now for the pyromancy part - wait in the shallow water and block its head thrusts and when it's trying to retract the heads attack with your pyromancy spell of choice. I haven't tried magic attacks, but with pyromancy flame +15 it took something around 5 attacks to take out the hydra (exact number of fire attacks needs confirmation). I've used the Great Chaos Fireball with 0 humanity and in hollow form. My friend has tried this method and it worked fine for him as well. The tricky part is that pyromancies have a short range, so you need to use them on the hydra while it's close to you due to having heads stuck in ground after the head thrust attack. One fire attack with your pyromancy spell of choice should take out at least one of the heads, making the fight way shorter than the melee technique preferred by most.
Soul Spear Frenzy
This is more about preparation than strategy. Ideally, you should go into the battle with 8 Soul Spear and 4 Crystal Soul Spear. If you can equip crystal soul spears, chances are you do enough damage to knock off the heads in one shot, which is key to this method. Run up and bait the Hydra into a melee battle. You should be close enough so that the heads are easily within shooting distance. Without locking on to the Hydra, adjust your camera and aim for the heads. Every time a head comes off, the Hydra is stunned, and its animation resets. During this time, aim for the next head, rinse, and repeat. Once you knock off about three heads, you will have a nice, safe zone to leisurely pick the rest. If you do not waste any shots, you should be able to kill it in around a minute, with absolutely no rolling, blocking, or dodging necessary.
Head cut
To cut off one head it's necessary to deal a certain amount of damage against it. The HP of each head increases with higher NG cycles and is based on the HP of the respective Hydra.
| Playthrough | HP (Darkroot Basin) | HP (Ash Lake) |
|---|---|---|
| New Game | 264 | 620 |
| NG+ | 604 | 1,018 |
| NG+6 | 755 | 1,273 |
A head from the Darkroot Basin Hydra has about 10.47% and a head from the Ash Lake Hydra has about 16.07% of it's HP.
Bugs
Sometimes on very rare occasions, the Hydra located in Ash Lake will use its bombardment attack and on landing will instantly die. (Unconfirmed)
Information
Strategies
Drops
Lore
Notes
Trivia
Black Dragon Kalameet
Black Dragon Kalameet (黒竜カラミット) is a Boss in Dark Souls, encountered in area.
Description
The red-nosed Black Dragon Kalameet is one of the last remaining ancient dragons. To honor your services to Artorias, Gough incapacitates the dragon with his greatbow, allowing you to fight Kalameet more easily. Kalameet can first be seen when about to cross the stone bridge leading to the second area of Royal Wood.
Conditions to Fight Kalameet
You can kill Kalameet without Gough's help, but it will be extremely challenging. To normally fight him, you need to:
- Talk to Hawkeye Gough until he mentions Kalameet
- Get close enough to Kalameet's area to see him fly past (it's not necessary to descend the ladder or be attacked by him)
- Talk to Gough again. Answer "Yes" to both his questions
After the cutscene, a fog gate will appear in front of Kalameet's boss area. You can now properly fight Kalameet. Royal Wood (including Artorias's boss area) is now eligible for summoning/invading again as Kalameet is now considered a boss for the area.
Location
Royal Wood
From Chester's spot, cross the short stone bridge, then turn left. Just go straight forward after the slope. His area is behind the third dog.
| Playthrough | HP | Souls |
|---|---|---|
| First | 5,400 | 60,000 |
| NG+ | 8,478 | 120,000 |
| NG+6 | 10,597 | 150,000 |
Drops
- Calamity Ring
- Obsidian Greatsword - tail cut
Resistances
Physical resistances
| Regular | Strike | Slash | Thrust |
|---|---|---|---|
| 468 | 374 | 468 | 468 |
Elemental resistances
| Magic | Fire | Lightning |
|---|---|---|
| 900 | 900 | 762 |
Auxiliary resistances
| Poison | Toxic | Bleed |
|---|---|---|
| ∞ | ∞ | 333 |
Notes
- A Titanite Slab can be obtained from the chest behind the waterfall either after Kalameet is defeated or even before, if you're fast enough.
- A Crystal Lizard can be found over the edge of the waterfall resting on a ledge.
- Despite being a dragon, Kalameet has exceptionally high resistance to lightning.
Attack Patterns
His black fire breath attacks cause a significant drain on stamina and deal both physical and magic damage. Avoid it wherever possible.
- Vertical breath blast - Flies up and breathes fire straight down which spreads across the ground in all directions.
- Forward breath blast - Breathes fire straight forward in a line with long range.
- Arcing breath blast - Retracts head with black flame appearing around the mouth while turning to the left, then breathes fire across an arc of about sixty degrees.
- Forward charge - Leaps forward for a moderate distance then turns around while breathing fire in an arc in the direction he came from.
- Sit up breath blast - Sits up on back legs and then blasts breath on the ground in front of him.
- Telekinesis - Sits up on back legs and then emits a telekinetic field in front of him, grabbing anyone caught in it and causing damage. The affected character will take double damage for a short time, indicated by an eye icon floating above their head (see Calamity Ring).
- Head swipe - Swipes his head for moderate damage. May follow up with a swipe in the other direction.
- Lunging head swipe - Similar to the above attack but with deceptive range. He will not follow this attack up, but it is more powerful and will knock you back even if blocked.
- Diving attack - Hovers above the ground, then does a dive attack.
- Tail pound - Player must be directly behind Kalameet and under his tail, slams his tail into the ground for massive damage in a small area. This attack leaves Kalameet's tail exposed, use this opportunity to cut his tail. Easiest to bait out after a diving attack.
- 360 degrees tail swipe - Sweeps tail in a complete circle.
- Foot stomp - Stomps with the left front leg and then right back leg or vice versa.
Dodging and Blocking
Regardless of strategy, do not stand directly in front of him. Always be circling him, preferably clockwise (to your left) so that he is facing slightly off to your side. This will allow you to completely avoid his lethal charge attack and linear breath attack, both of which he can do without warning, and you can more easily dodge his sit-up attacks.
Dodging all his attacks requires practice and a lot of deaths. Under 25% encumbrance is a requirement and stamina recovery (eg, Grass Crest Shield) is highly recommended. Familiarise yourself with all his moves; his head swipes should be rolled through, roll to the left of his dive attack, run to the left of any of his breath attacks except his vertical breath attack, which you should run away from. Unless going for his tail cut, he will likely not use his tail slam but to avoid it if he does, roll to the side. Similarly with his foot stomp, but roll back. Do not use lock-on for this strategy.
Blocking his attacks is simpler but requires much better equipment. A heavy shield with high stability, such as the Greatshield of Artorias, is necessary. Try to avoid his fire attacks where you can and do not get hit by his telekinesis. If you see him sitting up at all, run or roll to his side. Note that high poise can be a hazard as you will be hit multiple times by lunge attacks that would otherwise knock you down, but high defense and magic resistance is desirable. Using lock-on will help you point your shield in the right direction; however, be wary of his flying vertical breath attack as it can point the camera into the air and make it difficult to get away from. Note you will need to unlock to get any attacks in if using melee.
If you get hit by his telekinesis, it is more important than ever to dodge all his attacks as you will take double damage. Play super-safe until the effect wears off.
Kalameet is fast and hits hard, kindling the Oolacile Township bonfire three times is highly recommended to reduce the risk of running out of Estus.
Melee
The easiest window for an attack is when he lowers his head for either his straight breath attack or his arcing breath attack. You can run to the left and hit his neck until he finishes. If you are close enough, you can also get some attacks in as he sits back for either a breath attack or his telekinesis by running around to his side. If he uses his foot stomp, you can usually get an attack or two in, wait until safe.
If dodging you should two-hand your weapon for more damage, there is no point trying to block without proper equipment. You can additionally get attacks in after his double head swipe (tiny window) and dive attack (beware of tail attacks).
As always keep an eye on your stamina and leave enough to respond to his next attack.
Environment
Do not get caught up against a wall and be wary of the cliff at the end of the canyon. Be aware of where you are on the map and circle around him to give yourself the most room.
Climbing the ladder after engaging him will cause him to fly up and cover the area in fire, likely killing you instantly.
Ranged
The maximum lock-on range slightly exceeds the range of Kalameet's breath attacks. This allows you to stay just out of range and shoot projectiles at him while locked on.
Fighting from a distance eliminates most of the dragon's nastiest attacks. He will rely primarily on breath attacks, which are easily avoided from far away. Each time he uses his breath, you should be able to get one or two shots in.
Watch for his lunging head attack, it deals massive damage and has a deceptively long range. Roll back or through it when you see him preparing for it.
Tail Cut
To cut off a tail, it's necessary to deal a certain amount of damage against it. The HP of the tail increases with higher NG cycles and is based on the HP of the respective enemy.
| Playthrough | Tail HP |
|---|---|
| New Game | 540 |
| NG+ | 847 |
| NG+6 | 1,059 |
In case of Kalameet, the tail has about 10% of Kalameet's HP.
The tail pound is the greatest opportunity for getting hits on his tail, roll to the left when he does a dive attack and then bait out his tail slam to get a few hits in. It can also be provoked by rolling forward through or blocking a head swipe and running to his rear, but this is difficult to pull off.
His dive attack is more easily baited out by equipping the Ring of Fog.
- Melee - Only a few hits with a decent weapon such as a Black Knight Sword should be necessary, but the windows are difficult to find. Be sure to two-hand your weapon for additional damage.
- If you are close enough when he does his sit-up breath attack, you can get extra hits in by running around and doing a running attack. A weapon that performs an overhead swing with this attack is preferable. Circling to his right (your left) may cause him to do this less often but will leave you in a better position when he does.
- A spear or halberd can be utilized after a Kalameet's tail pound to make up for some of the distance that would otherwise be spent running towards the tail.
- Pyromancy - Strong Pyromancy can be used to "cut" his tail off if you lack a good weapon. Ascended Pyromancy Flame +5 is highly recommended.
- Great Chaos Fireball is particularly useful after a tail slam as it leaves a lava patch on the ground that will deal additional damage. You will need to time it to hit as his tail hits the ground for maximum effectiveness.
- Sorcery - Several good sorceries will allow you to "cut" his tail with an Intelligence build, Bellowing Dragoncrest Ring and Crown of Dusk / Crown of the Dark Sun recommended. You will nearly always need to bait out a tail pound for this method.
- A good hit from Dark Bead can sever the tail in one cast.
- Any strong sorcery you can "aim" will be sufficient, such as Crystal Soul Spear.
Without Gough
Be prepared to spend up to an hour and several hundred arrows doing this, as the damage inflicted at that range will not be significant.
Defeating Kalameet without the aid of Hawkeye Gough is tedious, but not particularly difficult. Characters with a fully upgraded bow, as well as a high stamina/equip load/Dexterity, will find it easier.
First, tank up. Hawk Ring and Havel's gear/shield is recommended. Upgrade your strongest bow - Dragonslayer's is best - and stock up on Estus, Green Blossom and Humanity, as you will need to heal regularly and keep your stamina bar full. After sliding down the ladder, dash to the large waterfall in Kalameet's arena, standing against the wall with your back to the right-hand side of the Titanite Slab chest. This will prevent you from being pushed back by his breath attack.
Aiming at the canyon entrance where he flies in, you will see a row of trees on the right-hand side. Zoom in and position your reticle just above the tip of the shortest tree (furthest to the left) and release the arrow just as he unleashes his breath attack. This will give you a higher chance of scoring a headshot. Once the arrow is released, raise your shield to protect against his breath attack. It should only hit you once but will do some health/stamina damage. When he flies off, he will not return for 15-20 seconds, allowing you to heal/consume Green Blossom, etc. Rinse and repeat.